by Hannah Collerson
If you’ve been with someone for a long time, and you’ve traveled with them, they’ve probably become your go-to travel partner. At least, that was the case with me.
I was with someone for four years, and during those four years we traveled all around Europe and Asia together. It was perfect. Until it wasn’t. And when it became time to go our separate ways, it was so much harder than a regular break up.
We’d built a lifestyle together. A lifestyle that most people could only dream of. We both worked remotely, and hopped between cities, islands and mountains.
So when our relationship came to an end, one of the biggest heart aches was knowing that my future adventures would be alone. After four years of traveling together, as a couple, I struggled to come to terms with the thought of traveling alone.
But it turned out, traveling alone had even more opportunities and perks than traveling as a couple. Solo travel is truly life changing, and it’s not as daunting as you might think. So I thought I’d write this post to help anyone else who’s broken up or breaking up with their travel partner.
Should you break up before or after a trip?
If you’re having doubts about your partner, but you’ve got a trip booked, it can be hard to know what to do. You can feel trapped and helpless.
If you break up before the trip, it’s a lot of excitement and money down the drain. If you break up after the trip, you have to sit on your decision until your trip is over.
One thing to consider is that there’s never a good time to break up. You’ll always have something planned, or something going on that would make it a bad time. Break ups are always bad, which I know isn’t particularly reassuring, but it means that break ups on the road aren’t that much worse.
Waiting it out until the end of your trip can also cause a lot of tension. If you speak your mind before you depart you can get the hard part over and done with, and start moving on sooner. You’ll also have more time to think about what happens regarding your trip.
Breaking up before a trip is also a lot easier than breaking up whilst abroad. The last thing you want is for tension to build, and for you to encounter the fresh hell of a break up when you’re supposed to be enjoying a holiday.
However, if you’re not sure about whether you definitely want to leave your partner, seeing how the trip goes can be a good idea.
What happens if you break up before a booked trip?
If you’ve broken up, but you’ve got a trip booked together, you’ll need to come up with a plan. Your options are:
1: both of you still go together, as friends
2: neither of you go
3: one of you goes alone or with someone else
Option 1 is a bad idea. If you go away together having just broken up, you won’t be able to move on, and the break up won’t feel real.
Option 2 is a good option, if you can get your money back. But if you can’t get any sort of refund, this is going to be disappointing for both of you.
Option 3 is worth considering. One of you could pay the other back their share of the holiday, and take a friend instead. This way, no one really loses. One person gets their money back, one person gets a holiday. But be considerate of your ex – don’t take a romantic interest on what would have been your holiday together.
How To Break Up With Someone Whilst Traveling
If you’re already traveling with someone, and you realise it’s just not working, a break up can feel impossible. Especially if you’ve got several weeks or even months left of your trip.
But it is possible to break up whilst traveling. And it doesn’t have to ruin your trip. Here are some tips to help breaking up whilst traveling go as smoothly as possible.
1: Be as kind as possible
If you’re the breaker-upper, you’ve probably been thinking about leaving your partner for a while. But for them, it might come as a shock. Especially in the middle of a trip.
So try to be gentle with them. They’ll be sad, maybe angry, and possibly scared about being left in the middle of an unknown country.
In this situation a little kindness goes a long way. Don’t end it with screaming and shouting. Just be honest, and grateful for the good times.
2: Don’t abandon your (ex) partner
If your relationship ended with anger, it can be tempting to storm off and never see your partner again. But if you care about them, which you probably still do so soon after a breakup, make sure they’re alright.
Don’t abandon them in a strange country. Help them make a plan. Will you continue the rest of your trip together, or separately? Or will one or both of you decide to fly home?
Reassure them that whatever they decide to do, you’ll support them. Because if your relationship meant anything, you’ll want them to be safe, and as okay as they can be.
3: It can still be a life changing trip
Just because you’ve decided you don’t work as a couple, doesn’t mean you can’t still enjoy the trip. Whether you decide to finish the trip together or separately, there’s no need to write off the experience.
You’ve both spent money on the trip, and you were both hoping for life changing experiences, so why not have them?
If the break up was too painful, and you’d rather just fly home, that’s completely fine. But if you think you can continue as friends, or as solo travellers, it’s worth sticking it out and making the most of the time you have left.
4: Make plans for when you arrive home
Did you drive to the airport together? Or do you have belongings at each others homes? Will you be arriving home at different times? These are things you’ll need to think about. The chances are that parting ways at the airport won’t be that simple. Decide when you’ll collect belongings, how you’ll both get home from the airport, etc.
How To Cope With Losing A Travel Partner
Whether you’ve broken up with your partner, or you’re the one that’s been broken up with, losing a travel partner is hard. You’re probably wondering how you’ll ever travel again without them.
But just because you don’t have your partner anymore doesn’t mean you can’t travel anymore. You still have the option of traveling with friends, or alone.
Here are some tips to help you cope with losing a travel partner.
1: Discover yourself again
I know, it sounds cringey. But rediscovering yourself is an important part of any break up. You’ve probably spent a long time getting to know who you are as part of a pair, so it’s time to figure out who you are as an individual.
Once you’re comfortable and confident with yourself, and you know what you want from your future, then you can start planning future trips.
2: Don’t cling to the past
It’s tempting to hold on to the idea that you might get back together, but if you do this, you’re never going to move on. Try to focus on what the future might bring, rather than clinging on to the past.
3: Remember love and convenience aren’t the same thing
If you and your partner broke up, it was for a reason. And one of those reasons might have simply been that the love was gone.
If you find yourself questioning whether breaking up was the right thing to do, consider the difference between love and convenience. Are you having second thoughts because you still love your partner, or because life was easy with them?
Just because your partner lived and enjoyed a similar lifestyle to you, doesn’t make them your soul mate. Hold on for someone who not only has a similar lifestyle and interests, but someone you also absolutely adore.
4: Grow your confidence
Even if you consider yourself a shy person, and you’re worried about facing the world alone, remember confidence is like a plant: it can be grown!
Spend some time focusing on yourself. Achieve personal goals, and start to take on new tasks and challenges independently. If you lack social confidence, push yourself to go to more social events and you’ll soon feel like a social butterfly.
Growing your confidence is going to help you move on, and potentially plan solo trips in the future.
5: Focus on friendships
Partners come and go, but your friends and family will always be there for you. So rather than thinking about moving on romantically, just spend some time with your close friends and family.
Spending time with your loved ones can remind you of how special you are, and they can often help you feel much better and more confident.
6: Make a bucket list
It’s normal to lose interest in travel a little after breaking up with your travel partner, but if you make a bucket list, you’ll start to rediscover your love of adventure.
Make plans for the places you want to see, and remember the reason you fell in love with travel. You probably had a desire to travel before you met your partner, so you just need to rediscover it as a solo traveler.
Think of why it is you want to see and experience certain places, rather than who you want to see them with.
7: Book a solo trip
Booking a solo travel trip is the final and most important stage of getting over losing your travel partner. It’s your chance to thrive as an individual, and explore the world on your own terms.
You might not have anyone to set off with, but you’ll meet so many people along the way, and you’ll see things you’ve always dreamed of seeing.
I’ll admit, setting off on a solo travel trip is absolutely terrifying the first time. You don’t what’s going to happen, who you’re going to meet, or what the place is going to be like. But once you’ve set off, it’s going to be the most life changing experiences you’ve ever had. And it will be a huge personal achievement.
by Hannah Collerson
If you know someone who loves to travel and write about their adventures, you’ll know that when it comes to birthdays and Christmas, conventional gifts just won’t do.
Aspiring travel writers are always on the go, so they value portable gifts that can make any journey easier, and gifts that can help them find success as a travel writer.
But it can be hard to think of great gift ideas that are actually useful, especially if you’re not very travel-inclined yourself.
So to make the gift-giving process a little easier, here are the best gifts for aspiring travel writers.
Little gifts for aspiring travel writers
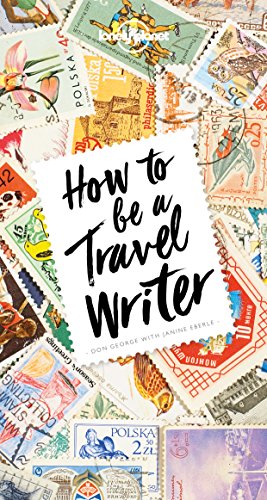
This book by Lonely Planet is one of the best books out there for aspiring travel writers.
It gives a thorough strategy to getting set up as a travel writer, covering everything from preliminary trip research, to story planning, to how and where to publish travel writing and start building an audience.
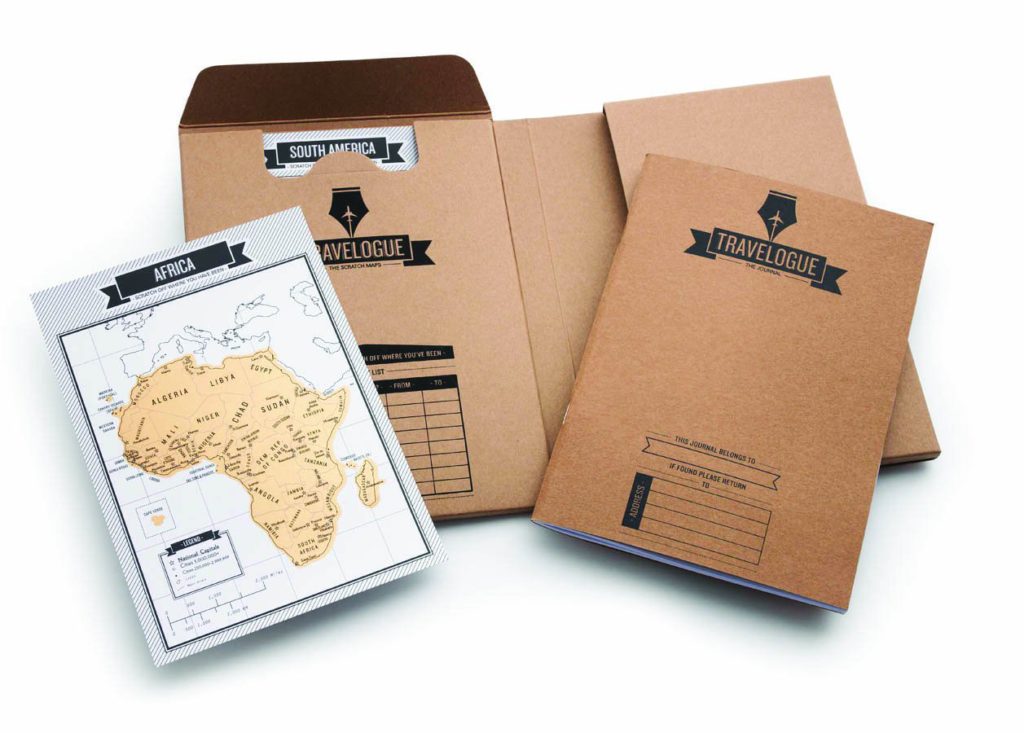
This travel diary is 2 gifts in 1, with a handy travel planner journal and a set of scratch maps for each continent.
Travel writers can plan their trips, make notes as they go, and scratch off the places they’ve seen.
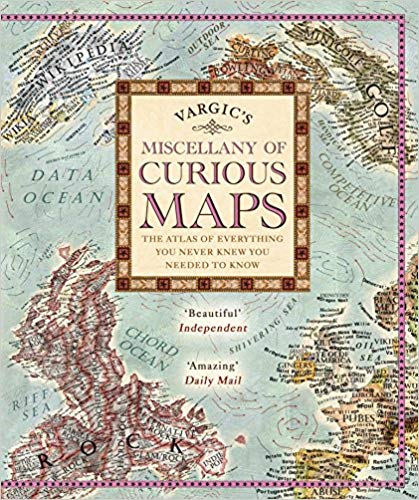
This is a quirky gift for an aspiring travel writer, and one that inspires old school adventure.
Travel writers can feel like traditional adventurers as they unfold the different vintage-style maps and plan a route through various countries.
The 64 maps in the atlas don’t just focus on geography, they focus on culture, changing the way you think about each country. There are maps of the internet, of literature, of gaming and sport. You can even see a map that shows the world in terms of heavy metal bands.
Each map is accompanied by a handful of interesting and unusual facts, so travel writers can learn about the world whilst planning a route based on culture.
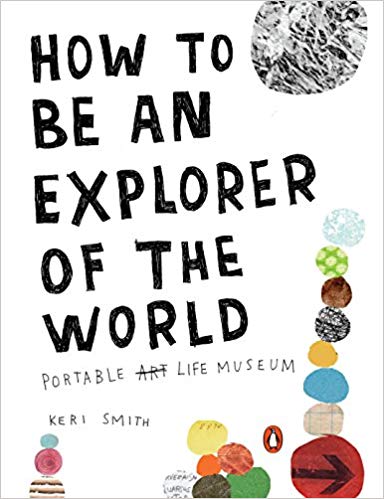
This is a travel book/journal that encourages observant thinking. It’s a refreshing reminder to look at the world through fresh eyes.
The colourful book is artistic and unusual, and it’s bound to get any travel writer thinking about new ways to observe and document the world around them.
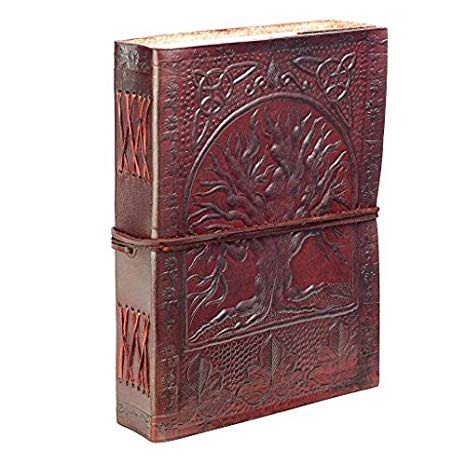
Every travel writer needs a journal to jot down their ideas, and this tree of life journal is both ethical and stylish. The blank pages give writers freedom to write and draw in their own style.
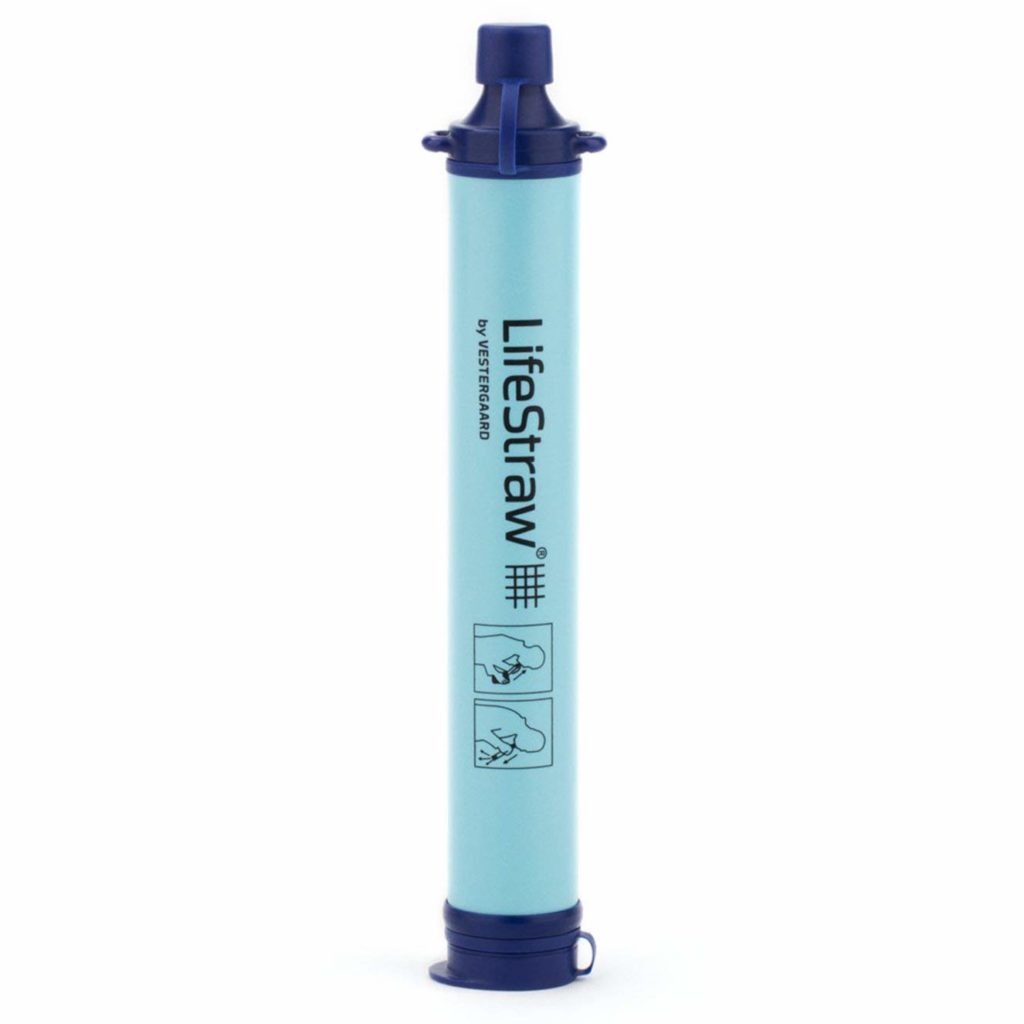
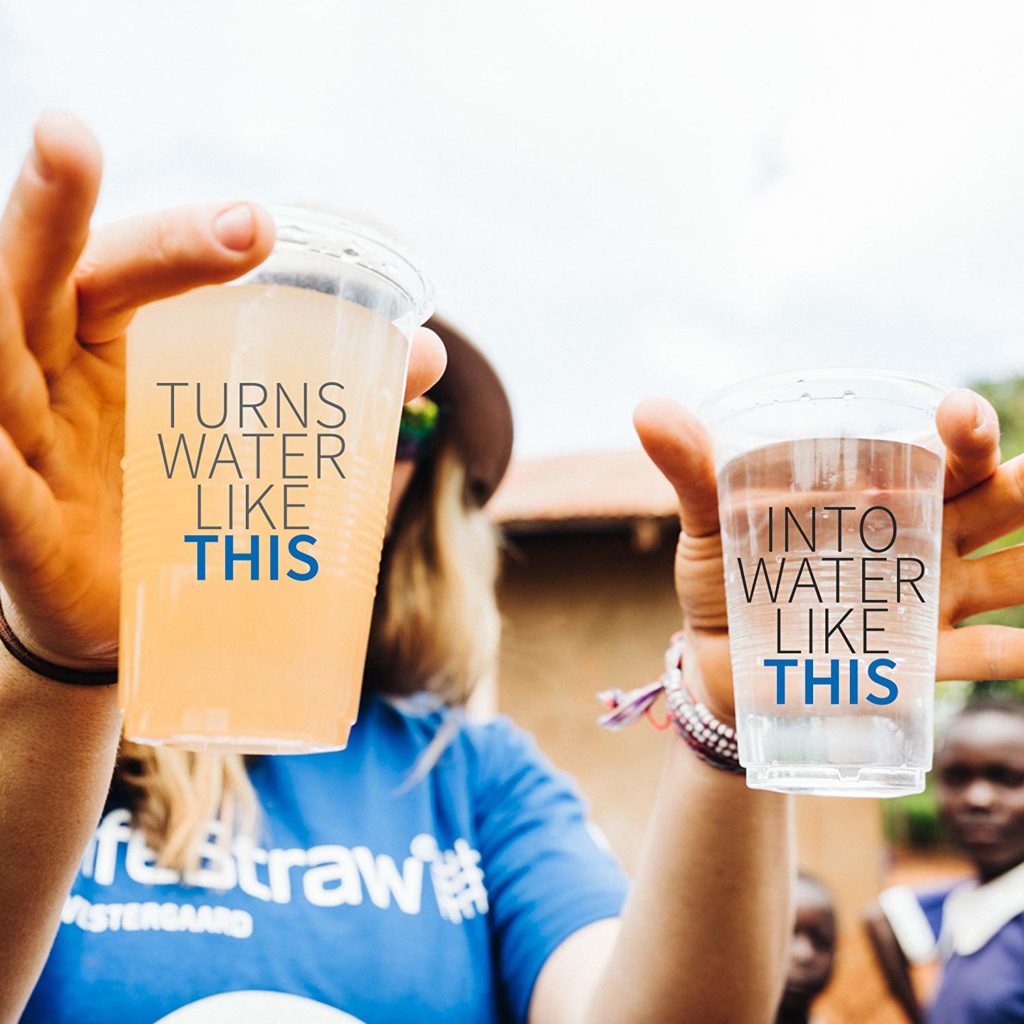
This is a great gift for travel writers who like to go off-grid. It’s a portable water filter so if there’s no bottled water around, you can use this safe in the knowledge that it’s going to remove 99.9% of waterborne bacteria and parasites. Lots of people have even said this makes water taste purer than some bottled water.
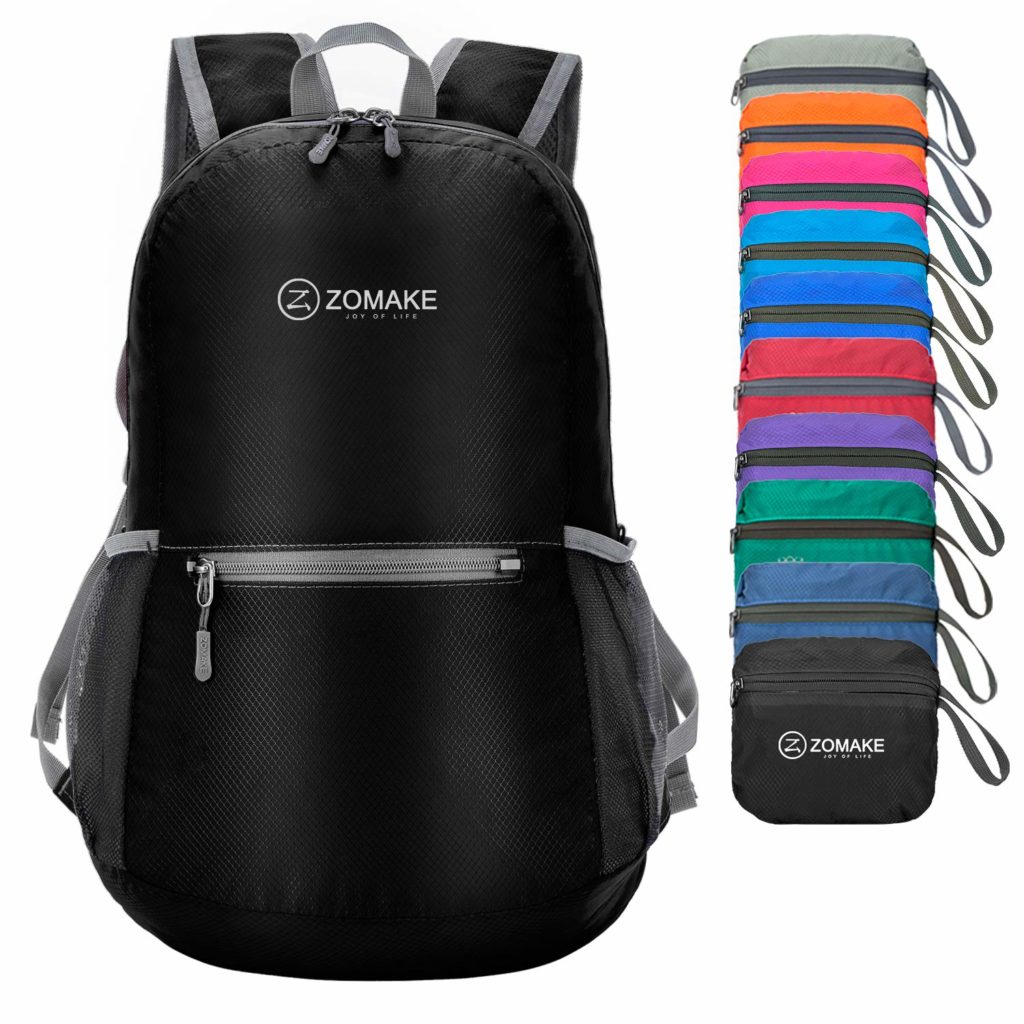
Traveling can have its spontaneous moments, and when spontaneity strikes, you need a good day bag.
This pack-away rucksack fits easily into a pocket when folded away, and can be unfolded to be a full size, 20 litre day bag.
It’s also water resistant and has different pockets so you can keep your things organised.

Having a versatile day bag means no adventure is off limits. Travel writers can store their notebooks, valuables, and even laptops in this day bag, and go adventuring on land or in the water.
It’s water resistant so you can use it as a dry bag, and it’s coated with RFID technology that makes data theft impossible – hackers can’t scan through the material.
It’s also one of the safest day bags you can get, with a built-in lockable stainless steel cage.
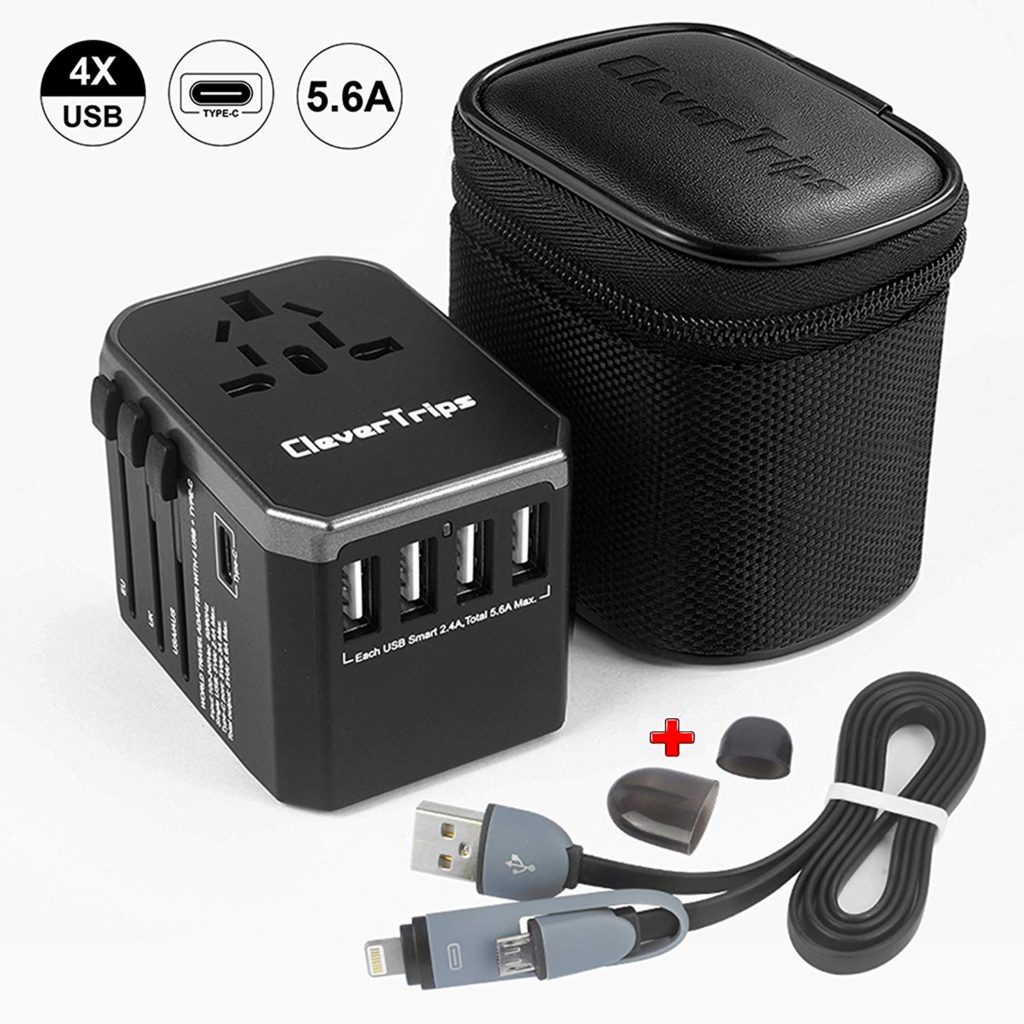
Every avid traveler needs a universal travel plug. It saves faffing around with different adapters, and means you can charge multiple devices at once, even if there’s only one plug socket available.
This travel plug can be used in over 180 different countries and can charge one device with a standard UK plug, and 4 devices using USB cables.
Technology Gifts For Travel Writers
Gone are the days when travel writers hit the road with nothing but a pad and paper. If aspiring writers want their content to be seen, they need to take their writing online, and certain pieces of technology can definitely help.
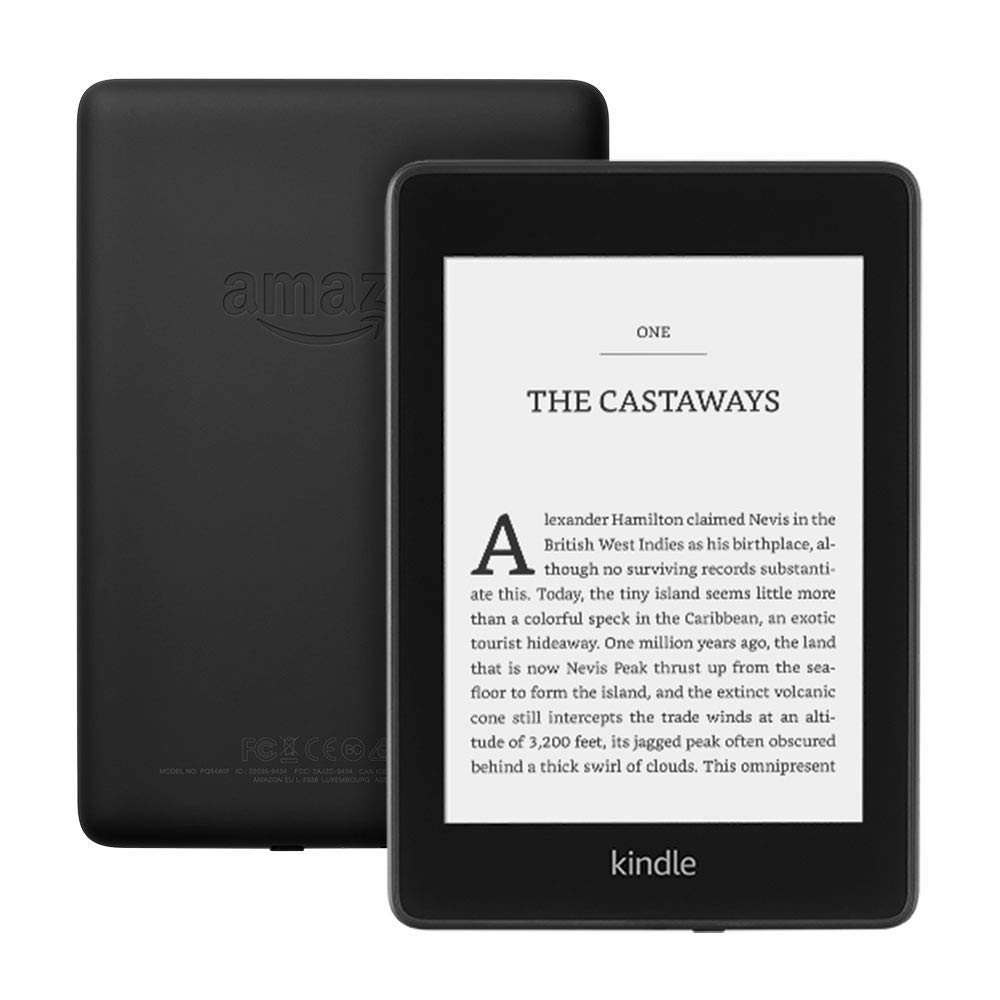
Most aspiring writers are also keen readers, where else would they have got the inspiration from? Anyway, bookaholics need to be able to take all their favourite novels with them when they travel, and a Kindle is a great way to do just that.
The Kindle Paperwhite is waterproof, and lightweight, so it’s perfect for anyone planning to travel. Travel writers can take thousands of books with them for inspiration, without feeling weighed down.
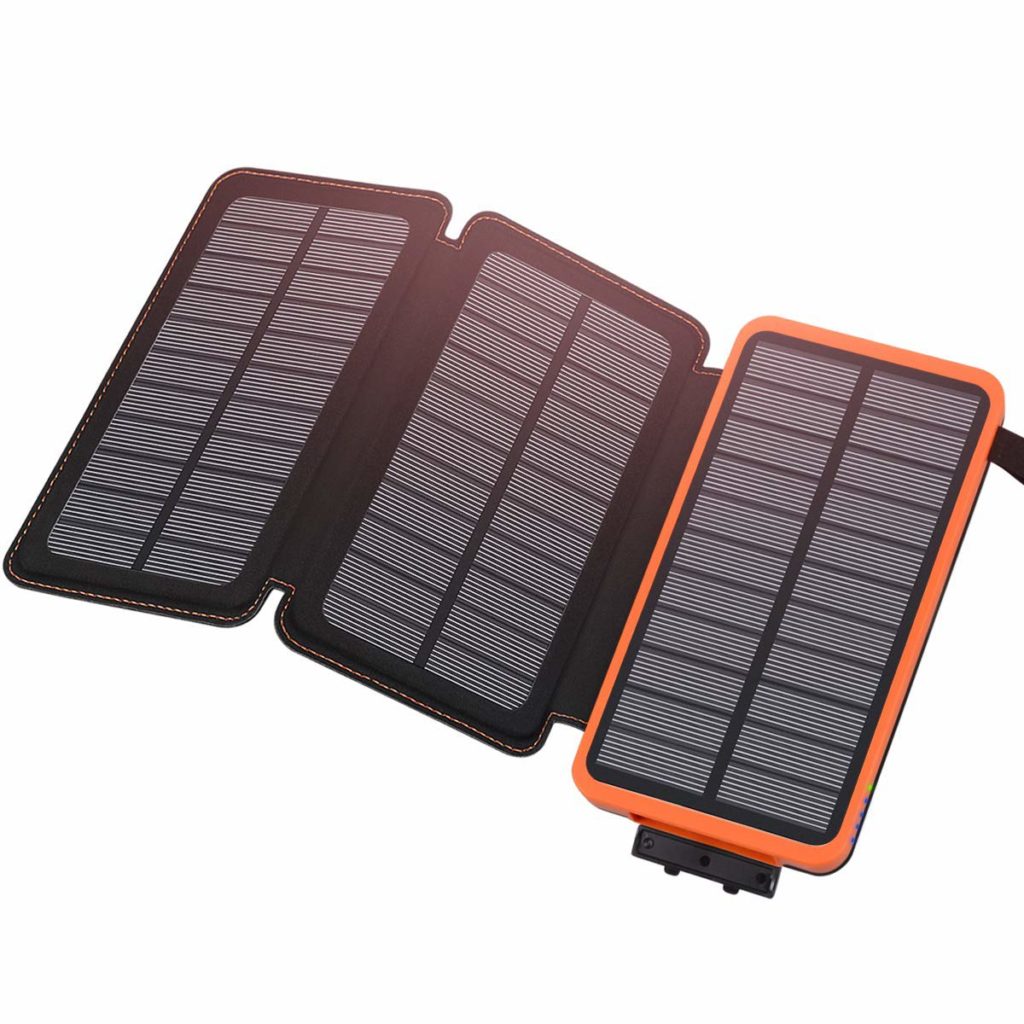
Every now and then, travel writers need to go off grid, or at least venture into the countryside for inspiration.
A solar charger is the perfect gift for the more adventurous travel writer, as regardless of where they are, they’ll be able to charge their devices.
They can then stay connected with loved ones, use their devices to write or research, and call for help in an emergency.
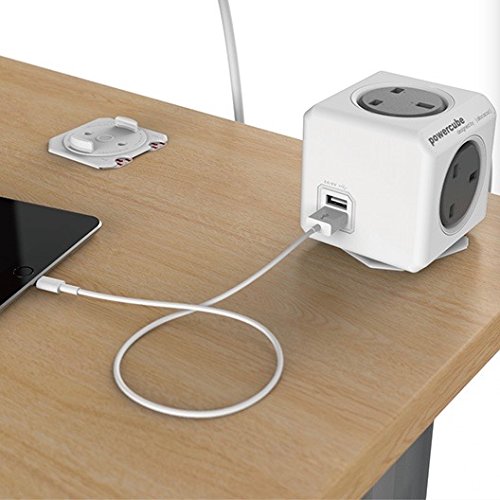
For technologically inclined writers and travellers, the PowerCube is an ideal gift. They can plug in to a single power socket, and charge several devices from one port.
The cube includes 3 standard plug sockets, and 2 built in USB ports, so they can charge laptops, tablets, phones etc.
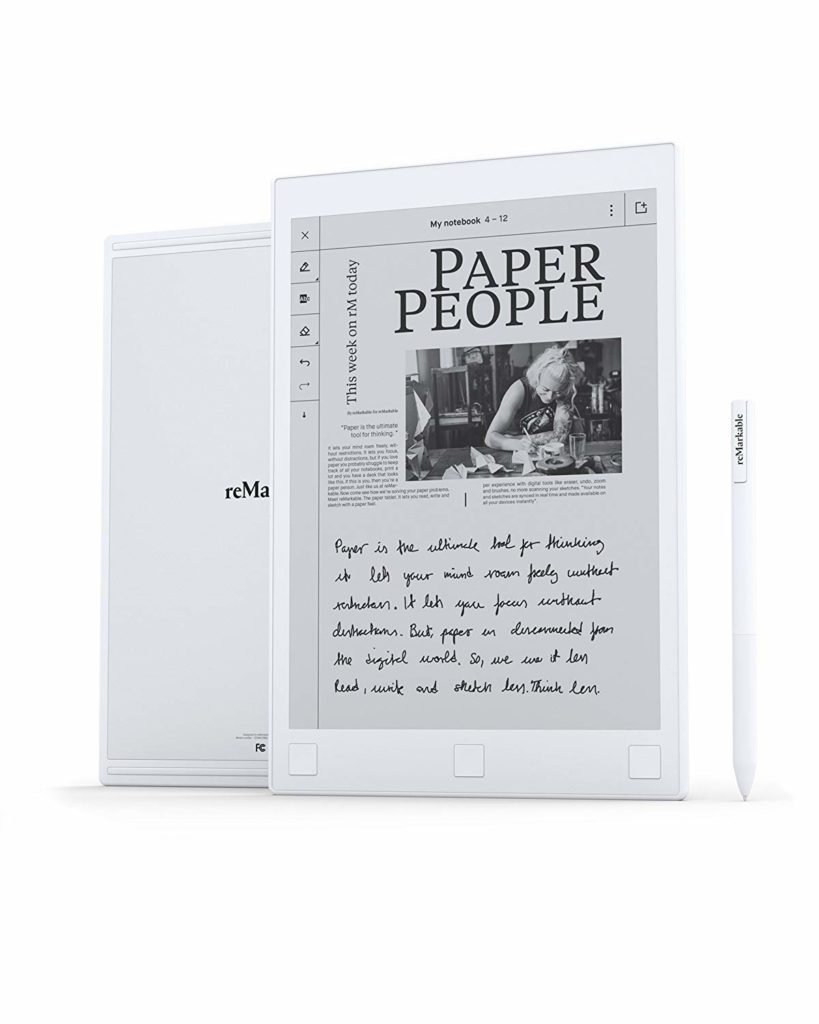
The reMarkable paper tablet is the ultimate gift for a writer. It feels just like paper to write on, and it saves all your notes in one place. So no flicking through endless pieces of paper containing random notes.
It’s an easier, and more modern alternative to a notebook, and it’s much more environmentally friendly. It’s also really lightweight, so it won’t be a burden if you’re trying to pack light.

Writers need to research, and nowadays, research requires Wi-Fi. One sure-fire way to get Wi-Fi all over the world is to have a Skyroam Wi-Fi hotspot, so this is definitely an impressive gift for a travel writer.
The device allows travellers to connect to the Wi-Fi as and when they need it. They can buy long term packages, or day passes. So if they ever need internet access urgently, think of this little device as the key to the internet.
It also doubles as a power bank, so you can charge devices whilst using the Wi-Fi.
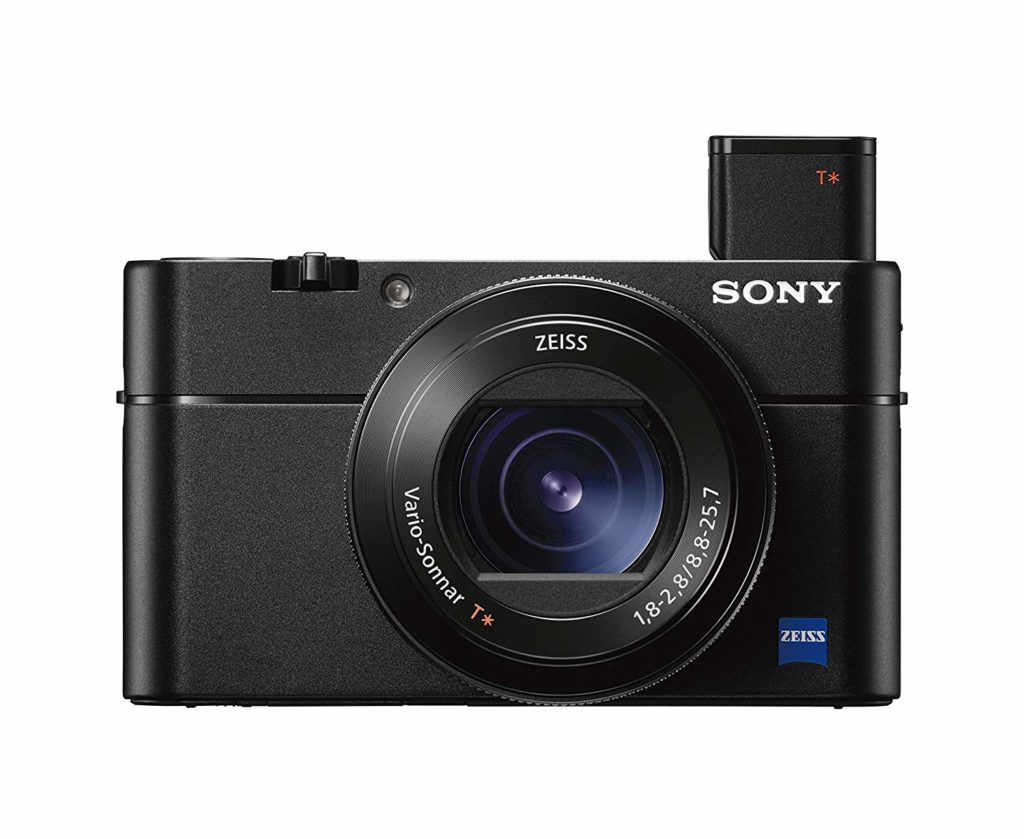
Writers often need to take pictures to accompany their writing, but a bulky camera isn’t really suited to travel. So if your travel writer friend doesn’t already have a compact travel camera, this could be a good gift idea.
My favourite travel camera is the Sony RX100 VA, which is a high end compact camera that can film in 4K and shoot 20.1mp photos. You can check out my Sony RX100 VA review here.
But if you’re after a more budget-friendly gift, my top choice for a budget travel camera is the Sony Cyber-Shot WX500. You can also read my Sony WX500 review.

Every travel writer needs a decent laptop, and a MacBook Air is the ultimate travel laptop. This is a pricey gift, but it’s a good one if you’ve got a travel writer who’s close to your heart.
With this laptop, travel writers will have all the equipment they need to achieve success. And it’s lightweight so it’s great for traveling.
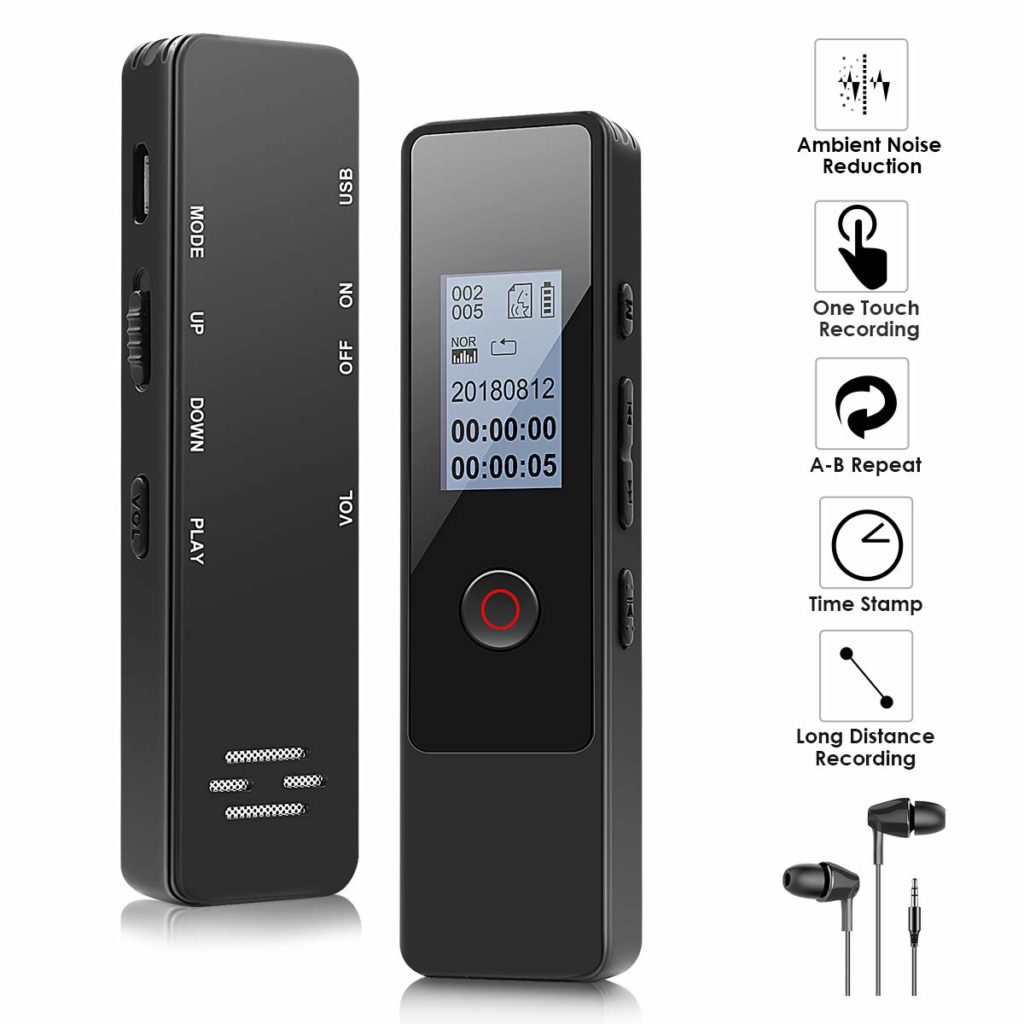
Writers need to take notes, and for some people, going through ideas out loud is the best way to sort genius from madness.
A voice recorder is a great way to take notes of ideas, without having to put pen to paper. This is a great gift for writers who suffer from not being able to write down their racing ideas quick enough.
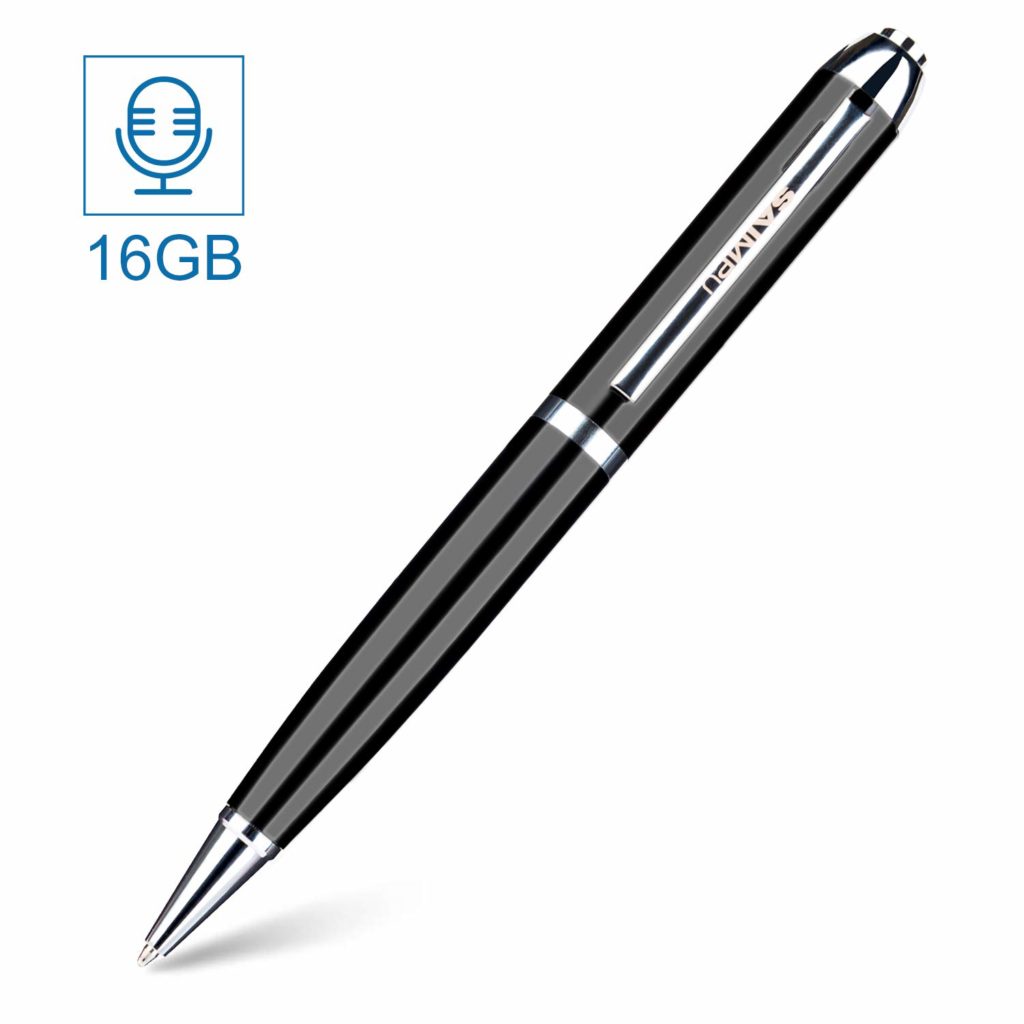
Voice recorder pens don’t have as many options and settings as standard voice recorders, but they’re great for writers who want to record conversations discreetly. It’s also a pretty cool writer’s gadget, and an unusual gift to give.
Gift a Course: Courses For Travel Writers
Every aspiring travel writer wants to achieve success as a writer. But to do that, they need to perfect their writing style and figure out how to get their content seen. A great way to better writing skills, and learn more about the world of travel writing, is to learn from the best.
These courses can help travel writers find success, and they can all be bought as a gift.
This course is run by the British College of Journalism, so writers can learn from the best how to write for an audience, and how to make money doing so. It’s a study-at-home course, so travel writers can take their time and study at their own pace. The course takes 24 weeks, but it can be completed in up to two years.
Students will be in contact with professional travel journalists who can give advice based on over 30 years of experience.
This is a course in the form of a book, so it’s an affordable gift to buy your travel writer friend, partner or relative. It acknowledges that travel writing is no longer about getting a column in a local newspaper, but thriving in the digital world. So it has modern tips about getting content out there and making money digitally.
It also includes interviews from more than 100 successful writers.
If you’re confused by the ‘2.0’ part of the title, basically there was an original book that was really popular, but this is the updated version, with more up-to-date information.

Nomadic Matt, aka Matt Kepnes, is the most successful travel blogger in the world right now. He’s making more than enough money to sustain a life of travel, and he’s inspired millions to seek the furthest corners of the earth.
His course on travel blogging teaches students how to write for an online audience, how to set up a blog, and how to get traffic to that blog. It really is a chance to learn from the best.
And it’s not just Matt’s advice that you’ll get on this course either. He also includes interviews with other successful travel bloggers.
by Hannah Collerson
So you’re off on an adventure, perhaps one that’s going to take you off grid for a while, but that doesn’t mean you can’t take some home comforts with you.
With a camping cot, at least you’ll have the luxury of a comfortable night’s sleep, even if you’re camping in the middle of nowhere in who knows what country.
But there are hundreds of camp cots on the market right now, and you want to make sure you find the best camping cot for backpacking adventures.
Here’s a buyers guide for backpacking cots, and a list of some of the best camp beds for travel.
What is a camping cot?
Camp cots, or camp beds as they’re also known, are collapsible beds that are lightweight and portable. Originally these types of beds were used by militaries all over the world.
They consist of a lightweight frame that pops apart or collapses, and then for the ‘mattress’ there’s material like canvas, linen or nylon.
You don’t need to use a mattress or sleep pad with them, you just sleep on top of them in a sleeping bag.
Why take a cot backpacking?
Packing your backpack for a long haul trip can be a difficult process. You want to have everything you need but you don’t want to make your pack too heavy to carry. And there’s no denying it, a camping cot is going to add weight to your bag. But trust me, it’s worth carrying the extra grams.
Here are some of the reasons you should consider taking a camp bed on your next backpacking tour:
Comfort
A camping cot offers you so much more comfort than the cold, hard ground. It might not be as comfortable as an actual bed, but it’s still 100 times better than sleeping on the floor.
Warmth
Regardless of where you’re backpacking, the nights can be cold. And if you’re sleeping on a cold floor, you’re going to lose even more warmth. In fact, you lose more warmth to a cold floor than to cold air. So by taking a camping cot with you, you’ll stay warmer, and you won’t need to pack such a heavy sleeping bag.
Health
Camping and backpacking can be mentally and physically draining, especially if you’re not sleeping well. By having a camping bed, at least you know that wherever you are, you can always can get a relatively comfortable night’s sleep. You’ll get the rest you need to stay healthy on your travels. It’s also more supportive for your back.
What to look for in a backpacking cot?
Camp beds vary in size, style and weight, so before buying one, it’s important to think about what you need from a camp cot. You should consider factors like your size and weight, as well as your sleeping position. Different cots will be better suited to different people.
Here are some things to look for when buying a camping cot.
Size
Some cots will be wider or longer than others. If you’re particularly tall, or you have a big build, you’ll be more comfortable in a larger camp bed.
Another thing to consider when deciding what size camp bed you need is you sleeping position. If you sleep on your back, a narrow cot should be okay for you, but if you like to sleep on your side in a foetal position, or you just generally spread out in your sleep, you’ll need a wider bed.
Weight
Ideally, you need your camp cot to be as lightweight as possible. Otherwise it’s just going to weigh you down too much.
Bear in mind that not all camping beds are designed for backpacking, so they won’t all be the same weight.
Collapsed size
As well as thinking about how big the bed is when it’s set up, you should think about how much space it’s going to take up in your backpack when it’s collapsed/folded.
Accessories
Some cots will come with included accessories like a pillow, a blanket or slip proof material for the cot legs.
10 Best backpacking cots
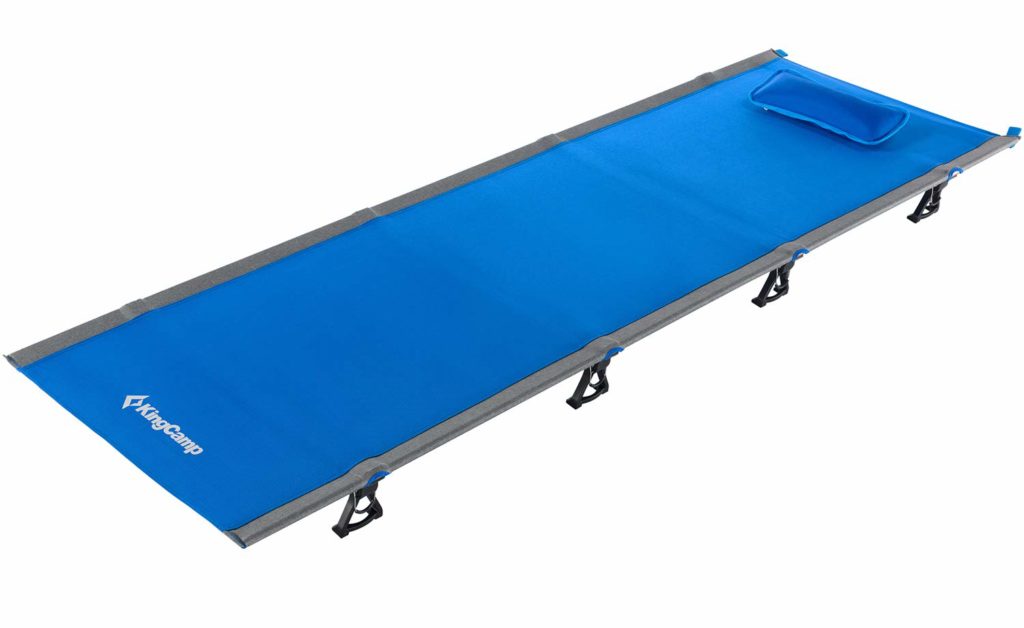

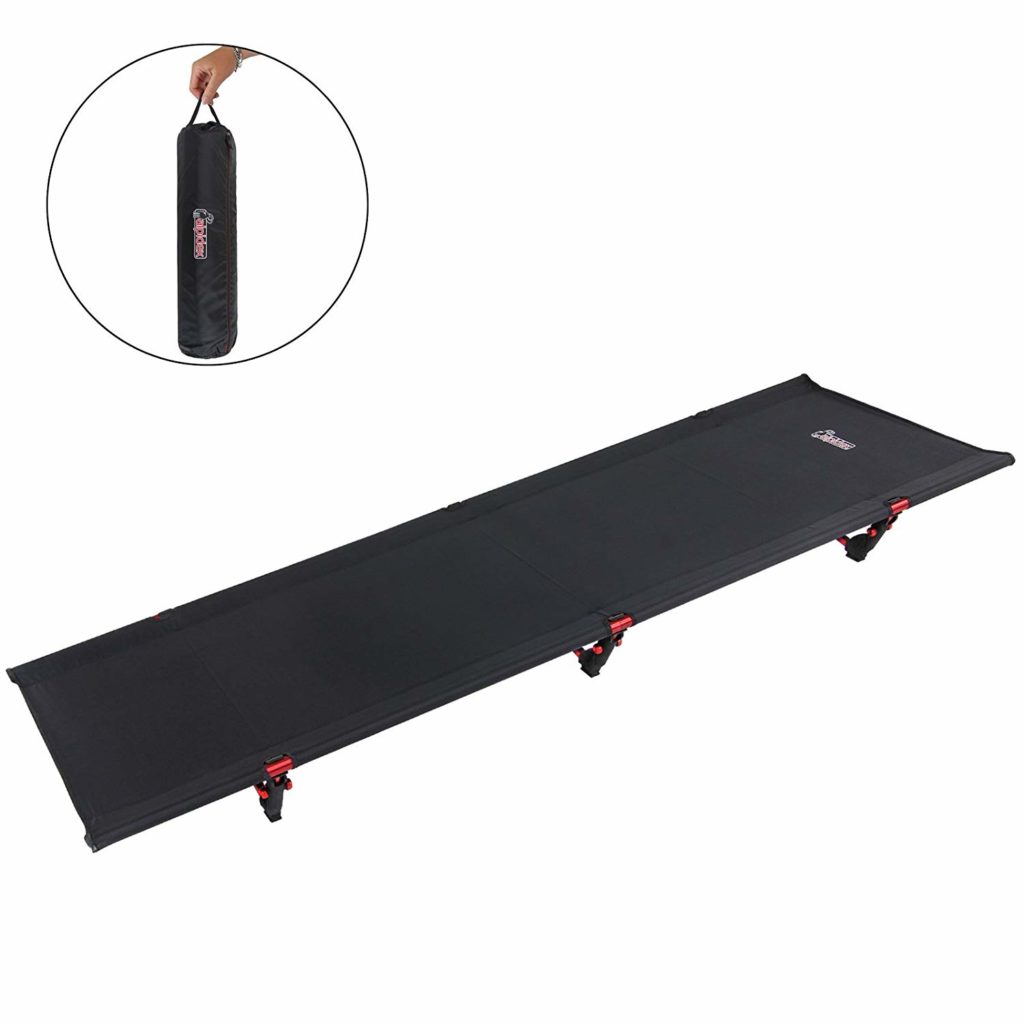
This is one of the best backpacking cots in terms of portability. It only weighs 2kg, and it folds up super small, making it easy to slip into a backpack. In fact, this camp bed folds up to be the smallest on the list. It’s also pretty comfortable, and it’s suitable for taller people with a length of 190cm.
Size: L190cm x W64cm x H12cm
Folded Size: L36 x W13cm xH13cm
Weight: 4.4lbs / 2kg
Pros
- It supports up to 120 kg
- It has two elastic straps to keep it from slipping
- It’s very lightweight, so it won’t be a burden if you’re hiking or moving on to your next destination
- Its packed up size is as small as you can hope for, and it will fit easily in a bag
- It’s easy to set up
- It has a pillow included
- It comes in different colours so you can choose your style
Cons
- It’s very low to the ground, which can make getting up from the bed a little more tricky
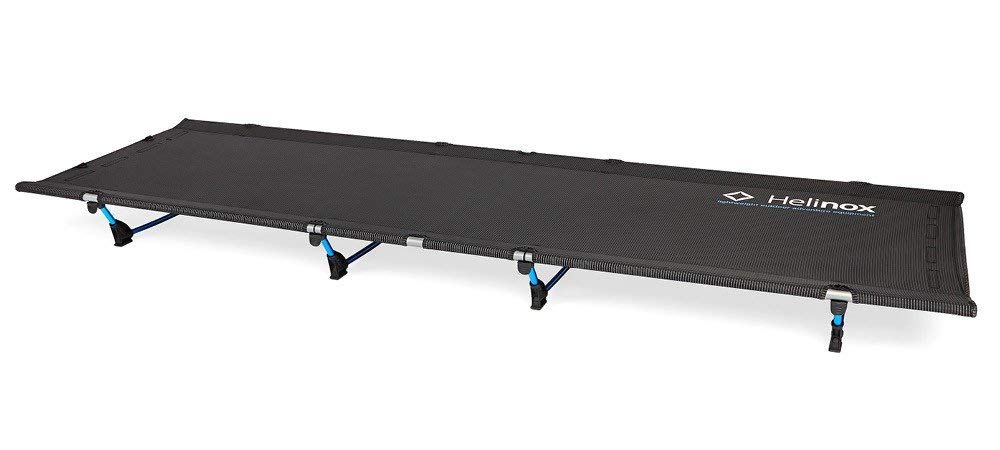
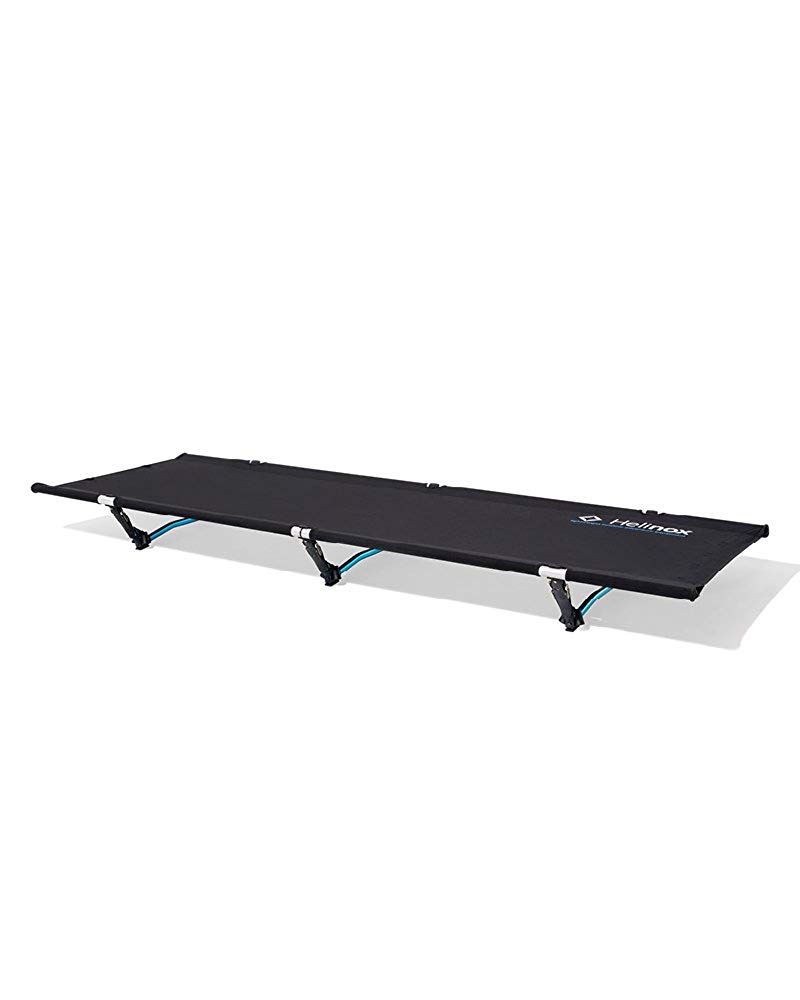
The Helinox Cot Lite is the most lightweight backpacking cot, weighing only 1.2kg. It’s so light that it’s won awards for its design and functionality.
It’s also specifically designed with backpacking in mind, so they’ve thought of everything – it’s lightweight, relatively small when folded up, and big enough to be comfortable.
However, it’s not the best choice for anyone who’s taller than 6ft, as it’s only 6 ft (185cm) long.
Size: L185cm x W60cm x H13cm
Folded Size: L53cm x W13cm x H13cm
Weight: 2.65 lbs / 1.2 kg
Pros
- This is quite literally an award winning camping cot
- Specifically designed for backpacking
- It’s the lightest backpacking cot money can buy
- Includes a storage bag with grab handles
Cons
- It’s a little on the pricey side
- It’s only 185cm long, so it’s not suited for those over 6ft tall

If you’re looking for a budget backpacking cot, this might be the one. It’s one of the top camping cots under $100, and it’s full length and can support a lot of weight, so it’s suitable for almost all backpackers.
However, whilst you save money with this camp bed, you sacrifice some portability. It’s heavier, and bulkier than more expensive alternatives.
Size: L190cm x W65cm x H40cm OR L210cm x W80cm x H42cm
Folded Size: L94cm x W20cm OR L103CM x W20cm
Weight: 4.5 kg OR 5kg
Pros
- It comes in two different sizes, so you can order the size that’s right for you
- It’s affordable
- It has a load bearing capacity of up to 150kg, which makes it suitable for a wider range of backpackers
- It has anti slip caps for greater stability
- It’s higher off the ground which makes getting up and laying down easier – no need to worry about getting stuck on the floor
Cons
- It’s quite a lot heavier than other options, as it weighs up to 5kg
- The packed up size isn’t particularly small, in fact it’s almost double the size of most other backpacking cots
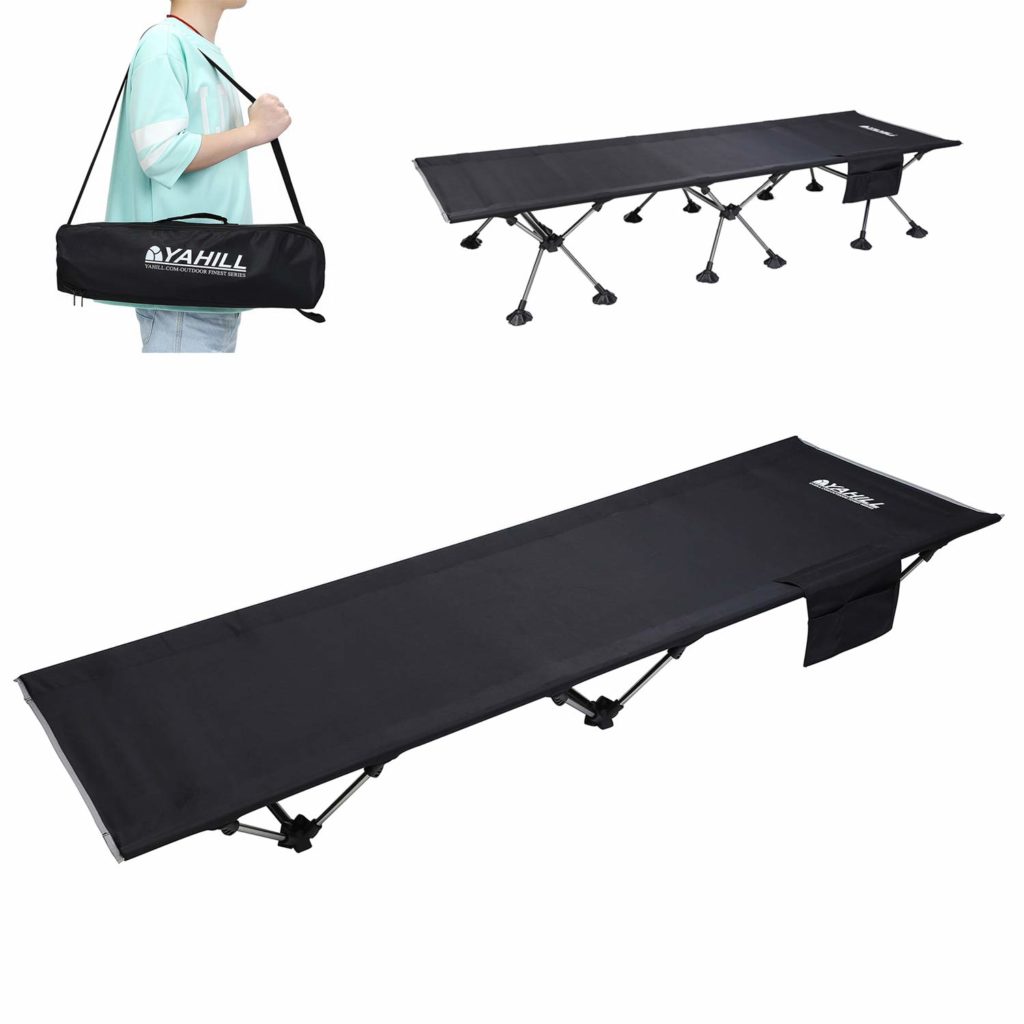
The YAHILL Ultralight Camping Bed does what it says on the tin. It’s lightweight, it’s portable, and it can support most people up to 6ft2 tall. And there’s no need to worry about being too heavy for it, as it can support an impressive 180kg.
Size: L190cm x W65cm xH19cm
Folded Size: L53cm x W11cm x H16cm
Weight: 6.5 lbs / 2.95 kg
Pros
- It supports up to 180kg, so there’s no chance of it buckling or breaking
- It’s long enough for anyone under 6ft2
- It has a simple collapsible design
- You can purchase additional feet to add height to this camp bed
- It comes with a 1 year warranty
Cons
- It’s not the most portable backpacking cot
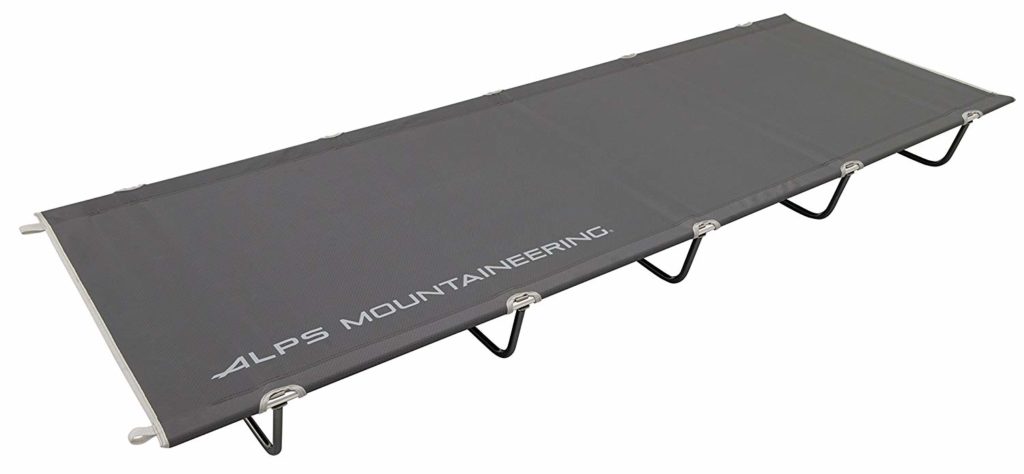
The ALPIDEX camping cot is one of the best budget backpacking cots on the market. And you’ll be pleased to hear that this cot doesn’t sacrifice comfort like many other budget beds.
It’s 190cm long, which is just as long as most high-end cots, and it has an above average width. This means it’s perfect for anyone who likes to sleep on their side, curled up or spread out.
Size: L190cm x W67cm x H16cm
Folded Size: L56cm x W15cm
Weight: 1.8 kg
Pros
- It has anti slip feet
- It’s built with backpackers in mind
- It’s affordable
- It’s a full length cot suitable for most people
- Above average width makes it perfect for side-sleepers
Cons
- It only three legs, so it doesn’t offer as much stability as cots with four or five legs
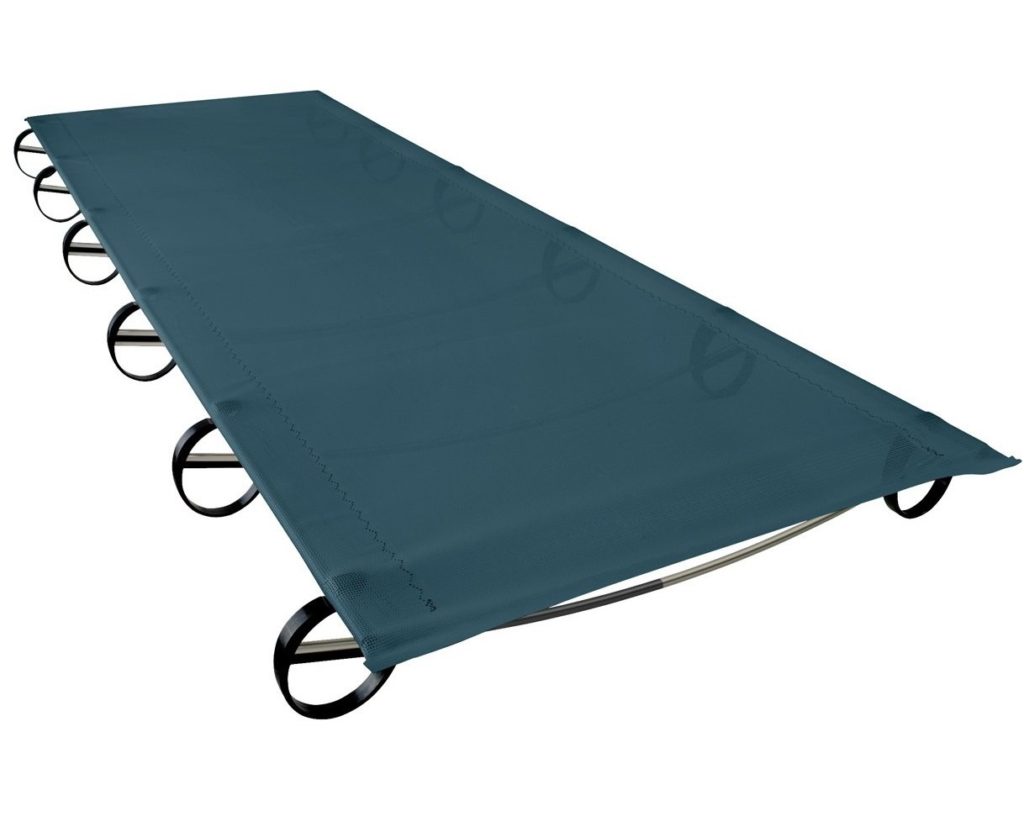
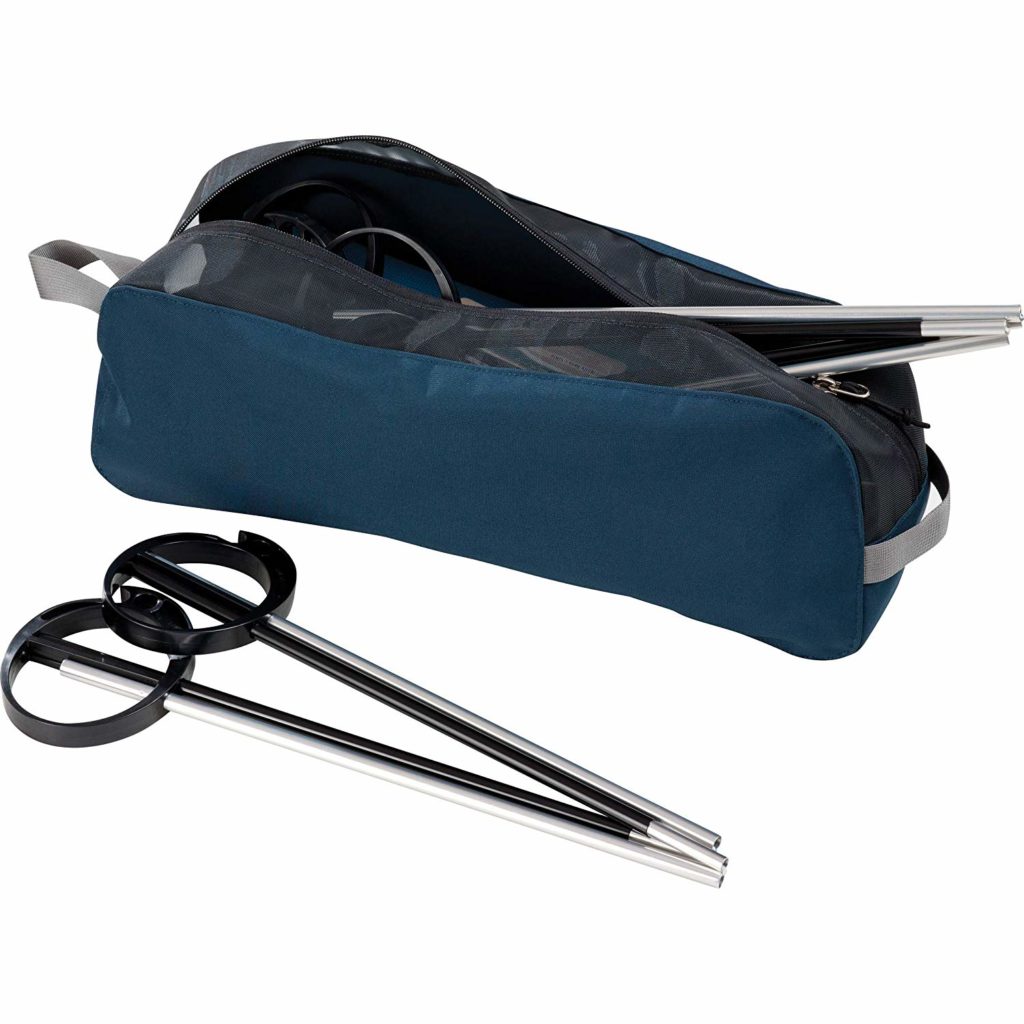
If you want a backpacking cot that offers the most comfort, the Thermarest LuxuryLite Mesh Cot is your best bet. It’s one of the largest camping cots on the list, but it’s also one of the lightest.
With a length of 196cm, it’s comfortable for anyone up to 6ft4 tall. And with a width of 76cm, it’s perfect for any side sleepers, or starfish sleepers.
Size: L196cm x W76cm x H11cm
Folded size: L46cm x W15cm
Weight: 4.7 lbs / 2.1kg
Pros
- Patented BowFrame technology means you don’t have to worry about any crossbars causing you discomfort
- It’s super portable thanks to it’s small packed size
- The canvas is breathable, giving you extra ventilation in warm weather
- Non-stretching material gives you long-lasting comfort
- It only takes three minutes to set up
Cons
- It’s a little on the pricey side
- Breathable canvas means you’ll need padding on the top for insulation in colder weather
The name of this camping cot might suggest it’s for men and men alone, but this is a camp bed that’s suitable for any backpackers, male or female.
The generous length of 198cm makes it perfect for taller travellers, but that’s not to say it can’t be used by smaller people – it will just be extra roomy. It also has an above average width, so it’s suitable for side sleeping.
Despite the large size of this cot, it’s still pretty lightweight, weighing only 2.2kg.
Size: L198cm x W71cm x H19cm
Folded Size: L43cm x H18cm
Weight: 4.8 lbs / 2.2 kg
Pros
- Extra long length makes it a great choice for taller backpackers
- Super portable, packs up to be one of the smallest camp beds on the market
- Includes a lifetime warranty
Cons
- It’s only available in one size, so there’s no smaller option
And here we have it, the largest cot on the list. This cot is suitable for EVERYONE (unless you’re 7ft tall). It’s long, it’s wide, and it can hold up to 145kg.
The only thing that’s not large about this cot is the height, but even that can be adjusted with accessory legs.
Don’t worry though, this cot might be large, but it packs up relatively small, and it’s still really lightweight.
Size: L210cm x W75cm x H16cm
Folded Size: L53cm x W13cm x H13cm
Weight: 4.9 lbs / 2.2 kg
Pros
- You can purchase separate accessory legs to add more height to this backpacking cot
- Above average length makes it suitable for taller backpackers
- Above average width makes side sleeping positions more comfortable – you’ll have more room to spread out
- It can hold up to 145 kg
- Good ventilation for warm weather
Cons
- During cold weather you need padding on top of this backpacking cot for insulation
- It’s quite pricey
- It’s not the most portable when packed up
by Hannah Collerson
I’ve wanted to see Chiang Rai’s White Temple for ages. Everyone I met on my travels recommended it, and showed me the most incredible pictures they’d taken of it. So I started looking into how to plan a day trip there from Chiang Mai.
I know there’s much more to do in Chiang Rai than just the White Temple, but I was strapped for time so I couldn’t spend a few days in Chiang Rai like most people do. Instead I got up at 6am and set out for a day trip to Chiang Rai’s White Temple.
Traveling to Chiang Rai from Chiang Mai
I planned on getting the first bus at 7am, but after taking a little too long at breakfast (what can I say, I got distracted by food), I had to get the second bus at 9:15am. The bus was super easy to get, I just went to Chiang Mai Bus Terminal 3, and got my ticket from the Green Bus ticket counter. It only cost 245 baht each way (about $7 each way).
The bus took longer than I expected (about four hours) and the road was a bumpy one. In fact, in some places the road wasn’t even built yet, and we had to wait for the road to be laid before we could drive on.
I was expecting to get off at Chiang Rai bus station and then get a bus to Wat Rong Khun. But about thirty minutes before we were due to arrive at the central bus station, it stopped just outside the White Temple. I quickly grabbed my things and jumped off with a few other passengers.
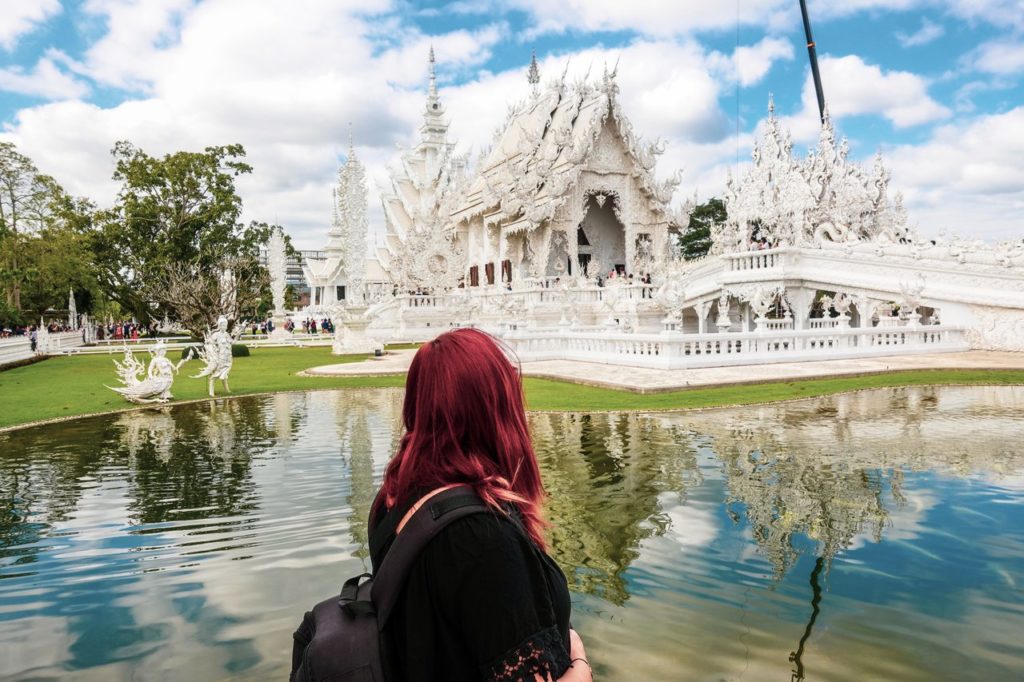
Arriving at the White Temple
The road towards the temple was lined with market stalls and coffee shops. Normally, I would have said the street vendors ruined the atmosphere, but after four hours on a bus, I was thrilled to see a coffee shop right in front of the temple. I grabbed a surprisingly reasonably priced brownie and smoothie and sat directly opposite the temple to get a time lapse of the hundreds of tourists.
At first I was a little disappointed at how busy it was. There was a queue to get into the temple, and people EVERYWHERE with selfie sticks. I guess that’s what I get for arriving in the afternoon, rather than early in the morning. But despite the crowds, the White Temple was still an incredible sight to behold.
Understanding the White Temple
I quickly learnt that all around the temple was contrasts between good and evil. The White temple was symbolic of purity and the tiny mirrors all over the temple were tactically placed to reflect the teachings of Buddha.

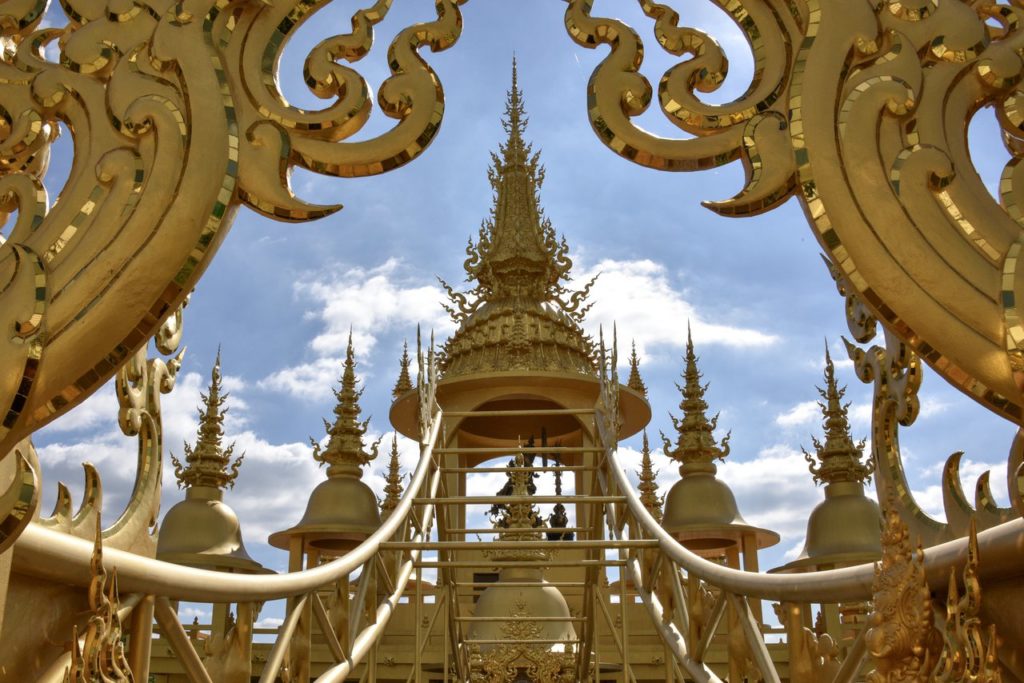
And to contrast the pure and good of the White Temple, there was a golden temple, and a golden toilet building. The gold of these buildings symbolises man’s desire and greed for money.
But there were lots of other, smaller contrasts between good and evil all around the temple complex. Just before the ticket counter there were trees with heads hanging from them (not real ones, obviously). Some were smiling, others were simply terrifying. It would be a great place to go at night, if you’re a fan of creepy stuff that is.


Underneath the bridge to the temple were hundreds of hands reaching up, apparently symbolising desire. The bridge represented rising above desire on the journey to purity.

I know there are lots of people who would probably disagree with me, but I found the small details around the temple just as impressive and interesting as the White Temple itself.
Each face, each statue and colour represented an emotion, a quality or a vice. I must have spent at least five minutes admiring each tiny detail.
Entering the White Temple
I’d hoped to get a perfect picture of the White Temple from the start of the bridge, but I should have realised that would be completely impossible with so many crowds.

But despite the hundreds of people rushing to see the temple, it was still incredibly impressive. First you have to walk over the bridge, over the sea of reaching hands, but each tiny part of the bridge was covered in sequin details, or more faces. So it’s safe to say, no one was moving very quickly.
We got to the White Temple entrance, and had to take off our shoes and carry them with us. Normally at temples you leave your shoes outside, but there’s no way that would have worked here, there were just too many people.
The inside of the temple was a little underwhelming compared to the outside, but still it was good to see. And walking around the temple’s veranda I got to admire the temple from different angles.
I even saw a couple of people that I’d met on Cat Ba Island (Ha Long Bay), so stopped for a catch up inside one fo the most impressive temples in the world.
Exploring the rest of Wat Rong Khun
Wat Rong Khun has so much more to offer than just the White Temple. The theme of good and evil continued throughout the rest of the complex, with modern figures like Spiderman, and Predators dotted about in trees or on benches.

There was also another impressive white temple-like building in the same style of the White Temple, but nowhere near as crowded. This was a great spot for pictures and selfies without massive crowds in the background.

Then there was the golden temple, which I don’t actually think was a temple at all. It had a bridge leading over a lake, and then a walkway around the building. Inside I think was a small art gallery.
And I’ve got to say, a highlight of the rest of the Wat Rong Khun grounds was the toilet. The golden toilet building might have symbolised greed, but still, I felt like a royal whilst going for a wee.
Lunch at the White Temple
After the long bus journey and the excitement of exploring the White Temple, I’d worked up an appetite. There were a couple of coffee shops directly opposite the temple, and luckily there was one with a couple of seats free outside, facing the White Temple.
I wasn’t expecting much from the food, I was just pleased to have such a perfect seat. So I set up my camera and tripod and started a time lapse of the busy crowds.
The food was also surprisingly good. They didn’t have much on offer, apart from a few pastries, cakes and brownies, and some great smoothies, but it was all delicious.
Wat Rong Khun Art Gallery
Outside the temple complex there was a gallery which was well worth visiting. There was information about those that designed the White Temple, as well as small pieces from the original temple. There was also some weird and wacky paintings that I can definitely recommend to any conspiracy theorists.
Getting back to Chiang Mai
My bus back was from Chiang Rai bus station, so I had to get to the town centre. I could have got a public bus, but after a long day, to be honest, figuring out the timetable and waiting around for one seemed like too much hassle. So I ordered a grab, and got to Chiang Rai with time to kill.
When my driver heard I was early for my bus, he recommended his favourite cafe, so I thought I’d give it a try. And I’m glad I did. It was one of the best meals I’d had in Thailand, and it was right opposite the bus station.
The bus ride back was just as bumpy and long, and I got back to Chiang Mai at about 10pm. It was a long day, but so worth it.
by Hannah Collerson
Packing everything you need can be one of the most stressful parts of traveling, especially if you’re visiting multiple destinations. Packing and unpacking at every place takes time and effort, and then there’s the frustration of not knowing where abouts anything is in your backpack.
If you want to stay organised throughout your backpacking trip, you need to find an efficient packing method.
You’ve probably seen packing cubes around, there’s quite a few of them on the market right now. But if you haven’t yet tried them out, honestly, once you’ve used them once, you won’t ever travel without them again.
The trouble is most packing cubes are best suited to suitcases, so in this post we’ll look at six of the best packing cubes for the Osprey Farpoint 40 backpack, and other similar bags.
The 6 Best Packing Cubes For Backpacks Like The Osprey Farpoint 40
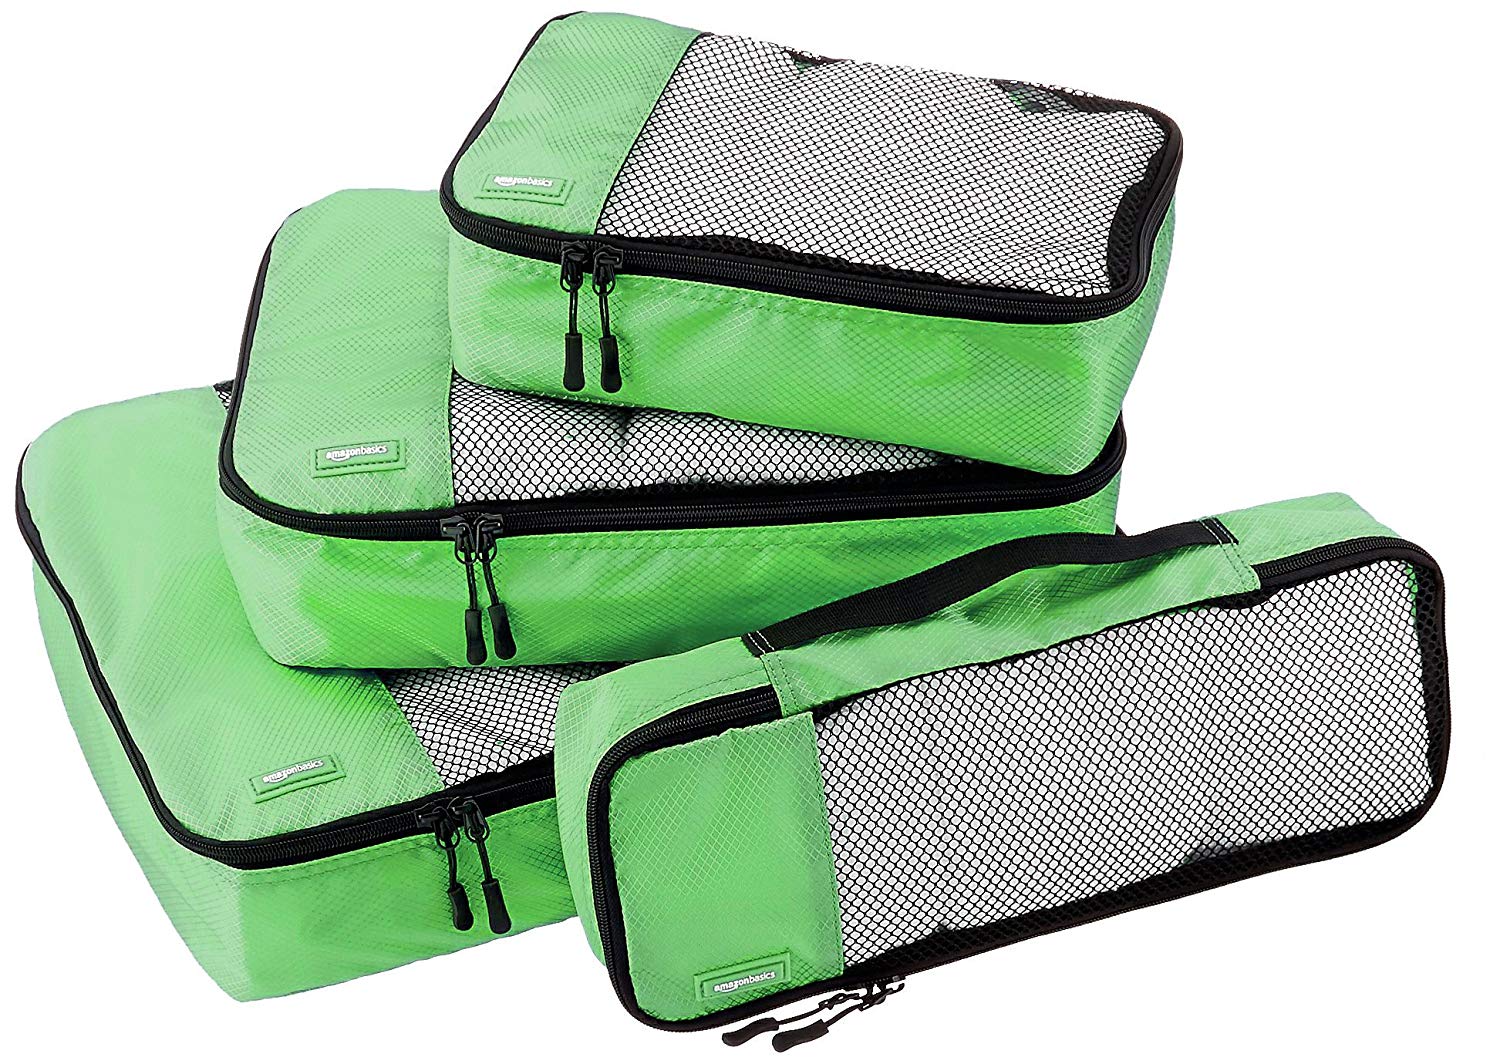
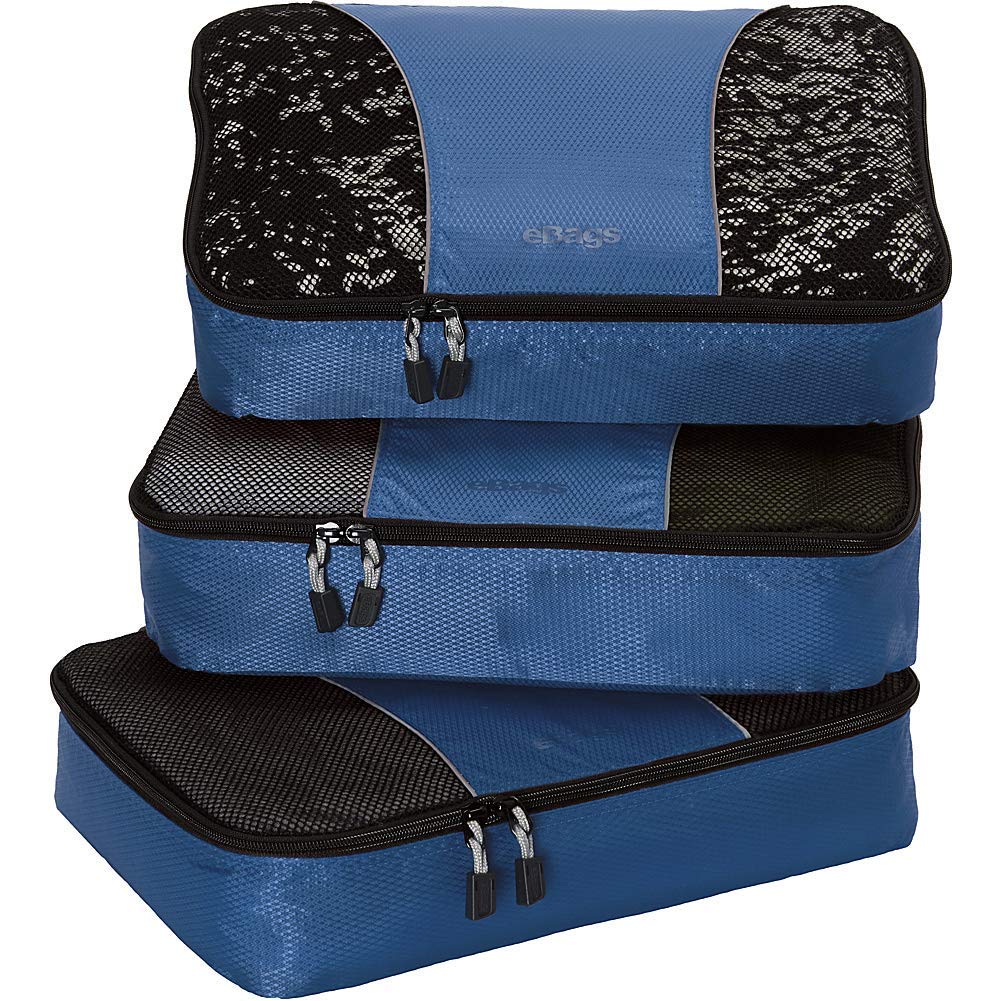
Amazon Basics products are usually pretty reliable – you always know exactly what you’re getting, and you get it for a great price too. And these packing cubes are no different.
In this set you’ll get one small, one medium and one large cube. Then the fourth piece is a long thin rectangle shape that’s perfect for a rolled towel, blanket, bottle of wine, or as us backpackers normally do, you can also jam various items of clothing into it.
The cubes all have a double zipper, which is great for quick access, and mean the zipper is less likely to snag.
The mesh design of these cubes makes it easy to exactly what’s inside each cube, so no more digging around blindly in your bag, pulling out items that may or may not be what you’re looking for.
Pros
- Mesh Design
- Durable
- Gentle Interior
- Machine Washable
- Great value
Cons
- Privacy – mesh design means your traveling companions can also see what’s in your cubes
This 3-piece set again has a mesh design, making it easy to find things at a glance, but these cubes also feature a ‘self-healing’ zipper. This basically means your zipper isn’t going to get damaged, regardless of how often you use it.
The exterior material of these cubes is weatherproof, and isn’t going to let any dirt in, which is great if you plan on doing a lot of outdoor activities like camping. The inside material though is soft, which is great for more delicate items.
The cubes are also machine washable, which is definitely a handy feature. We’re all guilty of shoving our dirties back in our bag with our clean clothes, and after a while, packing cubes can start to smell a little grim.
The main issue with this set though is the fact that it only comes with three cubes. The cubes will fit perfectly in your Osprey Farpoint 40 or other similar backpack, and you’ll have plenty of room spare as well. If you’re not taking too much with you on your trip, or if you only want to pack some of your clothes in cubes, this shouldn’t be too much of an issue. Otherwise, you might want to buy a couple of sets.
Pros
- Lifetime warranty
- Mesh design
- Machine washable
- “Self-Healing” zippers
- Protects your clothes
Cons
- Less total packing space with only three cubes
- Privacy – mesh design means your traveling companions can also see what’s in your cubes
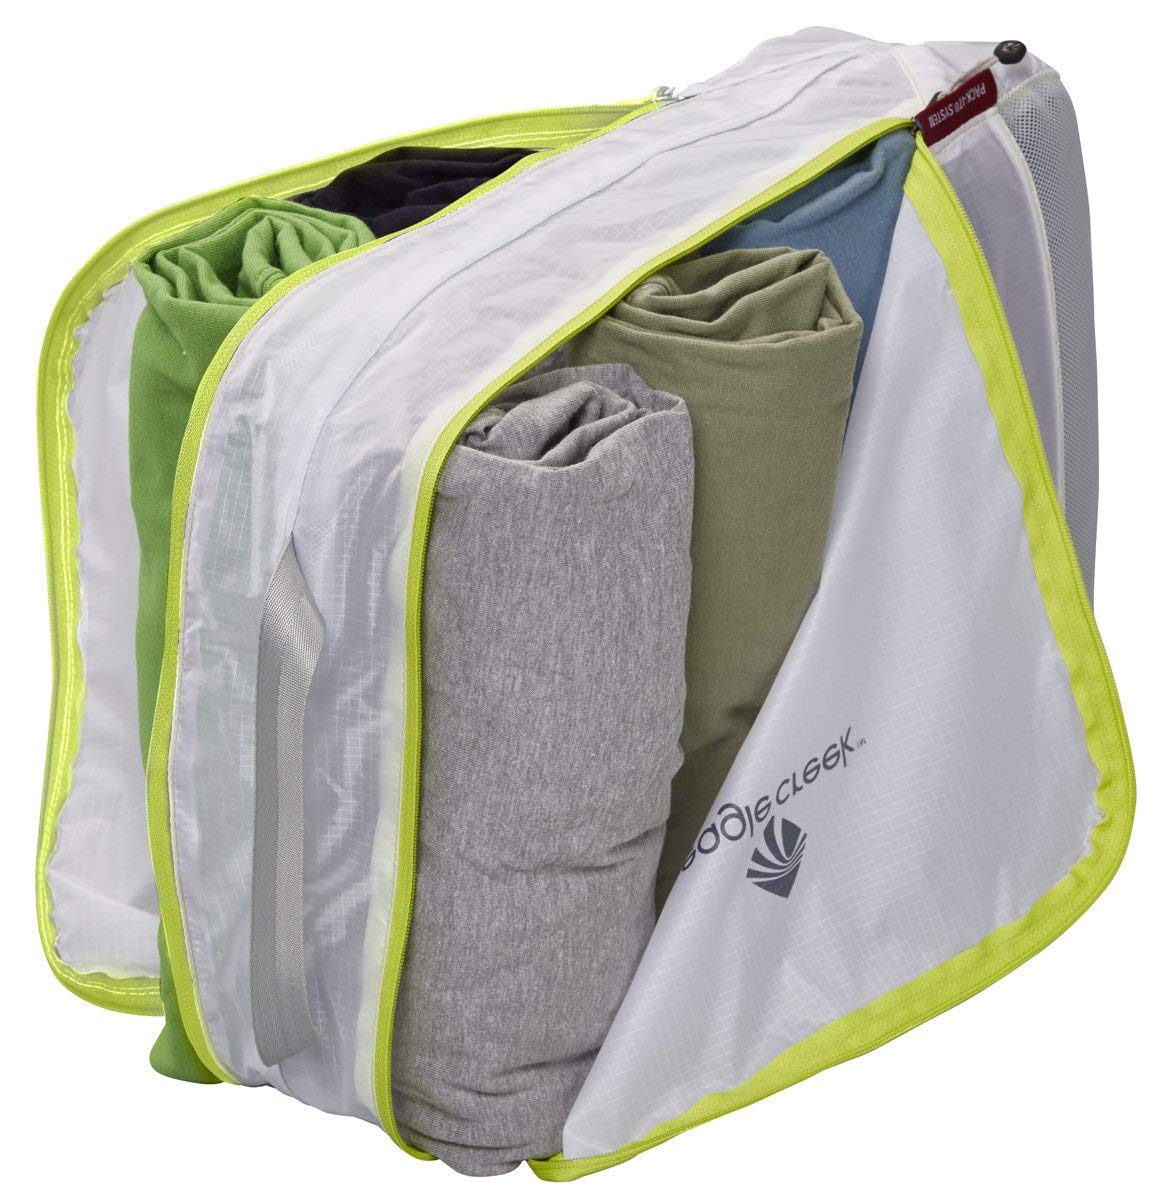
This is one of the most innovative packing cubes on the market, with the cube split into two sections, you can use one section for your clean items and the other for your dirty laundry.
The divider prevents any dirt or smell from crossing into the clean section. Even if you pack smelly wet clothing, you’re not going to smell it from outside the cube, and the smell won’t affect your clean clothes.
The materials used are specifically chosen for outdoor use, so this cube can take a battering. It’s also waterproof, and odour-proof.
Eagle Creek is also big on environmentally friendly materials and products, so you know that by buying this cube, you’ll be doing your bit for the environment.
This may only be a single set, but you can fit loads in it, and if you need any extra cubes, Eagle Creek also have a set of regular packing cubes, and a set of three pack-it dirty cubes if you want more than one.
Pros
- Simple Design
- Space for both clean and dirty clothes
- Waterproof and odour-proof
- Great Addition to other Packing Cubes
- Portable Handle
- Keeps Moisture in or out
- Green Company
Cons
- Heavy Fabric
- Only one Compartment
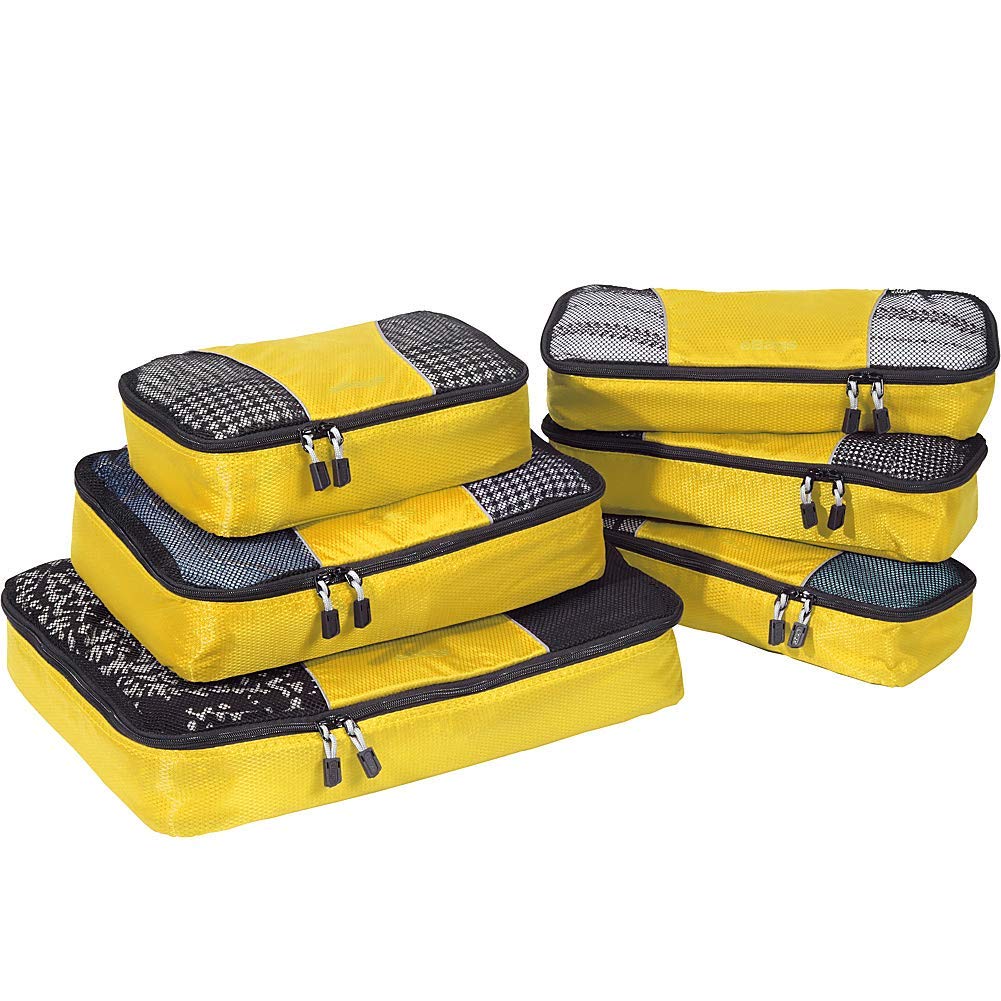
This 6 piece packing cube set is great value for money, with enough cubes for you to pack your clothes by colour, type, size – whatever you fancy!
With more pieces, you can make sure your backpack is better organised. Everything will have its own place. The only troule with more cubes is that it makes it easier to overpack!
Pros
- Value for money
- 6 pieces as opposed to the usual 3 or 4
- Durable
- Lifetime Warranty
Cons
- Smaller individual cubes
- Snug fit in backpack
- More to keep track of on the road
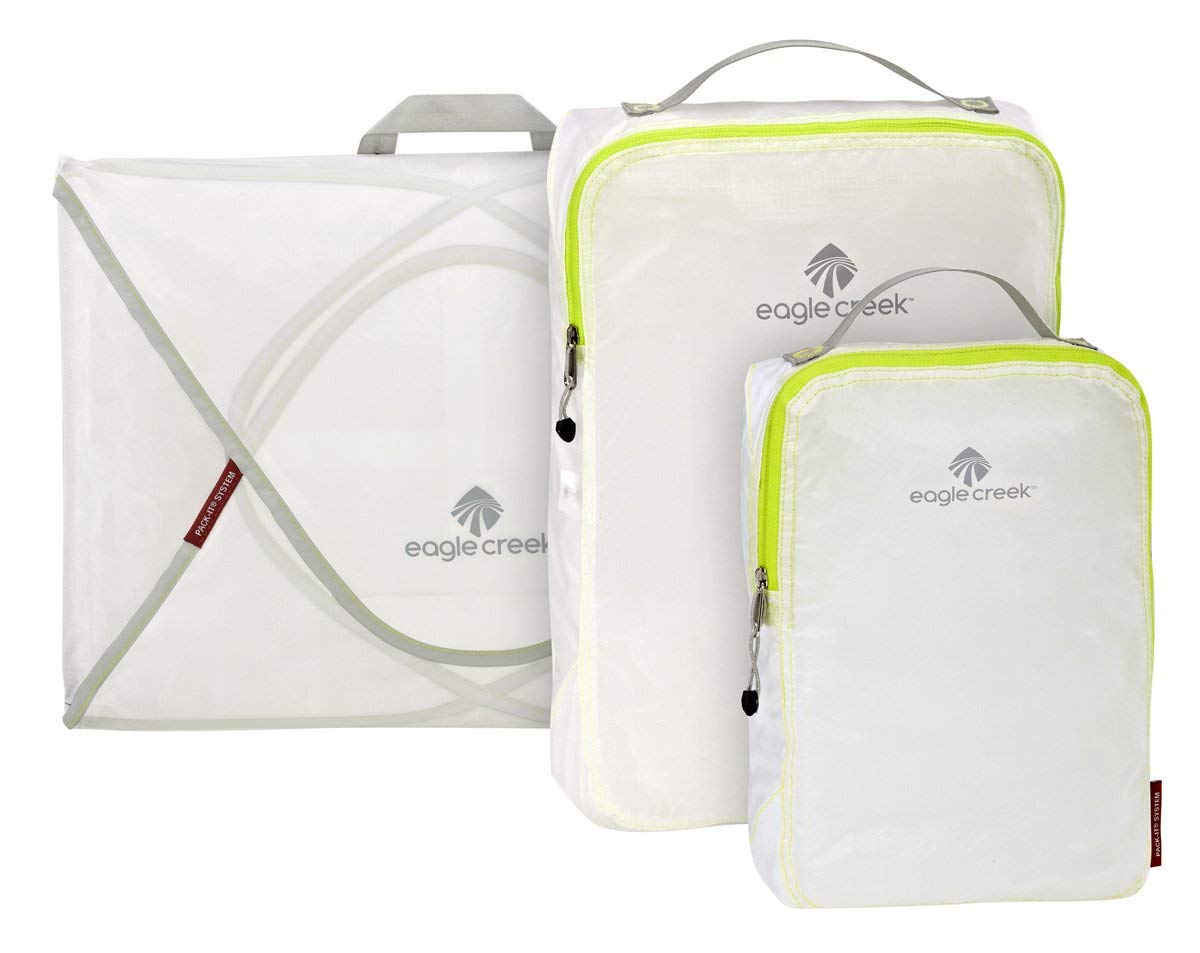
This Eagle Creek packing cube set is great for those who want a variety of different cubes. It comes with different shaped cubes, and even a garment bag that can be folded, keeping your clothes neat and crease-free.
These cubes all have handles, so you can easily grab them and keep hold of them (which is more useful than you might think – especially if you’re asked to unpack your bag at airport security).
Pros
- Versatility
- Light-Weight Fabric
- Great for Backpacking Beginners
Cons
- Fabric durability – cubes can get damaged when washed on high temperatures
- Bulky
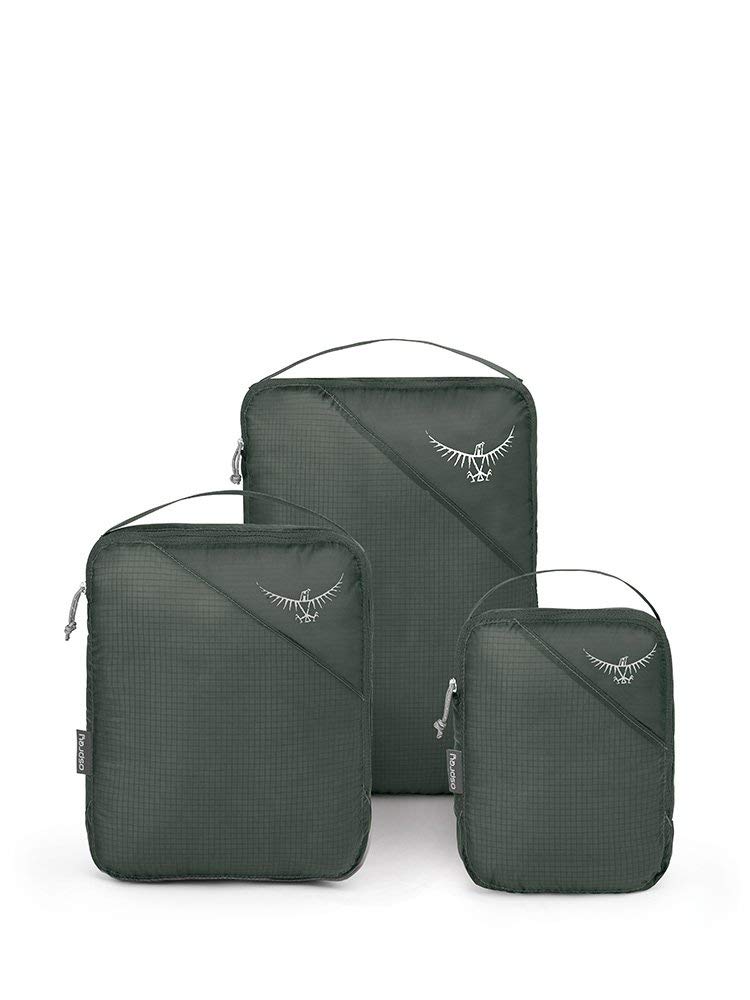
If you really want the best money can buy when it comes to finding perfect packing cubes for your rucksack, it’s worth sticking with the Osprey brand.
As well as rucksacks, Osprey have brought out several different travel organisers and packing cube sets, specifically designed to accompany their rucksacks. So getting an Osprey packing cube set would be like giving your rucksack tailor made compartments.
Pros
- Specifically designed to fit the Osprey Farpoint 40 and other similar rucksacks
- Immaculate quality – you can throw these things around as much as you want, they’re not going to break or tear
- Stylish appearance – the trouble with packing cubes is that you can tell the cheap from the high quality, and these certainly look like they’re high quality
- There’s a range of different organisers and packing cubes within the Osprey packing range, so you can choose the packing cubes that are best for you
Cons
- Sticking with a brand you trust can come at a cost, these packing cubes are slightly more expensive than their alternatives.
So to sum up…
Packing cubes can definitely transform the way you travel, so it’s worth investing in a set you get on with. The ultimate packing cubes for the Osprey Farpoint 40, and other similar rucksacks are definitely the Osprey cubes. They’re specifically designed to fit snugly in Osprey backpacks, and they’re made with top quality material.
If you’re just looking for a kit that can separate your clean from your dirties, the Eagle Creek clean dirty cube is probably best for you.
However, if you’re looking for a good set of packing cubes that can help you organise your clothes and gear, I’d suggest the Amazon Basics 4-piece set. This has everything you need for a small trip, and it’s great value for money.
Whichever cubes you go for, they’ll make your Osprey Farpoint 40 much more organised, giving you different compartments. The same goes for other similar backpacks. Trust me when I say, once you’ve used packing cubes, you won’t want to go back to one-compartment backpacks without them.
by Hannah Collerson
Anyone with boobs that are above average in size will know that tis can be a curse as well as a blessing.
Sure, having big boobs has its perks, I mean there’s a reason why so many girls dream of having bigger breasticles. But life isn’t always easy for the bigger breasted women out there.
If you travel often, and you’ve got bigger boobs than most, you’ll understand the struggles of lugging your breasts around the world.
Here are 10 travel struggles that only those with big boobs will understand.
1: Finding bras that can handle adventure
If you’re a hardcore travel addict, your will likely involve a lot of action and adventure. But for the bigger breasted ladies, adventurous activities require a little more forethought – we need to find a bra that can handle adventure.
Any vigorous movement can cause boobs to go flying, which can be both unflattering and painful.
So to be fully prepared for adventure, we need to find a bra with some serious support. It sounds simple, but it can feel like a wild goose chase trying to find one.
2: Finding supportive bras that aren’t sports bras
Traveling often involves visiting some pretty warm destinations, which means wardrobe choices like strappy tops.
Why is this an issue, you ask? Because with strappy tops, sports bras are a no-go.
Finding a supportive bra that’s not a sports bra is perhaps the biggest struggle of the big boobed community.
3: Packing bras is a nightmare
So finding suitable bras is hard, but packing them is even harder. Bigger boobs equal bigger bras, and bigger bras are an absolute nightmare to pack.
They take up so much room, and they’re such an awkward shape to pack. Having big boobs makes traveling light basically impossible.
4: It’s hard to find cool but modest outfits
When traveling to hot countries, you want your clothes to be as cool as possible. The only trouble is that cool outfits are usually quite revealing, with low cut tops.
For those with smaller breasts, this isn’t really an issue, but when your boobs are ridiculously large, any outfit that is even remotely revealing just looks overly sexy (it’s a hard life, I know).
This doesn’t always matter so much, but there are some corners of the world where having your breasts bursting out of your top can cause offence. It’s just so hard to find outfits that are both cool and modest!
5: Running anywhere is super painful
This is a generic struggle, but when you travel often, the chances are that at some point you’re going to need to run for a plane, train, bus, ferry or whatever else it might be that you’re late for.
Running with big boobs is not fun. You have to deal with the pain of your sensitive breasticles slapping up and down with every footfall, and you have to try and discreetly hold them in place without looking like a lunatic.
6: Your boobs act like a bib on long haul flights
Lets face it, we all eat more snacks than we probably should on long haul flights, it just helps the time go quicker. When you’ve got big boobs though, they act just like a bib, catching all the crumbs as evidence.
When you touch down after your flight, the first thing on your list of priorities, before even getting through security, is to empty your cleavage of crumbs.
7: Boob sweat in hot countries is unbelievable
No one likes to admit that their boobs sweat, but it happens. It’s a fact of life that no matter how big or small your breasts, they’re going to sweat. It just so happens that bigger boobs sweat a thousand times more than smaller ones.
And when traveling to hot countries, the level of boob sweat isn’t just annoying and embarrassing, it’s actually unbelievable.
8: Every flight is a battle between your boobs and the tray table
Unless you’ve splashed out on business class or first class flight tickets, plane seats are uncomfortably small and cramped.
So when you go to set your tray table down, you have to try and squish it down over your boobs.
9: The back pain on long walks is unbearable
Having big boobs is like constantly wearing a big rucksack on your front, which after a while gets pretty tiring and painful.
So when walking for anything more than half an hour (something which is pretty hard to avoid), the back pain starts to kick in as your spine gives up on your massive breasts.
10: ‘Nip slips’ are a much more common occurrence
So you’re out and about on your travels, by the pool or at a beach, rocking your new bikini, and you’re having a good time. But deep down, you’re awaiting the moment a nipple slips out, or your bikini or bra decides to snap, unleashing your breasts in all their glory.
