Author: Hannah Leigh

  • 14 Budget Alternatives to Popular (and Expensive) Destinations

    14 Budget Alternatives to Popular (and Expensive) Destinations

    Booking your dream vacation can be overwhelming, especially when you see the hefty price tag attached to tourist hotspots. Does that mean you have to forgo the best adventures in the world? Of course not! Don’t give up on your travel plans yet – just travel a little smarter.

    If there’s one thing I’ve learned from traveling full-time, it’s that often, the most popular and expensive destinations simply aren’t worth it. Hear me out. Would you rather spend a ridiculous amount of money visiting somewhere that’s overrun with tourists, or would you rather take the trip of a lifetime without breaking the bank, and without having to battle your way through crowds of tourists just to get a glimpse of the sights you wanted to see?

    There are so many incredible budget alternatives to popular (and expensive) destinations. You just have to know where to find them. That’s why I’ve put together this article.

    Here are some of the best budget alternatives to popular destinations.

    1. Budapest, Hungary Instead of Vienna, Austria

    Budapest is an inexpensive and beautiful alternative destination to Vienna.

    Are you dreaming of the rich history and fine food in Vienna? Budapest has both of those things and much more for a fraction of the cost.

    You can walk through this glamorous city and weave in and out of bustling crowds while admiring stunning river views and historic architecture. Tours of Castle Hill, including the 13th Century Royal Palace, are free due to its status as a UNESCO World Heritage site. Even better, you can spend around $30 and sail down the Danube or visit thermal spas for an afternoon of blissful relaxation.

    2. Cinque Terre, Italy Instead of the French Riviera
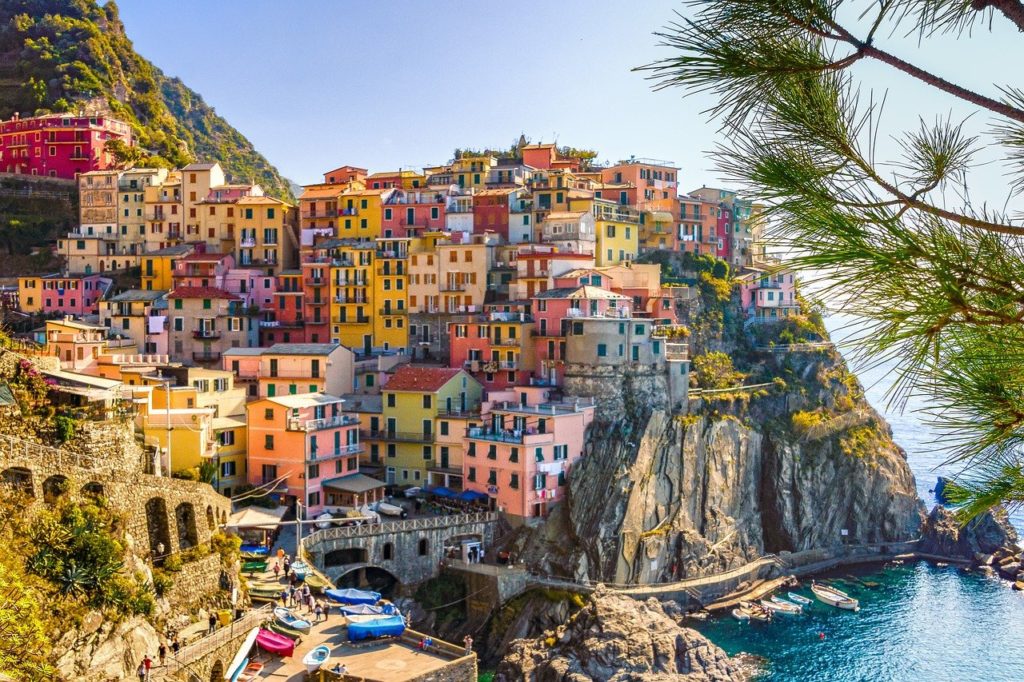
    The colorful coastal town of Cinque Terre, Italy offers a beautiful, budget alternative to destinations in the French Riveria.

    The French Riviera beckons travelers who want elegance and private beaches, but for lots of us, destinations like Nice, Menton, Cannes and Monaco simply aren’t within budget.

    Luckily, a trip to the colorful coastal town of Cinque Terre in Italy offers similar ocean views, beautiful beaches and charming dining opportunities, without the hefty price tags you’ll find in the south of France.

    In Cinque Terre, you can don a bathing suit and enjoy the free public beaches (which aren’t too crowded). The culture here is laid back and slow-paced, so you’ll have plenty of time to relax while eating fresh seafood and pesto at local restaurants.

    3. Gambia, Africa Instead of the Canary Islands
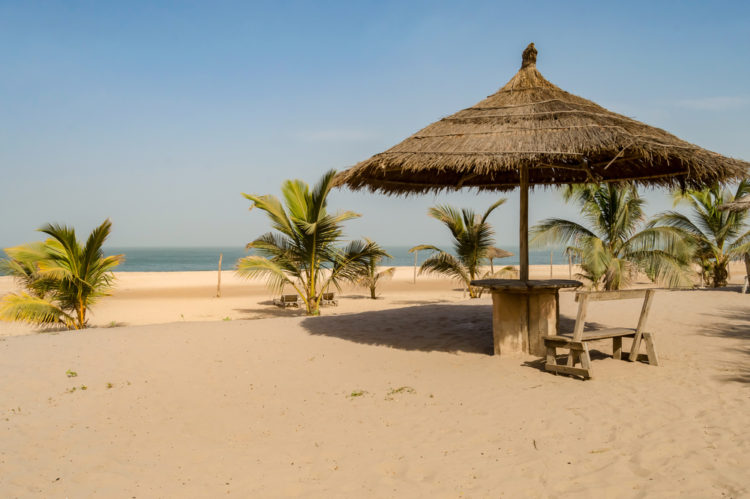
    The Gambia offers sun, sand and sea for budget beach holidays.

    Are sandy beaches calling your name? The Canary Islands have been popular for European island getaways for years, and while there are affordable resorts, most islands are overcrowded with tourists and peak season can see prices soar.

    So if you’re looking for a destination that’s a bit further off the beaten track, while still offering the sun, sand, and sea that you’ll find in the Canaries, you can still work on your tan in the Gambia, a narrow stretch of pristine coastline in West Africa.

    Bijilo Beach is still relatively undiscovered by tourists, allowing you to take in the sandy beaches and bright blue water all on your own. If you want a little more adventure, you’re just a short drive away from diverse wildlife tours and scenic explorations further into the country.

    4. La Paz, Mexico Instead of Cabo, Mexico
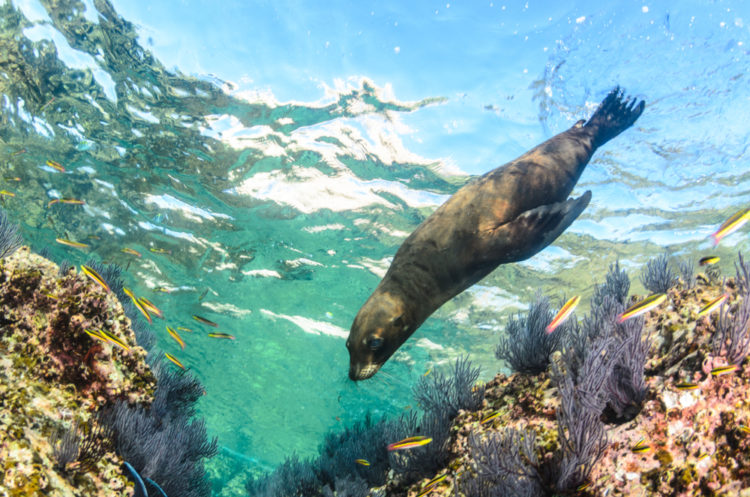
    La Paz, Mexico offers stunning beaches, traditional Mexican cuisine and opportunities to swim with whale sharks and sea lions.

    Even though Cabo is considered a hotspot for luxury travel, it can be overrun with tourists and it’s not the best destination for authentic travel experiences — it’s become heavily “Americanized”.

    A trip to La Paz, Mexico will be easier on your wallet and you’ll get to experience more traditional Mexican culture and cuisine. You can explore all aspects of local life by dipping in and out of local shops, restaurants, and markets. Plus, there are some beautiful beaches nearby, like Balandra Beach, which offers white sands and crystal clear waters. And if you’re interested in extra excitement, you can book a dive with whale sharks and sea lions to round out your adventure.

    5. Ljubljana, Slovenia Instead of Prague, Czechia
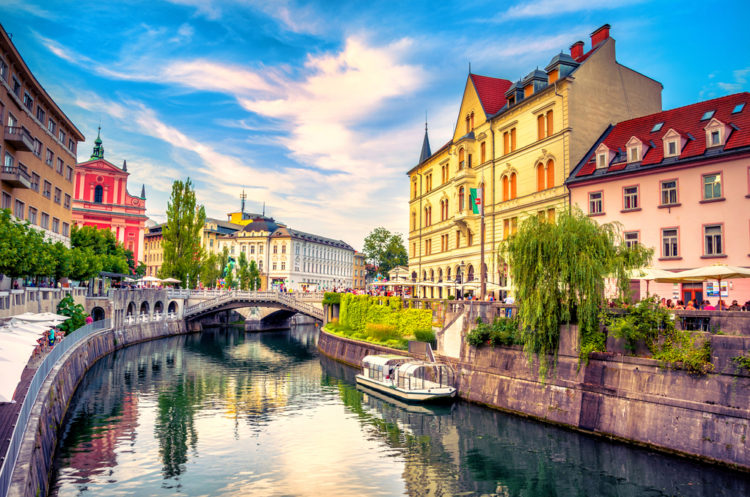
    Find quaint riverside walkways and restaurants, historic architecture and art galleries in Ljubljana, Slovenia.

    Prague boasts architecture from the Middle Ages and a romantic feel, but it can be pricey and crowded.

    Ljubljana, Slovenia is a budget alternative to the popular destination of Prague. You can find nice accommodation for less than $20 a night, with flowing wine and local delicacies costing even less. Better than the price tags are the sights – there are plenty of buildings from the Renaissance era to explore and countless art galleries full of masterpieces.

    6. Montreal, Quebec Instead of Paris, France
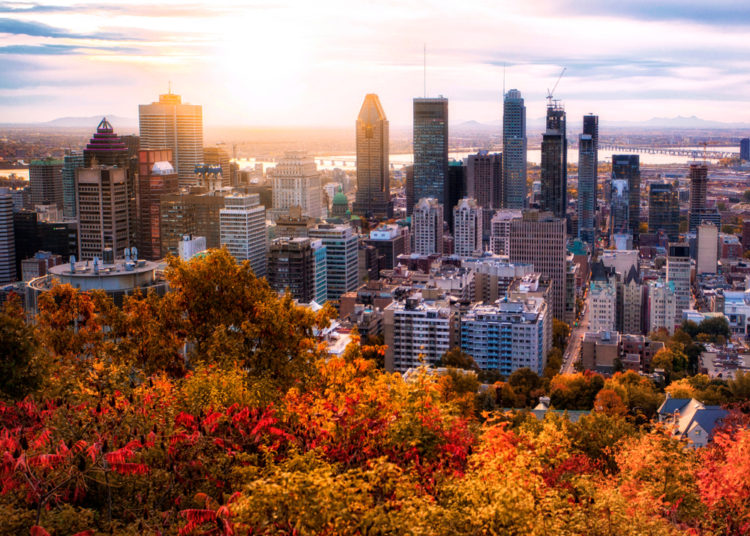
    Montreal is a brilliant budget alternative to the popular and expensive destination of Paris. Enjoy an authentic French experience for less in this Canadian city.

    Daydreaming of roaming the streets of Paris and learning to order your favorite pastries in French? You’re not alone, but you don’t need to hop continents for an authentic French experience.

    Despite being a Canadian city, Montreal is steeped in traditional European culture, and its winding cobblestone streets are the perfect place to indulge your wanderlust. The main streets are lined with all the cafes and patisseries needed to try delicate dishes, no pricey ticket to France required.

    7. Perth, Australia Instead of Sydney, Australia
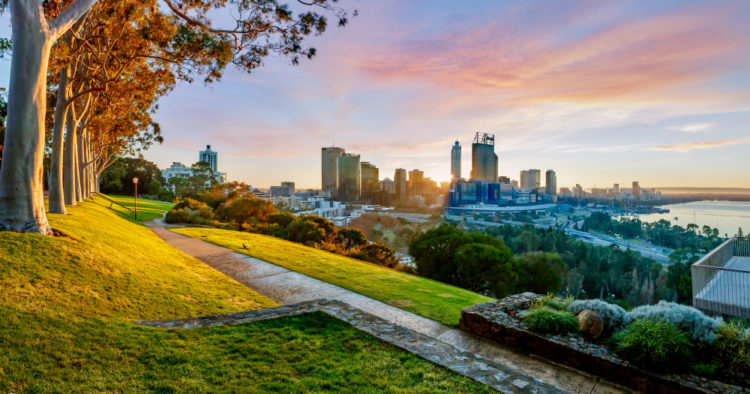
    Enjoy great food, adventure and fun in Perth and make the most of everything the southwestern coast of Australia has to offer.

    Sydney has the Opera House, but Perth has everything else. If you can stand to miss out on those white sails, you’ll find plenty of food, adventure, and fun lying on the southwestern coast of Australia.

    You can enjoy the city skyline at night or spend your days on the beach. Snorkeling at Shoalwater Islands Marine Park is surprisingly affordable, and you’ll have the chance to watch sea lions and penguins, too.  

    Perth is also a great place to base yourself for trips further afield. From Perth, you could visit Rottnest Island to enjoy stunning sandy beaches, snorkel in crystal clear waters and watch out for wildlife (like dolphins and adorable quokkas). There’s also stargazing at the Pinnacle Desert and vineyard tours that are not to be missed.

    8. Potosi, Bolivia Instead of Rio de Janeiro, Brazil

    Swap Rio de Janeiro for Potosi, Bolivia for a budget alternative to the popular destination.

    Between the nightlife and Christ the Redeemer statue that looms over Rio, most people have added this city to their bucket list. Its popularity has led to a huge increase in price though – so why not enjoy fewer crowds and less price gouging in Potosi, the highest city in the world? You can still dance in the streets, plus you’ll have access to even more natural wonders. Lake Titicaca and the Amazon Rainforest lie just a short trip outside the city.

    9. Puglia, Italy Instead of Tuscany, Italy
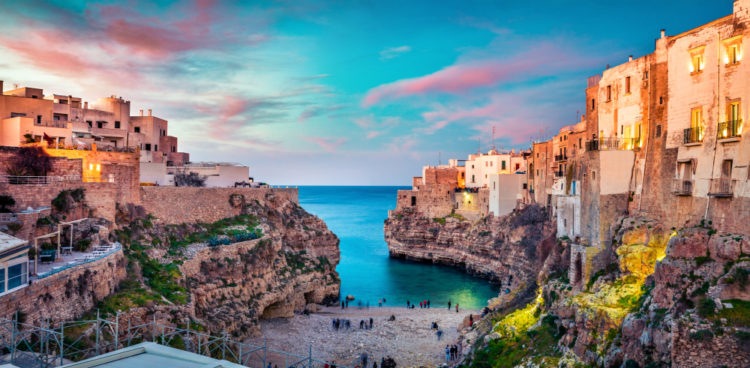
    Find sunshine and turquoise waters in Puglia — one of Italy’s more affordable destinations.

    If it’s olive groves and local wines you’re interested in, don’t overspend by traveling to Tuscany (which has been highly commercialized in recent years). You can easily eat and drink your way through picturesque Puglia for only dollars a day. It’s located on the southern tip of the boot, meaning you’ll never be short on sunshine or turquoise waters lapping against the white-washed town. Let your hair down and enjoy the warm breeze as you relax in style.

    10. Willemstad, Curacao Instead of Aruba
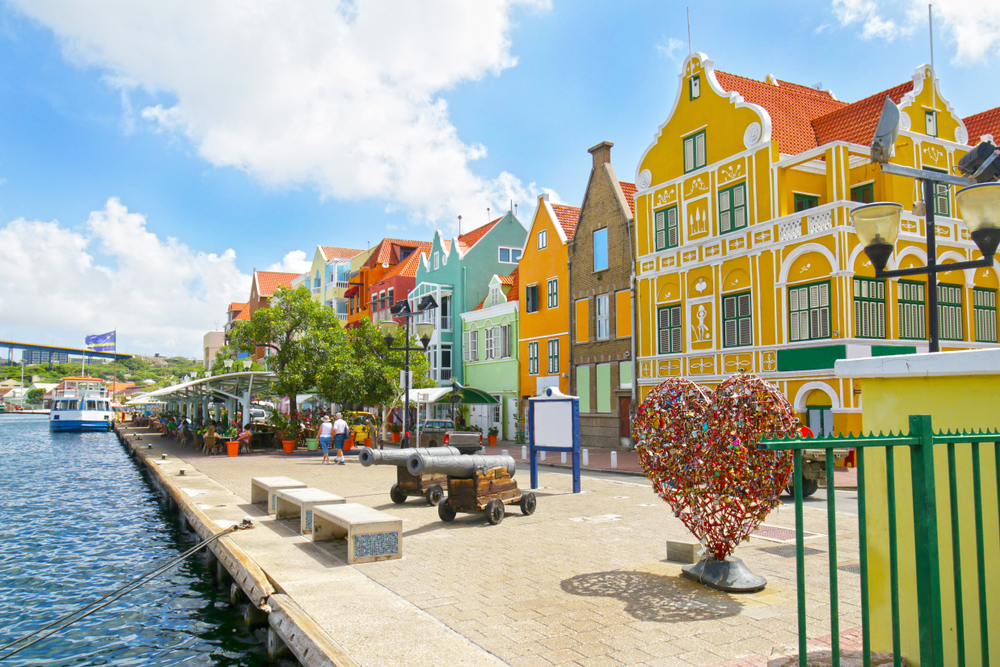
    Visit the colorful town of Willemstad, Curacao and make the most diving opportunities.

    Who hasn’t imagined traveling through the Caribbean waters? Aruba calls to those who crave only sun and sand, but it will cost you a pretty penny if you plan to stay the night. For a cheaper and quieter alternative, you can explore the area around Willemstad in Curacao. The entire area is a haven for those who love the ocean. You can spend your days exploring any of the 35 coves or visit any of the 60 dive sites to see local aquatic wildlife. 

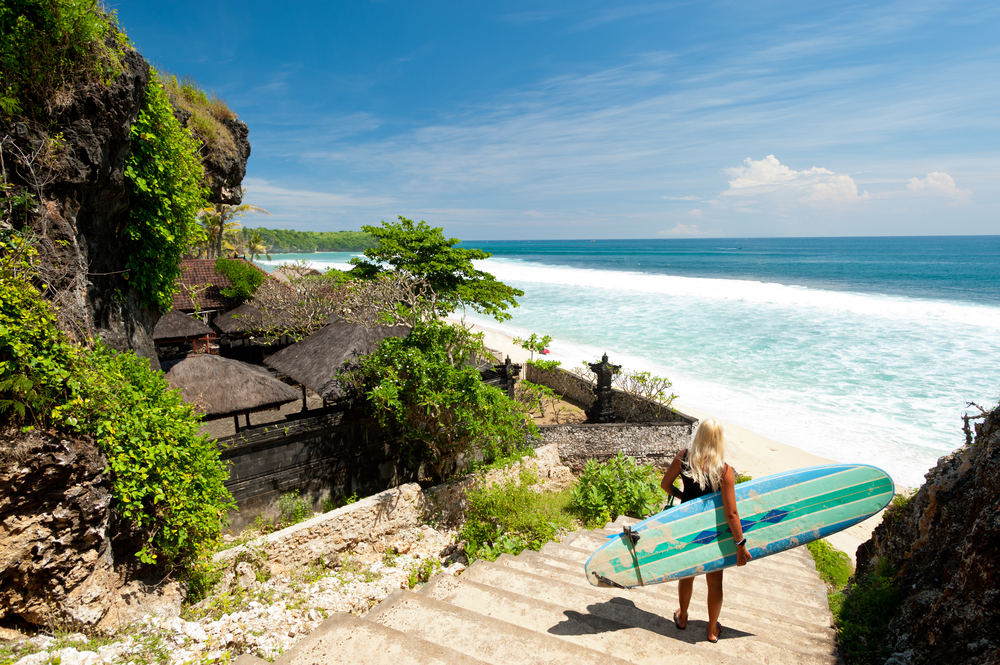
    11. Lombok, Indonesia Instead of Bali, Indonesia
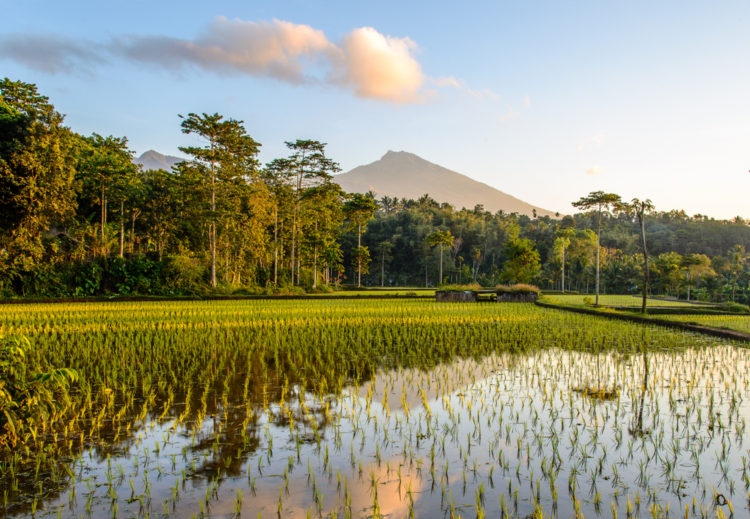
    Head to Lombok, Indonesia for a quieter and more affordable alternative to Bali.

    Bali is a dream destination for so many people and for a while I was lucky enough to live there long-term. But as much as I love the Island of the Gods, even I have to admit that it is becoming a bit overcrowded and prices are rising rapidly.

    Neighbouring island Lombok is a brilliant budget-friendly alternative travel destination. Rather than views of Bali’s Mount Batur, you can enjoy picturesque scenes with Mount Rinjani — Lombok’s active volcano — looming in the background. There are also plenty of Bali-esque rice terraces, palm trees and beaches.

    But there’s one major difference between Lombok and Bali. Lombok hasn’t yet been fully “discovered” by tourists. Of course people go there, but compared to Bali, this island is far quieter. And as a result, prices are much less. Accommodation can cost less than $10 a night, scooter rental is even less and day trips and food are always affordable.

    Lombok isn’t so much a tourist destination — it’s one of the best authentic travel destinations if you’re looking to get off the beaten track.

    12. Bansko Instead of the French Alps
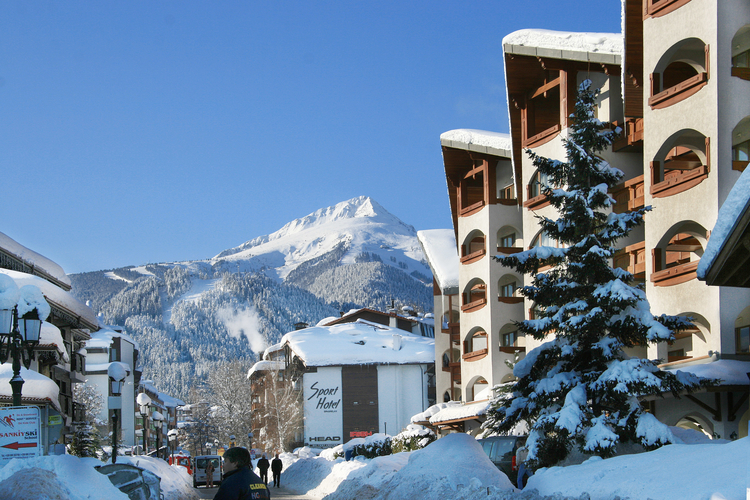
    Plan a skiing trip on a budget by visiting Bankso rather than French alpine resorts.

    Skiing in Europe is a bucket list travel experience for many people. And when you think of skiing destinations, you no doubt think of Chamonix, Val-d’Isère or other European alpine destinations. But there’s a reason skiing is thought of as a rich person’s sport — these places are expensive! A European skiing trip in the French Alps could cost thousands.

    But there’s another, less well-known skiing destination in Europe — one where you can try skiing without breaking the bank.

    Bankso is a small town nestled in the mountains of Bulgaria. There are stunning ski resorts, slopes for people of all abilities, luxury spas and great restaurants. And even if you plan a luxury vacation in this destination, it will still cost you a lot less than a trip to the French Alps.

    13. Edinburgh Instead of London
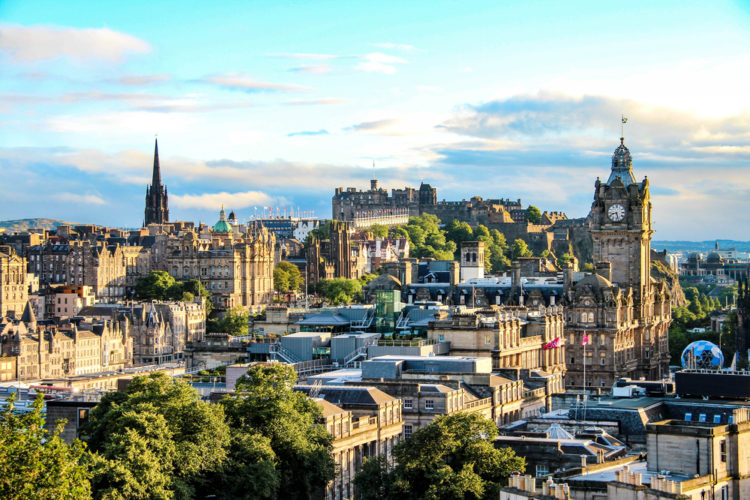
    Swap England’s capital for Scotland’s capital for a more affordable trip back in time.

    If you’re dying to see London’s blend of modern architecture and historic streets, with traditional features like red phone boxes and London cabs, but you’re put off by the extortionate prices of London hotels and experiences, I’d suggest Edinburgh as a budget alternative.

    Visiting Scotland’s capital is like stepping back in time. As you walk the cobblestone streets of the Royal Mile, visit Edinburgh Castle and admire views of the city, you’ll feel almost as if you’re in medieval Scotland. And for any Harry Potter fans, there’s plenty to see that relates to the books and the movies. Walking up Victoria Street is like stepping foot in Diagon Alley (there’s even magical shops), Greyfriars Kirkyard is home to gravestones with some familiar names (like Thomas Riddell), and George Heriot’s School is rumored to have inspired Hogwarts.

    And there are plenty of other literary attractions too. There might be literary pubs in London and London literary attractions, but Edinburgh has some amazing sights for avid readers. There’s the Writers’ Museum, Scott Monument, Greyfriars Kirkyard, and Abbotsford, the home of Sir Walter Scott.

    In Summer, there’s also the infamous Edinburgh Fringe Festival — one of the world’s best comedy festivals.

    On top of all these great attractions, Edinburgh is much more affordable than London.

    14. Novigrad, Croatia Instead of Dubrovnik
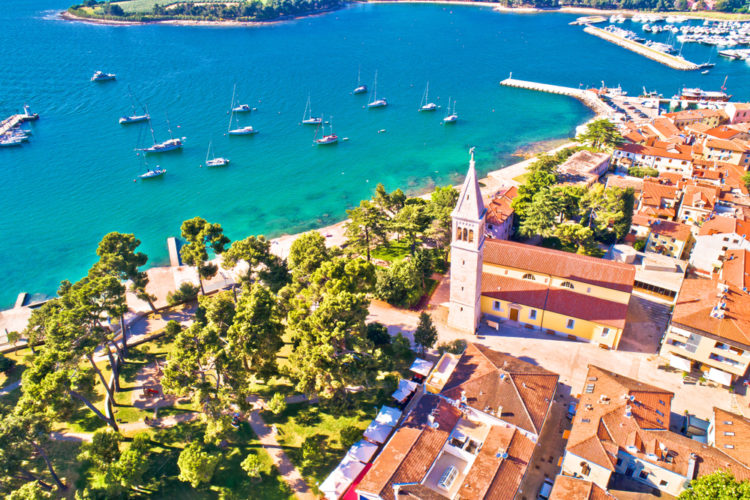
    Visit Novigrad, rather than Dubrovnik for an affordable beach destination, complete with great food, water sports and shopping opportunities.

    Dubrovnik quickly became one of Europe’s most popular tourist destinations and now it’s overly busy and prices have inflated dramatically.

    So rather than heading to the south of Croatia, I’d suggest looking further north. Novigrad is a coastal town located in Istria and it’s one of my favorite Croatian destinations.

    It’s so much quieter than Dubrovnik and Split, and accommodation is very affordable. There are luxury options too, but even they aren’t as expensive as their equivalents in more popular cities.

    As for the beaches, these are beautiful. The water is so clear and is perfect for swimming, snorkeling, and water sports. There are sunbeds with straw umbrellas for hire on many beaches and water sports kiosks offering just about any water sport you can imagine.

    You’ll find some incredible restaurants in Novigrad (this is controversial, but the best pizza I have ever had was in Novigrad). There are restaurants overlooking the water that can be a little pricey, but a few steps inland you’ll find budget-friendly options with food that’s just as good (if not better).

    And of course, there are lovely little gift shops dotted throughout the town.

    Ready to Get Packing?

    Fingers crossed you’ve found a budget alternative to a popular destination that actually excites you. I write these articles to help fellow travelers plan the best trips so hopefully, you’ve found this one helpful!

    I’m a bit of a sucker for “underdog” destinations — destinations that are a little more unusual and aren’t teeming with tourists. Not only are they cheaper, they also offer more authentic and traditional experiences than those offered in tourist hotspots.

    If you’re looking for a budget alternative to a popular destination that isn’t on this list, feel free to drop me an email. I’d be happy to update this article with more suggestions and I’d love to hear what you think of the suggestions above.

  • Landing Remote Writing Opportunities: How To Write a Winning Upwork Cover Letter

    Landing Remote Writing Opportunities: How To Write a Winning Upwork Cover Letter

    My first ‘digital nomad job’ was a freelancer writer. I applied for jobs on Upwork writing articles, books, product descriptions — just about anything you can imagine. And after several years of pitching clients and landing jobs, I perfected my cover letters. It sounds a little cocky, I know, to say I ‘perfected’ them but for the last two years that I worked through Upwork, every pitch I sent out resulted in me being hired.

    So as my talent seems to lie in writing Upwork cover letters, I thought I’d write a post about it, for anyone else who wants to go freelance so that they travel while working. Plus, I no longer use Upwork, I play casino games at https://www.uptown-aces-casino.com/, so I don’t mind sharing my secrets.

    How to Write a Winning Upwork Cover Letter (for Writing Jobs)

    If you want to succeed as an Upwork freelancer and land the higher-paying jobs, you’ll need to perfect your cover letter. There are thousands of freelancers out there, so whatever jobs you apply for, you can expect a fair amount of competition.

    Cover letters are the first impression that potential clients are going to get of you, so you need to 1) sell yourself, and 2) stand out from the rest. Most of the time, clients don’t even bother looking at your profile, which is probably not what you want to hear if you’ve spent ages perfecting your profile (sorry). They skim your cover letter, check out your previous reviews and make a decision.

    The only trouble is, if you’re new to the freelancing world, it can be hard to know exactly what clients are looking for and how to impress them. So here’s everything you need to know about writing job-winning cover letters.

    Be Friendly and Conversational

    Most clients are looking for writers who can write in a conversational style. They want to see that your friendly personality is going to shine through your writing. And the first piece of writing they’re going to see from you is your cover letter.

    Don’t make the mistake of making your cover letter too formal. Generally freelance writing jobs are fairly casual, and clients want to skip past the normal formalities of hiring someone. Plus, if you can sell yourself in a conversational cover letter, you’re already proving that you can write in the style they’re looking for.

    Check Your Cover Letter for Spelling and Grammar Mistakes

    You’re applying for a writing job, so don’t let clients’ first impression of you be that your English writing skills aren’t quite up to scratch. Any proposals with spelling mistakes are probably going to be dismissed instantly.

    How to Start Your Upwork Cover Letter

    Knowing how to start a cover letter, and how to address the potential client is something that a lot of freelancers struggle with. The trouble with Upwork is that you don’t always have access to clients’ names. So how do you address them in your cover letter?

    Every freelance writer has their own approach, but we’d suggest either a simple ‘Hi!’, ‘Hello!’ or if you want to be more formal, try ‘Dear Hiring Client’.

    Using ‘Dear Hiring Client’ is a great way to let your potential clients know that you’re a professional, but at the same time, it’s a little distant and impersonal. When applying to any conventional job you’d definitely want to steer clear of starting your application with ‘hello’ but Upwork clients are looking for an informal working relationship. So if a simple ‘hello’ is more natural to your personality and style, then go for it.

    Don’t Ramble: Keep Your Cover Letter Short and Sweet

    If you’ve got quite a lot of writing experience, it’s easy to fall into the trap of rambling about all the different articles you’ve written. But your cover letter isn’t just for you to ramble on about how great you are (even if you are incredible). It needs to be more specific than that.

    By all means mention your experience, but make it relevant. If you’re applying to write articles for a beauty or fashion blog, they probably don’t want to hear about your experience writing technology reviews.

    Keep it short and sweet, this way your cover letter should be relevant, and won’t send the hiring client to sleep.

    Be Honest: Lying or Exaggerating Your Abilities Will Lead to a Bad Review

    More often than not, hiring clients are experts in their field, or at least, they know a lot. So if you don’t have all that much experience or knowledge of their field, be honest about it. If you pretend to be something you’re not just to get the job, they’ll soon realise, and that could result in a bad review.

    So there’s no sense in lying in your cover letter. Even if you have no relevant experience, just be honest. As long as you seem keen to learn and get started, clients don’t always mind too much if you’re a little inexperienced.

    Answer the Questions Clients Haven’t Asked Yet

    Some clients ask specific questions that want you to answer in your proposal, but some clients don’t. And for these jobs, you should go above and beyond and answer the questions you know they’ll want answers to. This way, you’ll be showing that you’re organised, and that you’ve done this before.

    So what questions does every hiring client want to know the answer to? Here are the staple questions that I always try and answer in my cover letter:

    • What relevant experience do I have?
    • What is my writing style like?
    • How long will it take me to complete the job?
    • What is my bid for this job?

    Answer these questions, even if the hiring client hasn’t asked them yet. You’ll appear organised and professional. And if you’re applying for a job that involves writing longer pieces, maybe detail how you’d go about the project, how you’d structure it.

    Don’t Use a Templated Cover Letter for Every Job

    Hiring clients can spot generic cover letters from a mile away. And they hate them. You can tell straight away which cover letters have been copy and pasted, and which have been thought out in detail.

    It might be easier to have a cover letter that you use to apply for every writing job, but you’re not going to land all that many jobs.

    It’s fine to have a general template that you use, a structure to follow, but spending a couple of minutes making it personal is going to see much better results. Think about it, would you hire someone who hadn’t even made an effort to apply properly?

    Attach or Include Links to Articles You’ve Written

    If you provide potential clients with links to articles you’ve written, you’ll be making their life a whole lot easier, and they’ll thank you for it. No client wants to take the risk of hiring a writer without knowing what their style of writing is like. It’s just too much of a gamble.

    So in your proposal, include a link or two, and you’ll massively increase your chances of being hired, especially if the clients are instantly sold on your writing style. If you don’t have any live articles you can link to, you can always attach Word documents to your proposal.

    If you don’t have any writing examples yet, you really need to focus on building your writing portfolio. Start your own blog, even if it’s just a simple WordPress one, and write about something you’re passionate about. At least this way potential clients will be able to see your writing style at its best.

    Or if you’d rather not start a blog, spend some time applying for and completing lower paid jobs. You may earn next to nothing, but you’ll have some experience under your belt.

    So to Sum Up…

    Writing cover letters doesn’t have to be difficult or stressful. You just have to know what hiring clients are looking for, and how to structure your proposal in a way that positions you as the answer to all of their problems.

    Follow these tips, and you’ll start to find a cover letter style that works for you. Then the more cover letters you send off, the better you’ll get at writing them, and the more jobs you’ll start to land.

  • 8 Best Road Trip Destinations in the UK

    8 Best Road Trip Destinations in the UK

    When you think of travelling, you no doubt think of far-off destinations, but you don’t have to take a trip to a foreign country to have a great time. 

    Sometimes all you need is a good hike in nature or a relaxing stroll along the beach to soothe your adventurous soul. And if your wanderlust has you wanting to explore new destinations, I’ll bet there are some beautiful gems not too far from you that you haven’t explored yet. This is exactly why road trips will never lose their charm.

    Imagine hitting the road with your favourite playlist, your friends or family members in the passenger seats, and of course the snacks you’ll need along the way. We’ve all heard the cliche saying that travel is as much about the journey as it is the destination and on a road trip, the journey really is half of the fun. 

    And when it comes to planning a route and choosing your stops, every country has so much to offer by way of stunning destinations, the UK included. If you’re searching for a road trip to untouched, natural destinations, then believe me, the UK will not disappoint.  

    Whether you live in the UK or you’re a tourist, England, Northern Ireland, Scotland and Wales all have some stunning destinations that are well worth a visit. So buckle up and let’s go through the top 8 road trip destinations in the UK.

    1: Enjoy the Scenery of the Lake District

    Home to the finest lakes and picturesque drives in Europe, the Lake District is a famous holiday spot in Cumbria, in the North West of the UK. Filled with tons of outdoor activities, it offers unique and exciting experiences.

    There are plenty of hikes to be had, kayaking and SUP opportunities, and countless photo spots. With quaint towns and villages dotted around the Lake District, you can also enjoy some retail therapy in village gift shops, or stop for a traditional pub lunch. 

    You can hike to Scafell Pike, the third highest peak in the UK or make a stop at Lake Windermere, the largest natural lake of England. You can also visit Dove Cottage of the renowned English poet William Wordsworth or the little market town of Keswick to complete your tour.

    And depending on whether you consider yourself an outdoorsy person or you like to travel with all of your home comforts, there are plenty of accommodation options, from campsites to caravan parks, hotels, B&Bs and cottages for hire. 

    2: Learn From the Castles of Northumberland

    If you’re a fan of British history, Northumberland is the perfect UK road trip destination for you. This county will transport you back to medieval times with castles and epic battlegrounds.

    You can plan a stop at Bamburgh Castle, a much-loved fortress that has been home to a succession of Kings over the last 1,400 years. Or take a trip to Hogwarts by visiting Alnwick Castle. This castle has been the official residence of the Duke of Northumberland for 700 years but it rose to fame after its appearance in the Harry Potter movies. Other popular spots that are worth including on your road trip are Lindisfarne Castle and Chillingham Castle.

    3: Hike Over the Ancient Cheddar Gorge

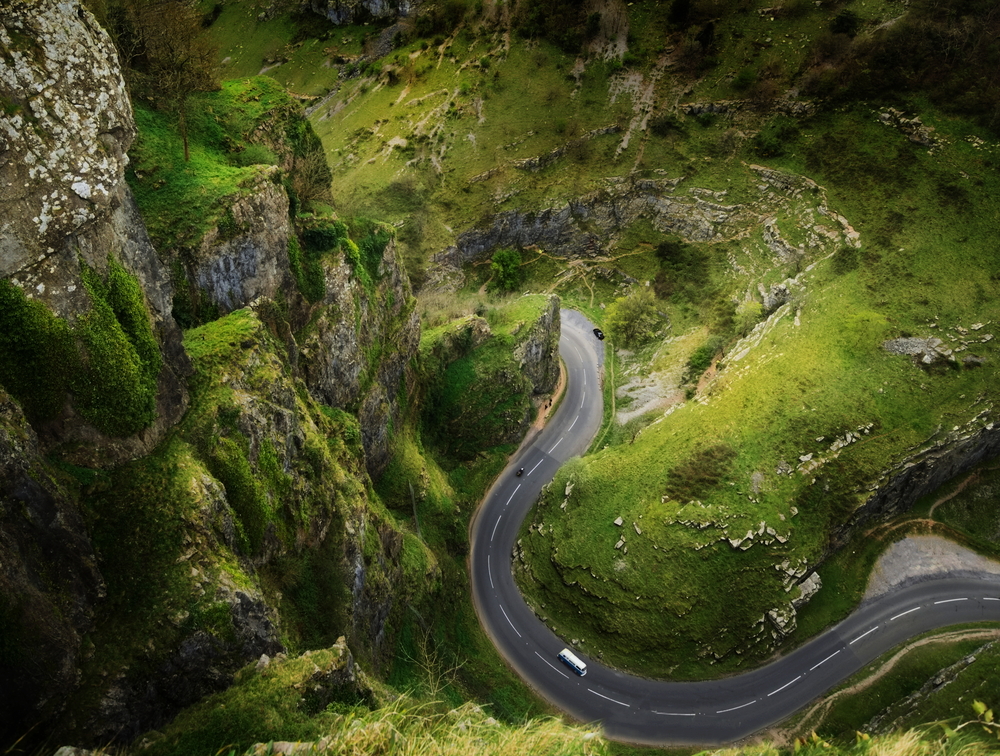
    Somerset’s Cheddar Gorge, located 10 miles south-west of Bristol in Mendip Hills, is nothing short of a natural wonder. With towering 450ft high limestone cliffs — the highest inland, limestone cliffs in Britain — prehistoric caves, and roads that wind through some of Britain’s most scenic landscapes, a road trip to Cheddar Gorge is one of the most beautiful and fascinating trips you can take.

    The roads are stunning and interesting to drive, and once you arrive there’s plenty to do. There are some incredible walks, caving opportunities for families and thrill-seekers alike, rock climbing sites, even free fall experiences (don’t worry, they’re completely safe). There are also escape rooms, over 30 local, independent shops to explore and a museum of prehistory.

    The highlight of this landmark are the Gough caves that are over 500,000 years old. The skeleton of the Cheddar Man, the oldest skeleton to be excavated in the UK, was found in these very caves. For mountaineers, Jacob’s Ladder and the Lookout Tower are the landmarks to explore for the astounding views around the gorge.

    4: Enjoy the Natural Beauty of the Cotswolds

    Road trips in the UK can help you reconnect with nature and discover places that take you back in time. And one of the most adorable and nature-rich areas in the UK is the Cotswolds. With mountains, lakes, nature parks as well as dainty, medieval villages, the Cotswolds are the ideal destination for nature-lovers and history enthusiasts alike.

    Brimming with lush green countryside, small pubs, narrow lanes and unique stone cottages, the Cotswolds is quintessentially English. This area offers everything you could hope for from an English road trip. And as the Cotswolds is an area that spans several counties, there are so many different sights to see within this area. Castle Combe in Wiltshire, Chipping Campden in Gloucestershire and Broadway in Worcestershire are few of the villages that should be on your bucket list.

    5: Drive the Black Mountain Pass to the Brecon Beacons

    A list of road trip destinations in the UK wouldn’t be complete without mentioning Wales. And one must-see, Welsh destination is the Brecon Beacons National Park. The Brecon Beacons are a mountain range with stunning scenery, waterfalls, caves, castles and beautiful villages. This 500 square miles piece of land includes breathtaking mountain ranges that are part of the UNESCO Global Geopark due to their amazing wildlife and geological formations. 

    There are plenty of hikes, cycle and mountain biking routes, and other fun outdoor activities including watersports, horse riding, and family-friendly caving adventures. And one daring activity park that’s perfect for both adults and children is Zip World — you can try out the world’s fastest zipline and travel at speeds of over 100mph, bounce on underground trampolines in the slate caverns or make your way through an underground assault course.

    Other attractions include Monmouthshire and Brecon Canal that offer magical, fairytale scenery. Craig y nos Country Park is also worth visiting — this area will take you back to Victorian times with its historic heritage and architecture.

    And when you visit the Brecon Beacons, you’ll have the chance to drive what is often considered the best road in Wales: Black Mountain Pass. Not only is it scenic, but it’s also super fun to drive with the occasional hairpin bend and roads that cut through the countryside. Just watch out for sheep in the road!

    6: Unravel the Mysteries of the Isle of Skye

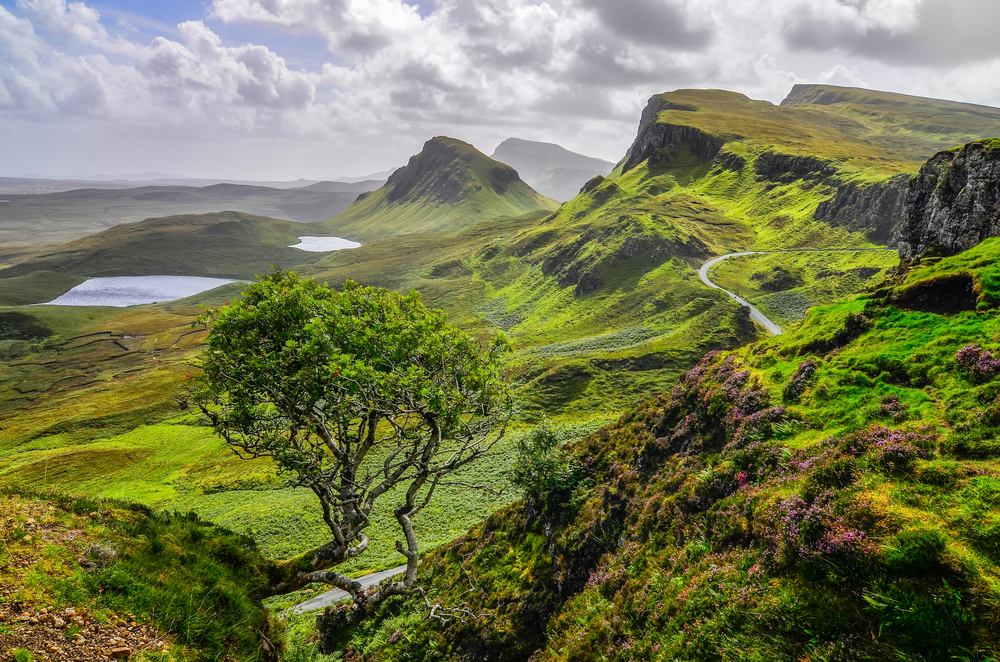
    Scotland has some absolutely stunning scenery that looks completely untouched by man. And one place to drive through unspoilt landscapes and reconnect with nature is the Isle of Skye. The mysterious blend of historical sites, quaint little towns and spectacular landscapes will make you fall in love with this region. 

    The Old Man of Storr is the perfect hiking spot for adventure lovers whereas the mystical Fairy Glen and Fairy Pools will hook you with their mythical charms. And you don’t want to miss the sunset at Neist Point — it’s one of the best sunsets you’ll ever see, and it’s the perfect area to appreciate the beauty and natural magnificence of this island.

    7: Travel the Causeway Coast Route and Explore the Giant’s Causeway

    The Causeway Coast Route in Northern Ireland is without a doubt one of the best roads to drive in the UK. Starting in Belfast, you can drive your way through picturesque coast roads, past beautiful little villages and unforgettable landscapes, and there are countless attractions to stop and visit along the way.

    For example, you could visit the Carrickfergus Castle, Nine Glens of Antrim and Carrick-a-Rede Rope Bridge but one place that is going to take your breath away is the Giant’s Causeway. It is characterized by horizontally lined polygonal basalt columns formed as a result of volcanic eruptions over centuries. However, the legend says that the Irish Giant Fionn Mac Cumhaill made this path to have a fight with its Scottish counterpart over territorial issues. But whatever the story may be, this UNESCO world heritage site is a symbol of pride for Northern Ireland.

    There are also plenty of gardens to admire, fairytale-like scenery to discover, adventurous activities to try and even Game of Thrones attractions to explore.

    To get to this Northern Ireland route from mainland UK, you can take your car on a ferry, or fly to Belfast and rent a car.

    8: Discover the Elegance of the White Cliffs of Dover

    If you are coming from London, take a drive from the town of Kent along the English coast to the magnificent White Cliffs of Dover. Overlooking the English Channel and facing France over the Strait of Dover, the cliffs are a popular spot for keen hikers, cyclists and photographers.

    And as well as offering beautiful flora and fauna, Dover has seen its share of historical events ranging from the Roman invasion to the evacuation mission from Dunkirk during World War II. Other interesting areas around the cliffs are the South Foreland Lighthouse and Dover Castle.

    When touring these destinations it doesn’t matter if you are a foreigner or a local. All that matters are the wonderful experiences you gain from each and every one of these road trips. So pack your raincoat and camera, and enjoy the gifts that the UK has to offer.

    [starbox id=none]

  • Kyoto Travel Itinerary: How to Spend 3 Perfect Days in Kyoto

    Kyoto Travel Itinerary: How to Spend 3 Perfect Days in Kyoto

    [et_pb_section admin_label=”section”] [et_pb_row admin_label=”row”] [et_pb_column type=”4_4″][et_pb_text admin_label=”Text”]

    With plenty of historical sites to explore, beautiful natural scenes to admire and traditional experiences to enjoy, Kyoto is one of Japan’s must-visit cities. As a cultural hub and a destination that’s surrounded by nature, it’s the perfect place for travelers and tourists hoping to immerse themselves in Japanese history and tradition and escape to nature. 

    Just imagine walking through towering bamboo forests, setting foot in ancient temples and traditional teahouses, and soaking up the natural beauty of cherry blossoms or autumn leaves. A trip to the former capital of Japan can be a real dream come true. 

    And you can explore this city in three magical days. So I’ve created this 3-day Kyoto travel itinerary to help you plan the perfect three days in Kyoto.

    Whether you’re following Japan’s “Golden Route” and visiting Tokyo, Osaka, and Kyoto, or you’re just visiting Kyoto, this Kyoto travel itinerary can help you plan your trip to perfection. Even if you’re spending longer than three days in this city, this itinerary will give you an idea of some of the best things to do during your stay.

    Kyoto Day 1 Itinerary

    Arashiyama Bamboo Forest 

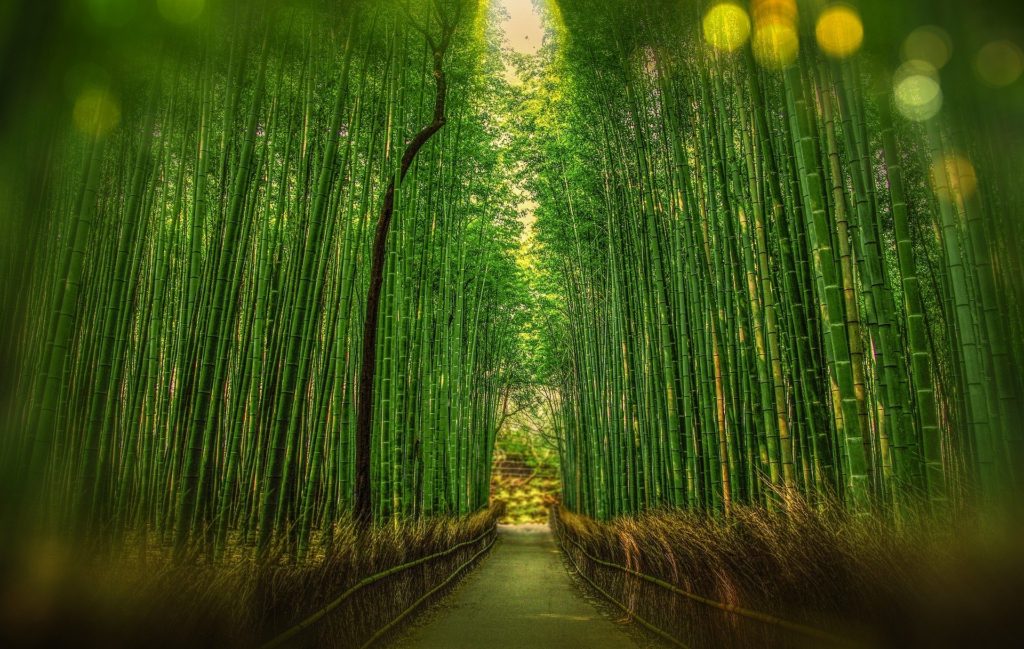
    You’ve no doubt seen pictures of this famous forest, and the pathway that winds its way through the towering bamboo stalks. The Arashiyama bamboo forest is one of Kyoto’s most beautiful sights — it’s a retreat into nature, in the middle of the city. 

    So why not start your first day in Kyoto with a breath of fresh air by taking a relaxing walk through this stunning forest? 

    The earlier in the morning you can get to the bamboo forest, the quieter it will be. So if you’re hoping to avoid the crowds, take perfect pictures, and enjoy the serenity of the forest, I’d recommend arriving as early as possible — definitely before 9 am, or if you don’t mind rising early, a sunrise trip is definitely worth it. 

    At sunrise, you’ll see the changing colours of the bamboo forest as the sun starts to filter through the bamboo stalks. But if you arrive after the sun is already in the sky, you’ll experience the beautiful green colour of the bamboo grove.

    The Arashiyama bamboo forest is a short walk from the JR Saga-Arashiyama station. After walking for about 15 minutes through the bamboo grove, you will come upon Tenryu-ji temple.

    Tenryu-ji Temple

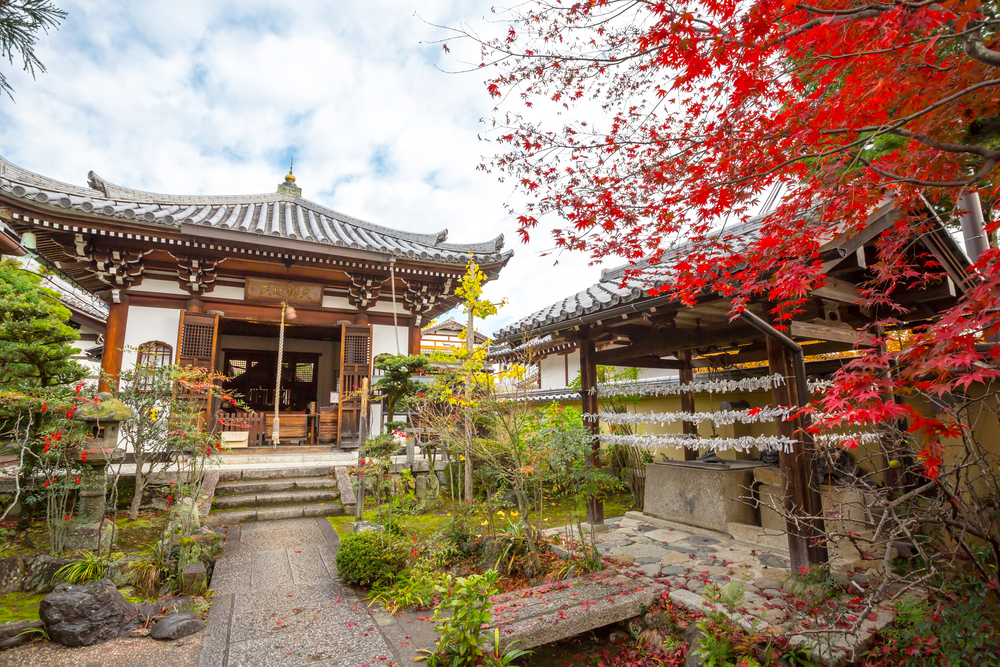
    Tenryu-ji temple is a world heritage site and one of the main Zen temples in Kyoto. Although the temple dates back to the 14th century, many of the temple buildings have been destroyed in fires, and compared to other Japanese temples, Tenryu-ji is now fairly minimal. 

    However, the temple is surrounded by mountains and forest, and the temple gardens alone are well worth a visit. Japan is well known for its careful garden designs, but the Tenryu-ji gardens have a much more natural feel, and they’ve remained the same for many centuries. 

    After exploring the garden of Tenryu-ji temple, another 15 minutes through the bamboo forest will bring you to the Arashiyama Monkey Park.

    Arashiyama Monkey Park

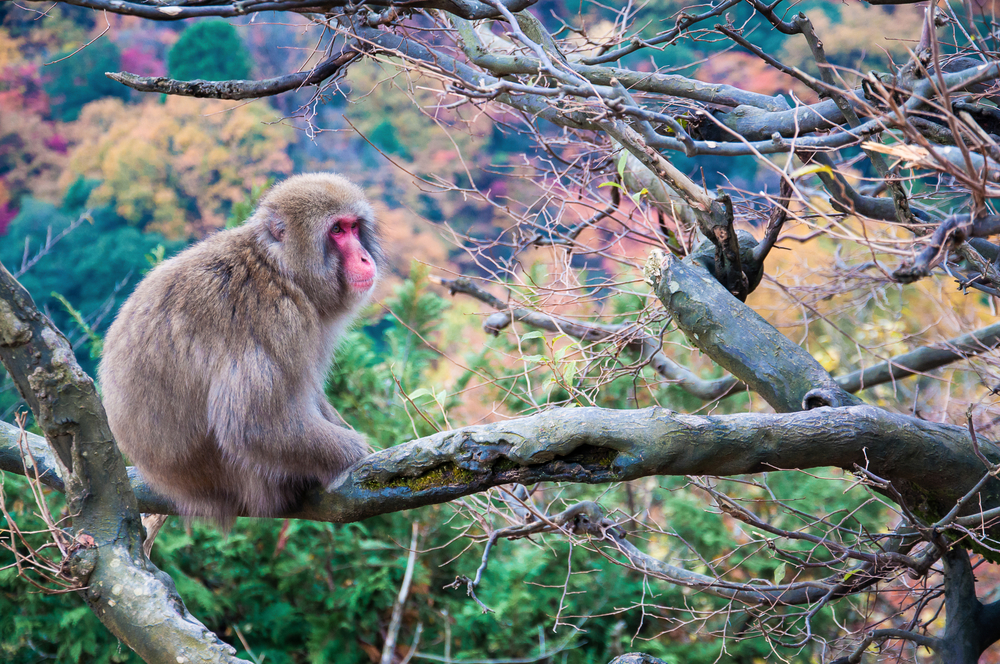
    If you’re hoping to encounter some Japanese wildlife on your trip, you’ll want to visit Arashiyama Monkey Park, also known as Iwatayama Monkey Park. Don’t be put off by the term ‘park’, all of the monkeys here are wild, in fact it’s humans that are in a cage at this park.

    As you venture into the park you’ll follow a path that leads you up the mountain, and as you approach the summit you’ll officially be in monkey territory. Over 120 Japanese macaque monkeys live in this area, so keep an eye out for these mischievous little beings — if you’re lucky you may even spot some babies. Just make sure you follow the rules which will be written on signs around the park. The monkeys are used to being around humans, so they won’t hurt you as long as you stick to rules like staying at least two metres away and avoiding eye contact.

    At the end of your hike through the park, at the top of the mountain, you’ll be greeted by staff and the welcome sight of benches. Here you can stop for a much-needed rest while enjoying one of the best views of Kyoto. You can enter an enclosed, caged area where you can look out over Kyoto and feed monkeys safely from behind the cage.

    To enter the park you’ll need to pay an entrance fee of 550 yen. And if you want to feed the monkeys you’ll need to buy food for 100 yen.

    Fushimi Inari Shrine

    Fushimi Inari Shrine

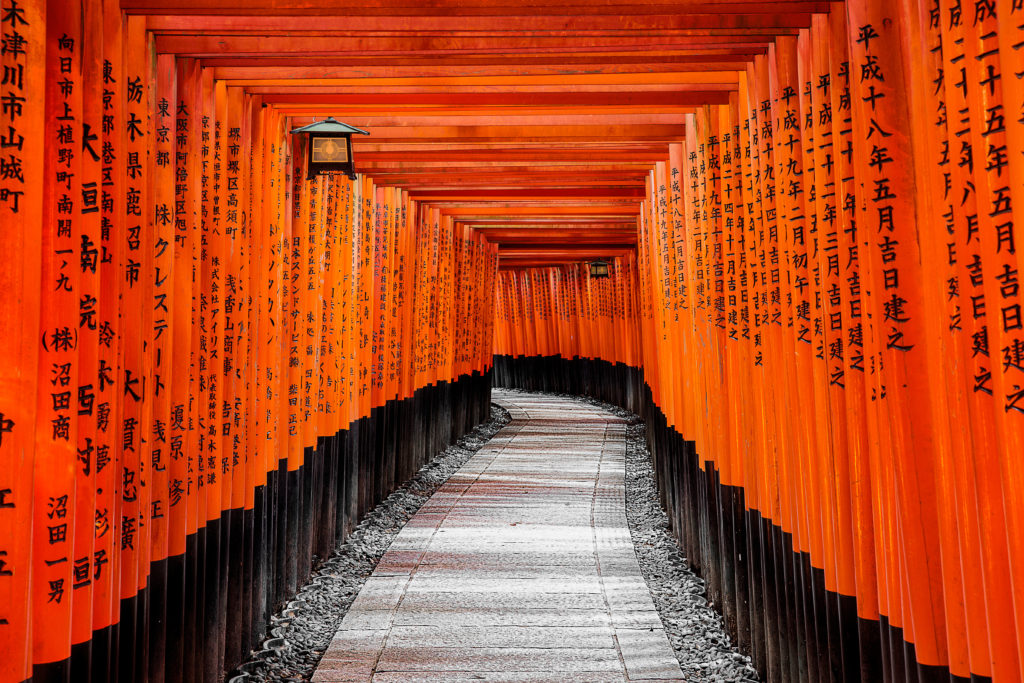
    Fushimi Inari shrine is an important shrine in Kyoto, dedicated to ‘Inari’, the Shinto god of rice. The messengers of the god are thought to be foxes, so you’ll spot many fox statues and emblems throughout the shrine grounds. But this shrine is most famous for the thousands of torii gates lining the paths behind the shrine. These red vermilion gates have made these paths one of the most popular photography spots in Kyoto. As the sun shines, paths are illuminated in red and orange, or if you opt for an evening visit, the atmosphere at the Fushimi Inari Shrine at night is quite something, with the illuminated orange gates casting dramatic shadows. 

    If you choose to follow the paths until the end, you’ll be walking for around 2-3 hours until you reach the top of a mountain. However, most visitors don’t get this far. Most people will simply walk a little through the paths before turning around, and some will walk to the halfway point, where the paths open up into a clearing, halfway up the mountain. Here you can relax on benches overlooking Kyoto. If you find yourself getting a little peckish or thirsty, there are several places to stop for a drink or a meal along the path.

    The further along the path you walk, the quieter it will be, and the better photo opportunities you’ll get. However, past the halfway point you’ll start to less of the iconic red gates.

    After walking through the Arashiyama forest in the morning and the Fushimi Inari shrine paths in the afternoon, you’re probably going to be pretty tired and ready for a break. So this attraction marks the end of day 1 in Kyoto.

    Kyoto Day 2 Itinerary

    Ginkaku-ji (The Silver Pavilion)

    Ginkaku-ji (The Silver Pavilion)

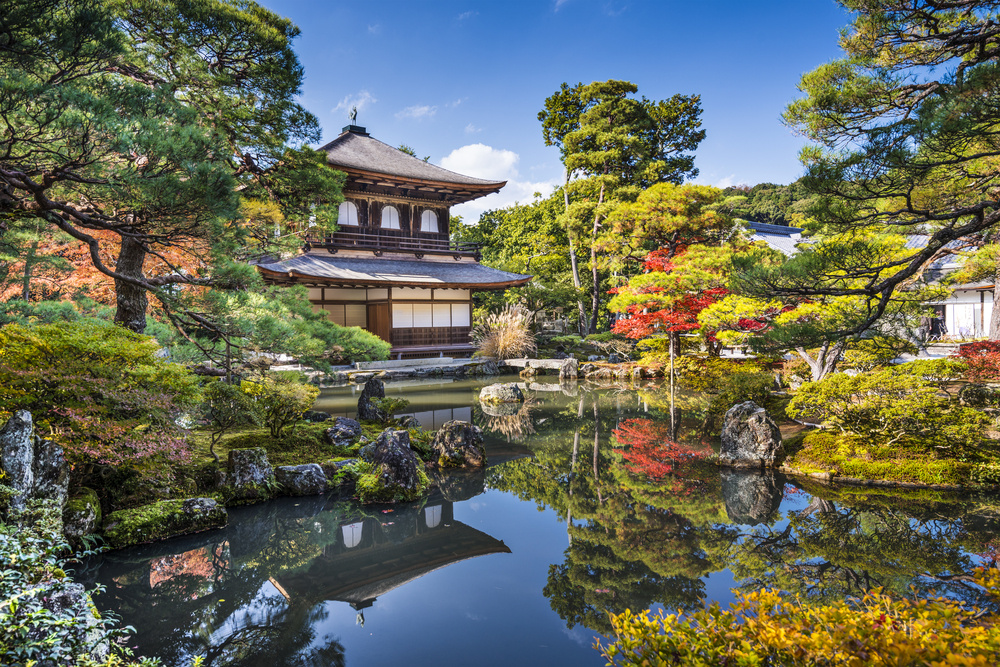
    I’d recommend you start your second day in Kyoto with a trip to the Eastern side of the city to see Ginkaku-ji, the 15th century Silver Pavilion, also known as Higashiyama Jisho-ji temple. 

    This beautiful pavilion was modeled on Kinkaku-ji (The Gold Pavilion) and named the Silver Pailion not because when the temple was first built it was originally covered in a dark finish which reflected silver in the moonlight. 

    The pavilion is surrounded by a number of other temple buildings and beautiful gardens, including a moss garden and a dry sand garden. The sand garden, also known as ‘The Sea of Silver Sand’, is symbolic of Zen concepts and peacefulness. It leads to a silver cone, designed for moon-gazing and reflection. The moss garden also embodies Zen ways of thinking in its slow growth to beauty. There are a number of ponds and small bridges in this garden. The intricacy of the moss garden perfectly contrasts the simplicity of the sand garden.

    Tetsugaku No Michi (The Path of Philosophy)

    Tetsugaku No Michi (The Path of Philosophy)

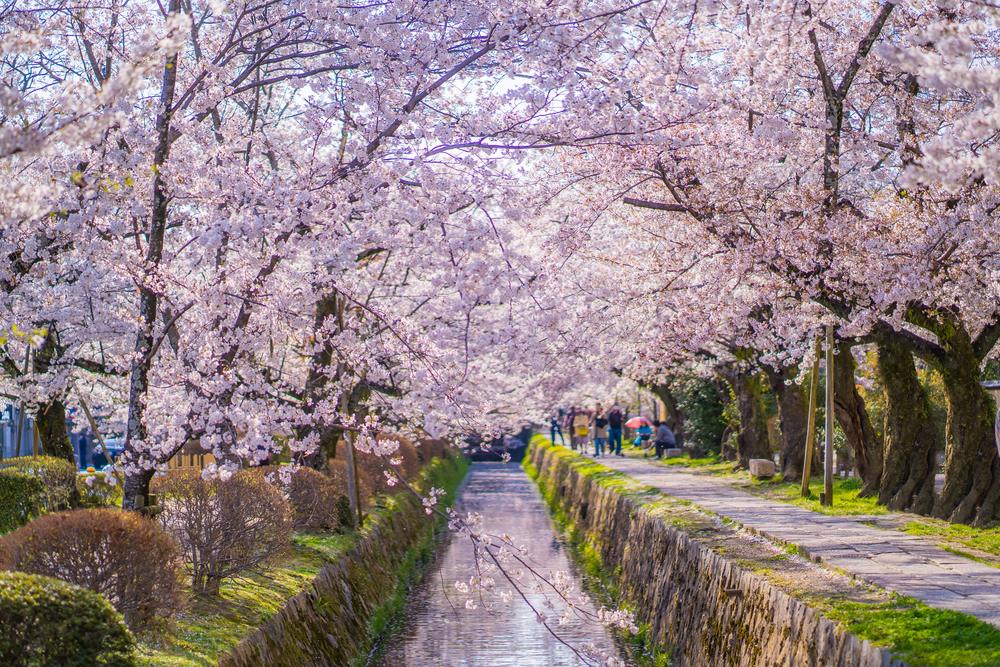
    From Ginkaku-ji, you can go for a wander through Tetsugaku No Michi, also known as the Path of Philosophy or the Philosopher’s Walk. This is a 2km long ancient stone path between Ginkaku-ji and Nanzen-ji temple. 

    The path runs alongside a canal and is lined with cherry trees. In spring, this path makes for a stunning walk and it’s one of the best places in Kyoto to enjoy the famous cherry blossoms. 

    If you want to walk the entire length of the path, you can also visit Nanzen-ji temple. However, you don’t need to walk the entire 2km to appreciate the beauty of this walkway.

    Kinkaku-ji (The Golden Pavilion)

    Kinkaku-ji (The Golden Pavilion)

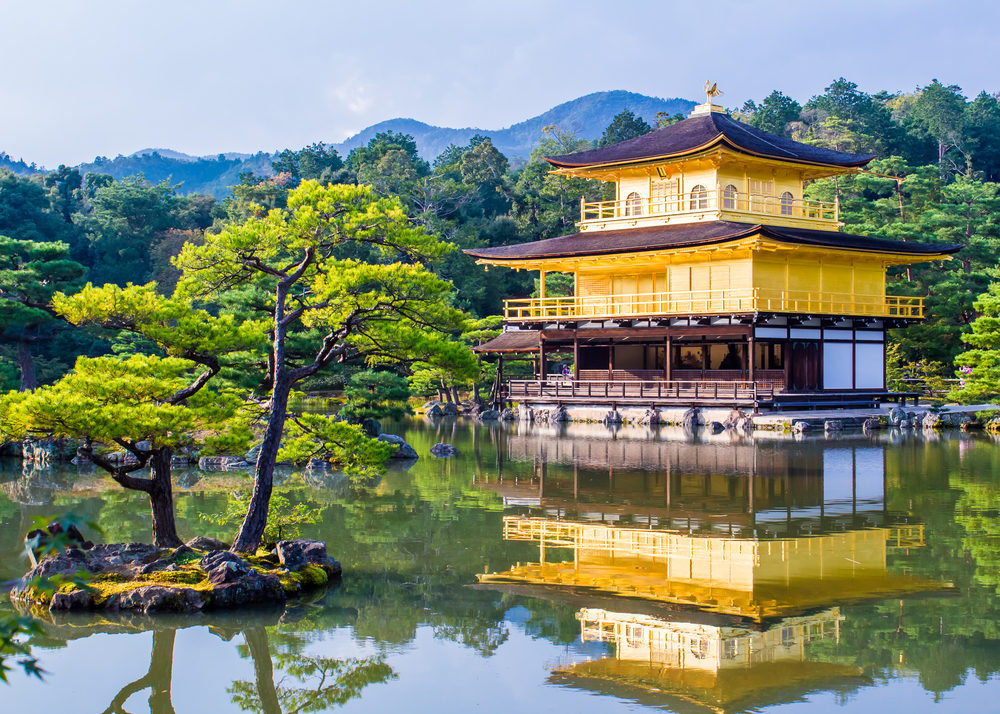
    Kinkaku-ji is the sister temple and original inspiration for Ginkaku-ji (The Silver Pavilion). In contrast to Ginkaku-ji, Kinkaku-ji holds true to it’s name and appears gold at any time of day. The top two floors of the temple are covered in gold leaf.

    Kinkaku-ji is famously picturesque in all seasons. The temple is set at the edge of a large pond with a colourful forest backdrop and on clear days the temple reflects perfectly in the still waters of the pond. In spring, the cherry blossoms perfectly frame the temple, and in winter, the gold of the temple glistens against the snow. 

    The entry fee for Kinkaku-ji is 400yen. It only takes a short time to see all the temple grounds have to offer, but the grandeur of the Golden Pavilion makes it an absolute must-see. 

    After visiting Kinkaku-ji a good transition into the afternoon and evening is a visit to the entertainment and dining district of Gion.

    Gion, Kyoto’s Geisha District

    Gion, Kyoto's Geisha District

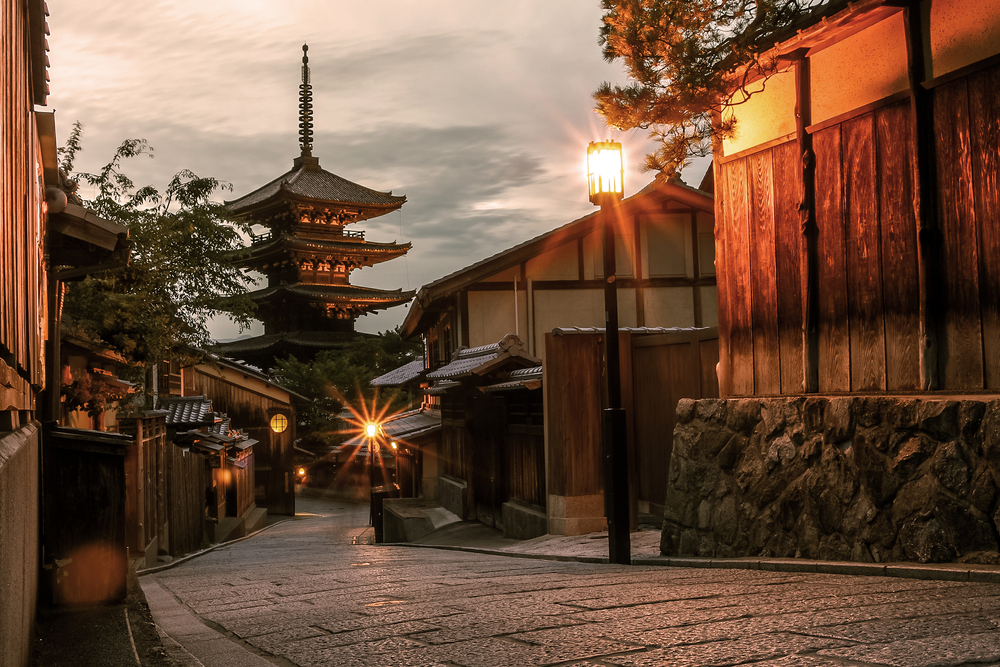
    Gion is the perfect place to end your second day in Kyoto. A visit to this district, which is well-known as the Geisha district, can feel like stepping back in time. This is where Geisha culture comes to life — you’ll see Geisha (Japanese women trained in traditional arts) walking between traditional wooden houses, teahouses, shops and restaurants.

    In Gion, you can dine in restaurants serving both traditional Japanese cuisine and international food, and attend cultural shows.  A cultural show is held every day at the end of Hanami-koji Street to showcase a range of traditional Japanese arts, including tea ceremonies, flower arranging, dancing and comic plays. This is a great way to experience traditional Japanese culture.

    Kyoto Day 1 Itinerary

    Nijo Castle

    Nijo Castle, Kyoto

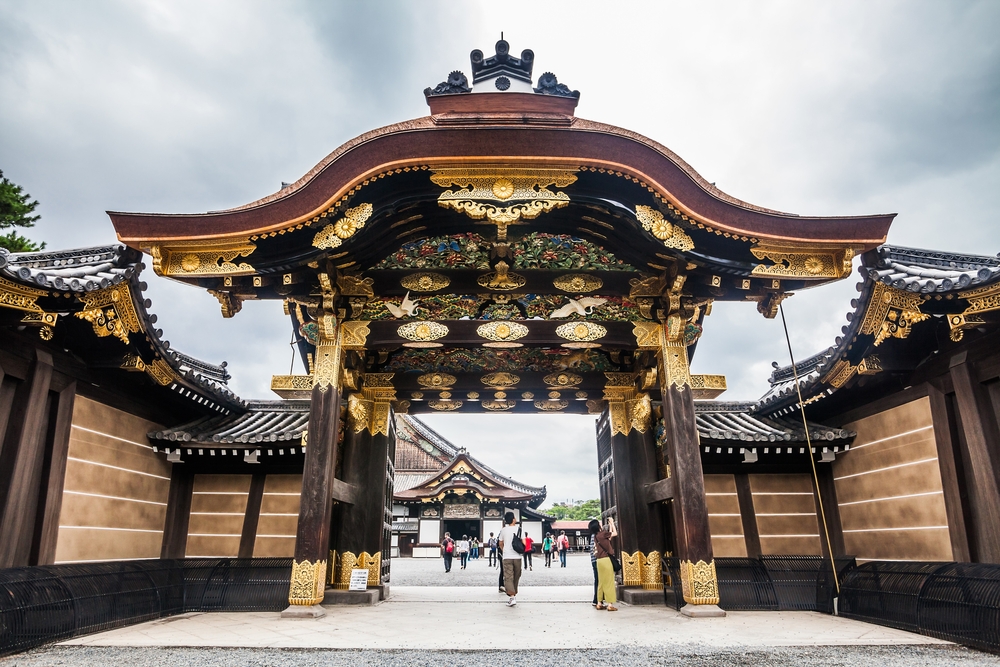
    During the Edo period, Japan was governed by the Tokugawa shogunate, a military dictatorship founded by the first shogun, Tokugawa Ieyasu, also known as the unifier of Japan. And for many years, Nijo Castle was Tokugawa Ieyasu’s main residence. 

    The castle was built in 1603 and has remained largely intact since the Edo period. Today it’s one of the best examples of Japanese architecture from this period. The Castle has two rings of fortification, each one built as a line of defence. These two areas are surrounded by Japanese-style gardens and ponds. In the centre of the fortress, you’ll find the most impressive building: Ninomaru Palace. For those interested in Japanese history or architecture, this castle provides a unique insight and understanding.

    Kiyomizu-dera Temple

    Kiyomizu Temple

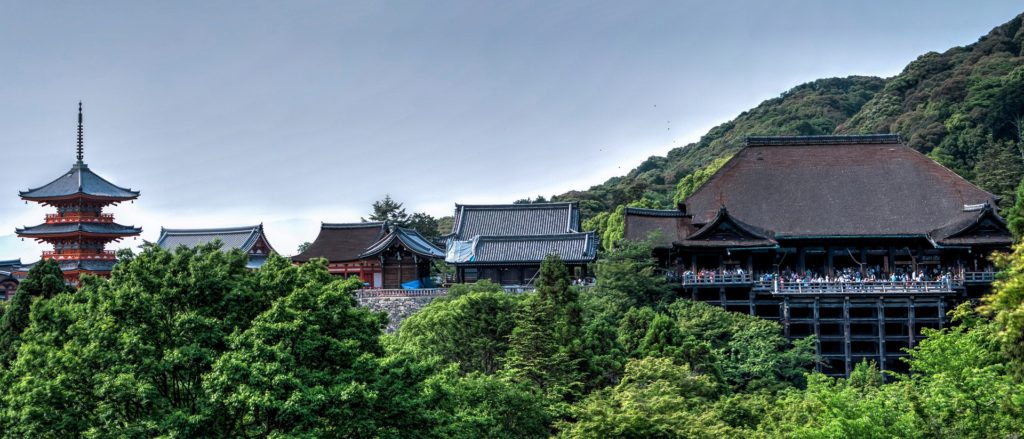
    Dating back to 778AD, Kiyomizu-dera Temple offers a glimpse into Japan’s ancient history. It was built mostly from Japanese cypress and entirely without nails, and it’s one of the oldest temples to remain in its original form. 

    The temple is well-known for its wooden stage, which is 13 meters high and protrudes over the mountainside, offering a panoramic view of the beautiful landscape. 

    Kiyomizu-dera quite literally translates to Pure Water Temple — it was named because it’s located beside the Otowa waterfall, where pure water flows. The water has been re-directed through the temple grounds and it is possible to drink this water from a ladle. To drink the water is said to give good fortune and success. You’ll often see school students gathering to drink the water before sitting exams. 

    Nijo Castle and Kiyomizu Temple are both keystones of Japanese history and have been preserved exceptionally well. Visiting both of these beautiful sites will give you an insight into Japanese history, architecture, and culture. And you’re sure to get some incredible photos too.

    What Did You Think of this Kyoto Travel Itinerary?

    I hope you’ve found this guide useful! I created this Kyoto travel itinerary to help you plan an incredible three days in this wonderful Japanese city, packed with temples, castles, shrines, and gardens.

    If you follow this itinerary I’d love to know how you found it, or if you’ve already visited Kyoto, what would you do differently?

    [/et_pb_text][/et_pb_column] [/et_pb_row] [/et_pb_section]
  • When is the Best Time to Visit Bali?

    When is the Best Time to Visit Bali?

    [et_pb_section fb_built=”1″ admin_label=”section” _builder_version=”3.22″][et_pb_row admin_label=”row” _builder_version=”3.25″ background_size=”initial” background_position=”top_left” background_repeat=”repeat”][et_pb_column type=”4_4″ _builder_version=”3.25″ custom_padding=”|||” custom_padding__hover=”|||”][et_pb_text admin_label=”Text” _builder_version=”4.4.2″ background_size=”initial” background_position=”top_left” background_repeat=”repeat” hover_enabled=”0″]

    One of the first things you’ll need to decide when planning a trip to Bali is when to visit this beautiful island. Find out which months have the best weather, when the high and low season is, and choose the best month for your trip to Bali. 

    So you’re planning a trip to Bali? Good choice! After spending 4 months in Bali last year, I fell in love with this little island and decided to spend most of this year there too.

    I’ve experienced different seasons in Bali, so I’ve basked in the Bali sun and got caught in the crazy Bali rain. I’ve seen the island heaving with tourists in high season and experienced it slightly less crowded in low season. So when is the best time to visit Bali?

    Most people visit between April and October, simply because this is the dry season. You’ll get beautiful weather and clear skies (mostly, no promises), and if you’re into surfing these months are perfect for catching waves too. However, dry season is also high season, and you’re likely to experience Bali at its busiest between April and October. July and August are particularly busy, but this seems to be the case with almost every destination.

    So there are pros and cons to different months in Bali. When you should visit will depend on whereabouts in Bali you’re visiting, the activities you have planned, and your budget for flights and accommodation.


    Which Months Have the Best Weather in Bali?

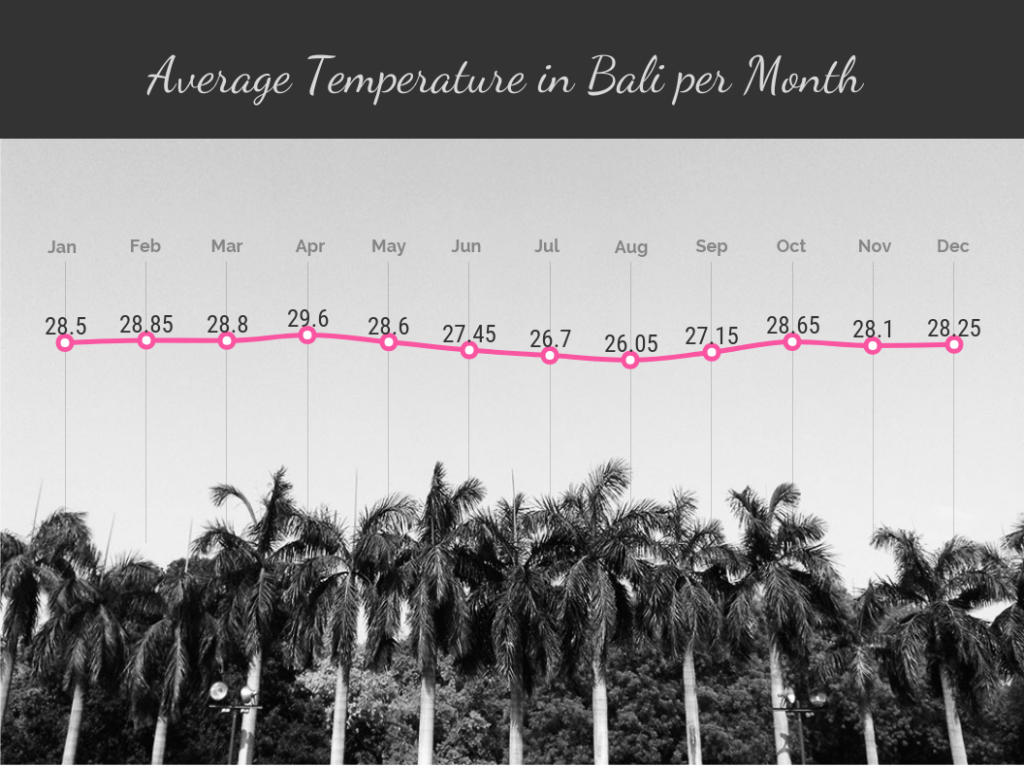
    If it’s warm weather you’re looking for, Bali has this year-round. You can expect average temperatures between 26°C and 29°C, but the reality is that average high temperatures regularly reach over 30°C. Coastal areas in Bali, such as Kuta, Canggu, Seminyak and Sanur will generally be a bit warmer (and more humid) than places like Ubud which are further inland and surrounded by mountains.

    If you check out the chart below, you’ll see there’s not much difference in average temperatures from month to month.

    Watch Out for Rainy Season!

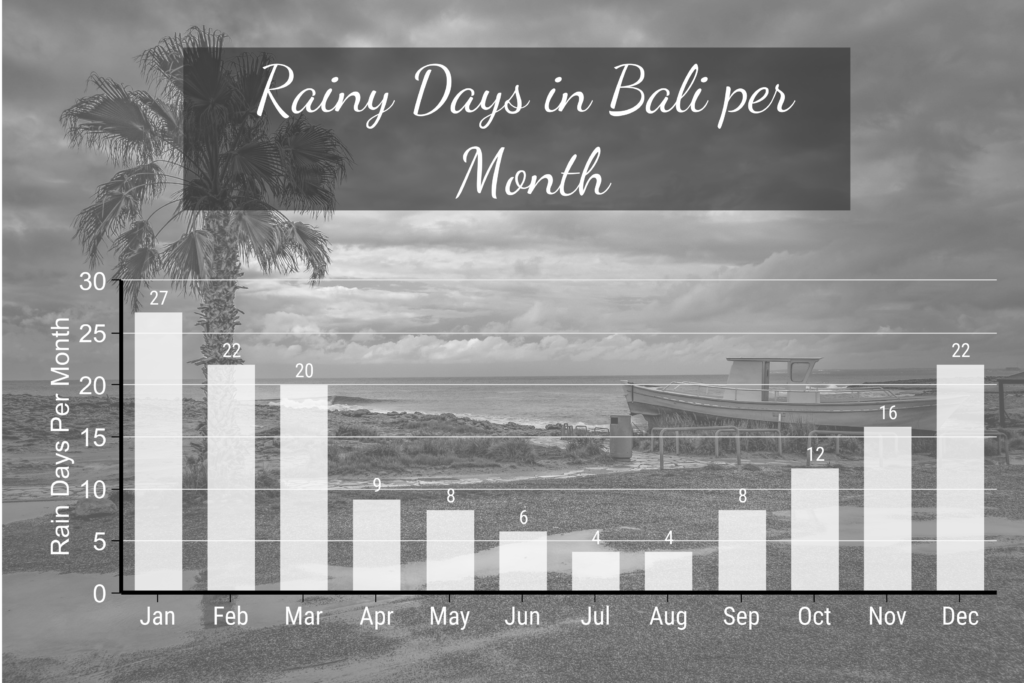
    As well as considering the temperature, you’ll also want to think about the Bali seasons. Bali has two main seasons: the dry season and the rainy season. The Bali rainy season is usually between October and April, so for most people, the best time to visit Bali is between April and October.

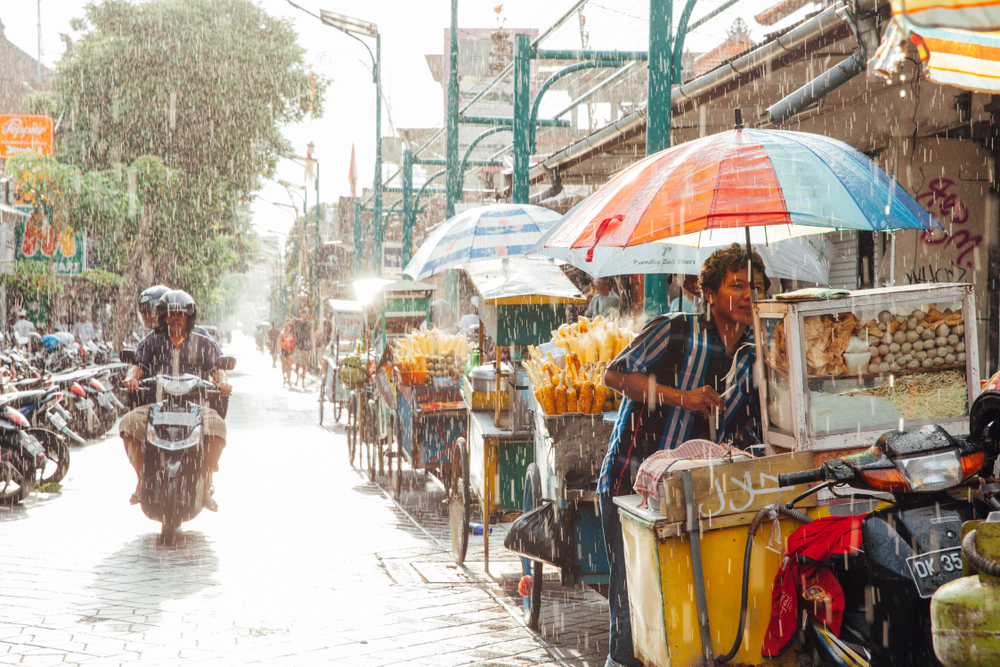
    Even if you’re the sort of person that doesn’t mind the rain, it’s worth noting that Bali rain is pretty intense. It’s often torrential, non-stop rain for days during the wet season. And while it can be exciting to see such heavy rain, especially if like me, you’re from a country where the rain is a little pathetic, it quickly wears thin, and it will ruin your plans to get out and explore, lounge around by the pool or enjoy the beach. Almost all of the tourist attractions and things to do in Bali are outside, so if you’re planning to explore Bali’s sights and natural beauty, the rainy season isn’t the best time to visit.

    However, the wet season is the cheapest time to visit Bali, so if you’re travelling on a budget, you may decide to brave the rain. And if you do visit Bali between October and April, check out this list of things to do in Bali in rainy season.

    Rainy Days in Bali per Month

    A Breakdown of the Months in Bali

    If you want to get an idea of what Bali is like in different months, here’s a breakdown of what to expect from each month of the year.

    January in Bali

    January is Bali’s most rainy month. With an average of 27 days of rain, it rains almost every day, and there are often multiple showers a day. There are quite a few thunderstorms during this month, which usually occur during the afternoon, evening or overnight. The tropical thunder and lightning can be quite impressive to watch, but it’s not ideal if you have day trips planned.

    Rainy Season in Bali

    February in Bali

    February isn’t quite as bad as January in terms of rain and thunderstorms, but it still rains an average of 22 days a month. Even though you’ll have more sunny and dry days than in January, the beaches may not be at their best — storms can wash up a lot of debris and seaweed, so February isn’t the best time to visit if you’re hoping to visit Insta-worthy beaches.  And just like January, February is a particularly hot and humid month.

    March in Bali

    March is the last month of the Bali rainy season, and while it’s slightly drier than February, you can still expect rain on most days. March is the most humid month in Bali, so you can expect to get hot and sweaty if visiting the island during this month. It’s not too busy in March, but you will find a lot of long-term travellers head to Bali at this point. Many tourists also want to experience Nyepi, the Balinese day of silence. Scroll down to read more about this Nyepi.

    April in Bali

    April is the start of the dry season, and with an average of only 9 days of rain in the month, you can expect good weather for most of the month. However, during this month, tourism starts to pick up, especially over Easter. It’s still nowhere near as busy as July and August though, so if you’re looking for a mix of good weather and bearable crowds, this could be the best month to visit.

    May in Bali

    Weather in May is much the same as April, but it can be a little quieter as there’s no Easter rush of tourists. You can get some good deals in May, and with beautiful weather, quieter streets and beaches, this is a great time to plan your visit to Bali.

    June in Bali

    June is one of the best months to visit Bali. The weather is perfect and not too humid, with a very slim chance of rain. Tourism really starts picking up in June so you can expect more crowds, but still it’s a great time to visit.

    July and August in Bali

    July and August are Bali’s busiest months, because of school holidays and the perfect weather. Traffic can be crazy, and beaches fill up. You can also expect higher prices as this is the peak time to visit the island. While the weather is great, I’d suggest avoiding these months if you can, and instead plan your visit for one of the dry season’s shoulder months: April, May, June or September.

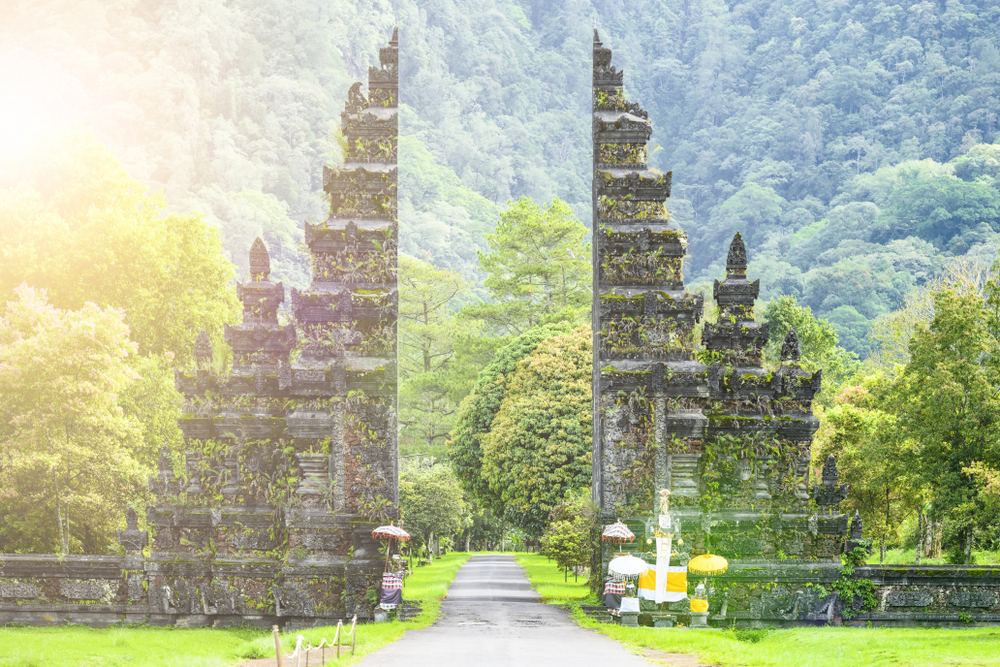
    Bali Handura Gate in August

    September in Bali

    You can still expect good weather for most of September, but as this is the last month of the dry season, you might experience a few days of rainfall and slightly higher levels of humidity.

    Flights to Bali from Australia can be more expensive towards the end of September as there is an Australian school holiday at the end of the month, and into the first two weeks of October.

    October in Bali

    October is the start of the rainy season in Bali. On average, it rains on around 12 days of the month, and while the rest of the month is generally blue skies and great weather, it can get quite humid. However, it’s worth noting that in recent years, perhaps because of global warming, the rainy season hasn’t kicked in until late October/early November. So if you’re planning a trip in October, you may not experience any rain.

    The first two weeks of October are Australian school holidays, so it can be a little busier than September, but it’s still much quieter than peak season, and you can still find some good deals on accommodation and activities. But flights from Australia can be more expensive.

    November in Bali

    Visiting Bali in November is a good choice if you’re on a budget. The weather isn’t fantastic: it’s a fairly rainy month and high levels of humidity mean you’re going to get pretty sweaty, but you’ll find plenty of affordable accommodation options, and you can get some good flight and tour deals.

    December in Bali

    In December, Bali starts to enter the height of the wet season. The start of the month can be relatively quiet, but over Christmas and towards New Year tourism can start to pick up as lots of people love to get away for the holidays and celebrate somewhere hot. Indonesian school holidays and year-end work leave also fall in December, so it can be busy with local tourists.

    Which Months Are Best for Surfing in Bali?

    Bali is the perfect destination for surfers. The island is famous for its surfing spots. Whether you’re a pro surfer or a complete beginner, Bali has the waves for you. But if you want the best possible wave-catching experience, it’s worth planning around the best months for surfing in Bail.

    If you’re planning on surfing on the west coast in areas like Kuta, Seminyak, Canggu and Legian, the best time to visit is between April and October. During these months the offshore wind creates the best waves for surfing.

    However, the reef breaks in the east coast might appeal more to you if you’re an experienced surfer. And if you’re hoping to surf east coast shores in areas like Sanur, it’s best to visit between November and March. This may be the rainy season, but you’ll still have some clear days, and the swell will make up for it. Plus, there’ll be fewer people about, which is always an added bonus.

    The Best Time to Surf in Bali

    When is the Most Affordable Time to Visit Bali?

    Bali is a fairly affordable destination all year round. The cost of living is less than most destinations in Europe, North America and Australasia. Like anywhere, there’s both an expensive and affordable side to Bali. And as long as you’re not fine-dining every day, and staying in 5* resorts, Bali is a great destination for backpacking on a budget. 

    However, the most affordable time to visit Bali is in low-season, also known as the wet season. Between October and March, you can find accommodation, flights and tours that are attractively priced and perfect for travelling on a budget. February and March in particular are often the best time to find deals, as during these months, tourism is at its lowest.

    Events and Ceremonies in Bali

    If you’re really hoping to throw yourself into local ceremonies, you’re probably hoping to experience some local events, ceremonies or festivals. The good news is, Bali has hundreds of ceremonies and you’re going to encounter lots of them during your visit. For example, ceremonies are held to mark the ‘birthday’ of temples, and as there are around 20,000 temples in Bali, I’m sure you can imagine these ceremonies are quite frequent.

    Here are some of the Balinese events that you might want to experience.

    Melasti and Nyepi

    Nyepi is Bali’s day of silence and it’s the most important Balinese Hindu celebration. The day marks the New Year in the Caka Calendar and for 24 hours the island is completely silent. Silence is compulsory, so even tourists need to stay in, be silent, and turn off the lights. Yep, you read that right, no lights are allowed during Nyepi.

    In fact, there are several rules that everyone on the island must follow during Nyepi:

    1: Don’t go out onto the street
    2: No fire, light or electricity (this also means there will likely be no internet)
    3: No motor vehicles
    4: Be silent — no one outside of your room should be able to hear you
    5: No travelling — the airport will be closed, and you won’t be allowed to drive anywhere

    The only people allowed to break these rules are emergency services.

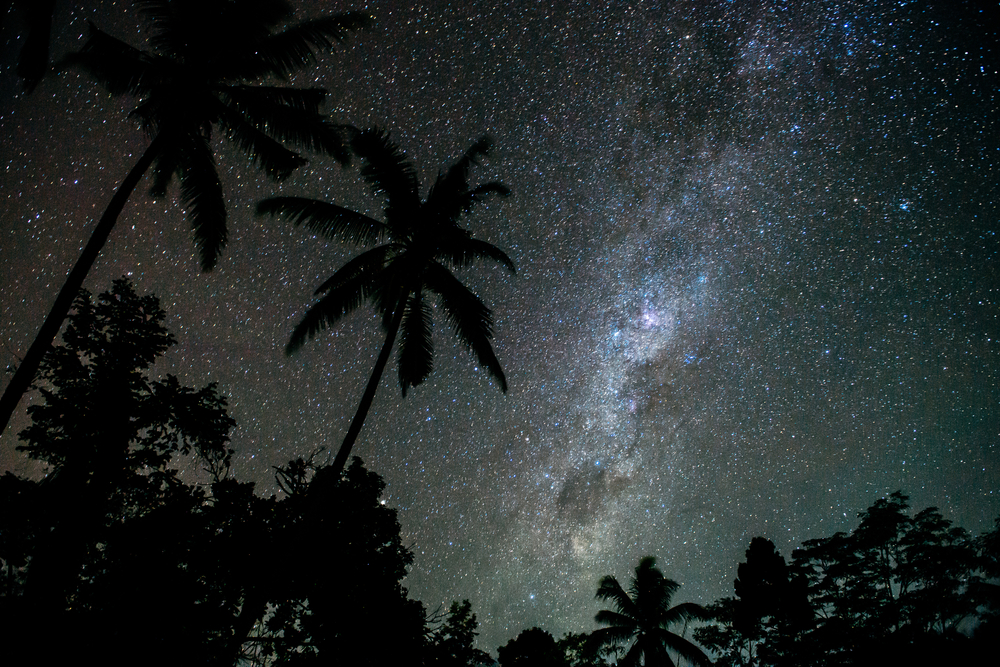
    It’s an incredible day to experience. With no traffic, no talking, or TVs blaring, no music and no lights, the island is at its most peaceful. You’ll see the stars like you’ve never seen them before, thanks to the lack of light pollution. And if you’re a keen photographer, you capture beautiful pictures of the stars, and even of the Milky Way.

    Nyepi Stars in Bali

    The days leading up to Nyepi also involve a variety of preparations and Melasti ceremonies — purification rituals and ceremonies. Locals create ‘ogoh-ogoh’ which are statues that take the form of mythical beings and demons. These figures represent the bad spirits that are guided to leave the island during Nyepi. They are paraded through the streets the evening before Nyepi.

    Galungan and Kuningan

    Galungan is a holiday that celebrates the victory of good over evil and it occurs during the 11th week of the 210-day Pawukon calendar (the Balinese have several different calendars). Kuningan

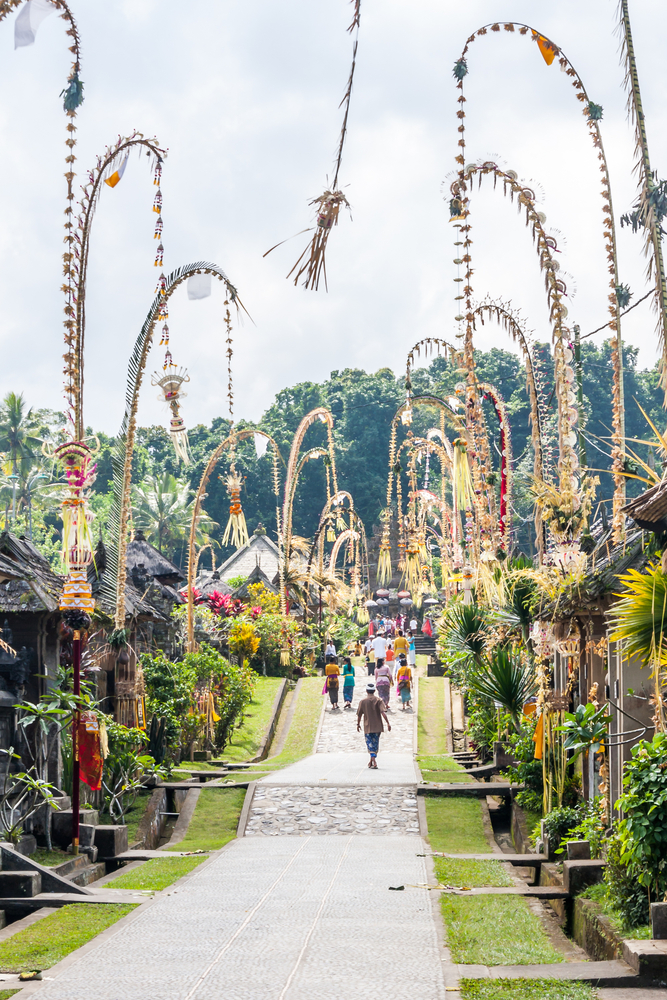
    The holiday will consist of a series of ceremonies and for 10 consecutive days, you’ll find traditional decorations over the whole island, and locals will be participating in festivities and ceremonies.  You’ll see penjors lining streets and decorating temples — these are ornate bamboo poles that hold religious offerings. Walking through streets decorated with penjors is quite an experience, and these traditional decorations can make for some beautiful photos.

    Galungan Bali Penjors

    While you’ll still see some decorations like these at other times of the year in Bali, the island is even more beautiful during Galungan. And visiting Bali during this holiday gives you a chance to immerse yourself in Balinese culture.

    Bali Arts Festival

    The Bali Arts Festival happens every year and usually lasts for a whole month. It celebrates Balinese culture and art with performances, exhibitions and traditional decorations all over the island. This festival usually starts in June and ends in July.

    Ubud Writers and Readers Festival

    The Ubud Writers and Readers Festival happens every year in October. The festival consists of five days packed with writing workshops, talks from authors and journalists, live performances and artistic events. This is a great event to visit if you love literature and want to learn more about Indonesian culture and how it is represented in literature and the media. This is a reflective event that will leave you feeling inspired to write and read more, and you’ll come away with a deeper understanding of Indonesian history and culture.

    [/et_pb_text][/et_pb_column][/et_pb_row][/et_pb_section][et_pb_section fb_built=”1″ _builder_version=”4.4.2″][et_pb_row _builder_version=”4.4.2″][et_pb_column type=”4_4″ _builder_version=”4.4.2″][et_pb_code _builder_version=”4.4.2″]

    [/et_pb_code][/et_pb_column][/et_pb_row][/et_pb_section]

  • 27 Things To Do In Ho Chi Minh City (Saigon)

    27 Things To Do In Ho Chi Minh City (Saigon)

    [et_pb_section fb_built=”1″ admin_label=”section” _builder_version=”3.22″][et_pb_row admin_label=”row” _builder_version=”3.25″ background_size=”initial” background_position=”top_left” background_repeat=”repeat”][et_pb_column type=”4_4″ _builder_version=”3.25″ custom_padding=”|||” custom_padding__hover=”|||”][et_pb_text admin_label=”Text” _builder_version=”4.4.2″ background_size=”initial” background_position=”top_left” background_repeat=”repeat” hover_enabled=”0″]

    I was so excited to explore Vietnam that when I booked my Airbnbs, I booked much longer in each location than I needed. So whilst most people only spend a couple of days in Saigon, I booked an apartment in District 3 for an entire month.

    After two days there, I’d completed most of the major tourist attractions, so I thought I’d set about finding the city’s hidden gems and quirky attractions.

    By the end of my month in Ho Chi Minh City, I’d compiled a list of 27 things to do. And don’t worry, it’s a wholesome list, with genuine places to go, there’s nothing like ‘try the streetfood’ – although you should also do that too.

    So for anyone else looking to spend a while in Saigon, here are 27 fun and unusual things to do in and around the city.

    (I’ll start with the classic tourist attractions, so if you want the more unusual things to do, keep scrolling down the list!)

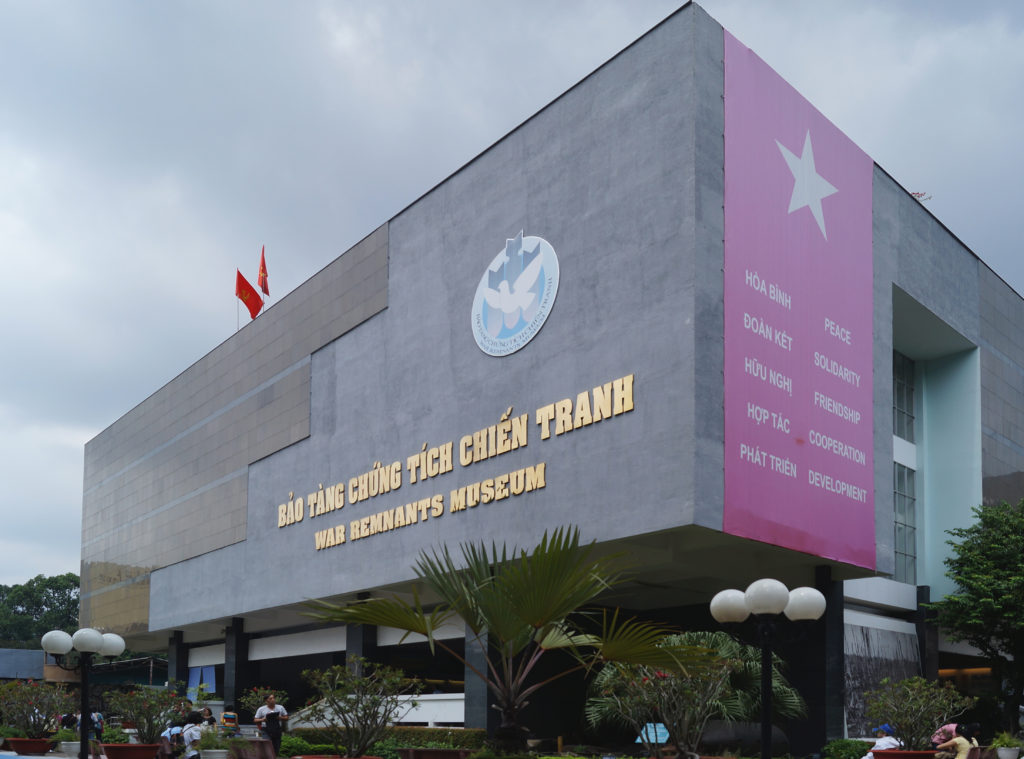
    1: War Remnants Museum

    War Remnants Museum Vietnam

    The War Remnants Museum is packed full of information about the Vietnam War, and the lasting effects of the weapons used.

    I was guilty of not knowing all that much about the Vietnam War, so for me, this was a real learning experience. There was political information, as well as stories from individuals and pictures that captured the devastation of war.

    As well as the main building, there was also a collection of war machines like tanks and planes outside. And round the back, there was a prison area, with information about how the prisoners were tortured and what crimes they’d committed.

    I won’t lie, this museum is full-on. I had planned to combine it with the Independence Palace, but it didn’t seem right rushing on to another attraction. It’s a sobering but insightful experience.

    Ticket Price: 40,000 VND

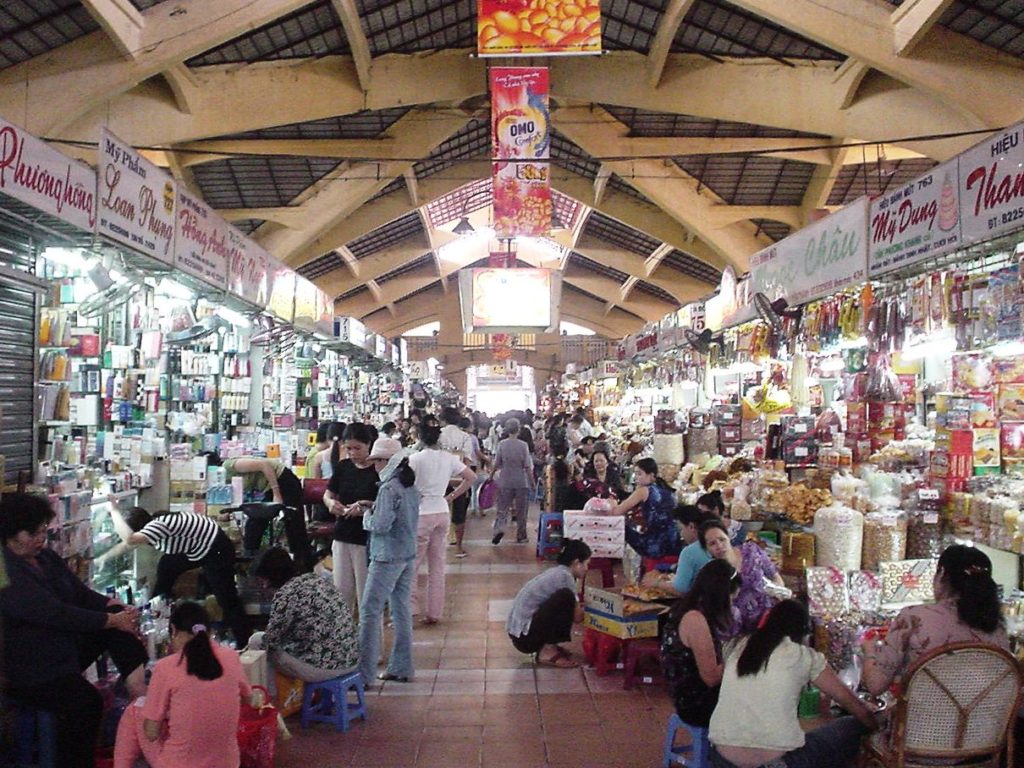
    2: Benh Thanh Market

    Benh Thanh Market

    Benh Thanh Market is the most popular tourist market in Saigon, and it’s a must-see. There’s plenty of souvenirs to buy and even if you’re not interested in shopping, just walking through the narrow market paths is an experience.

    There are colours everywhere, and some good food too. To find the food section of the market, just follow the smells.

    Cost: Free! (Unless you buy something of course)

    3: Thien Hau Temple

    Thien Hau Temple

    Thien Hau Temple is built with Chinese style designs and architecture. You can admire the intricate decorations, and learn about the history of the temple from a guide. It’s one of the most important temples in Saigon, so it’s definitely worth a visit.

    I’d recommend visiting this temple as part of a tour (you can find tours that combine different attractions in the city centre for about $7 per person). This way, you’ll learn all about the temple’s history.

    Cost: Free if you visit independently, or from $7 per person if you join a tour (the tour will involve other attractions as well)

    4: Binh Tay Market

    This is another market, but it’s one that’s not so touristy. It’s in Saigon’s Chinatown, in a two-storey building and it’s a great place to get a taste of local life.

    There are lots of foods including colourful fruit and veg stands, but there’s also crafts, pottery, clothes and a few souvenirs for sale.

    Cost: Free (unless you buy something)

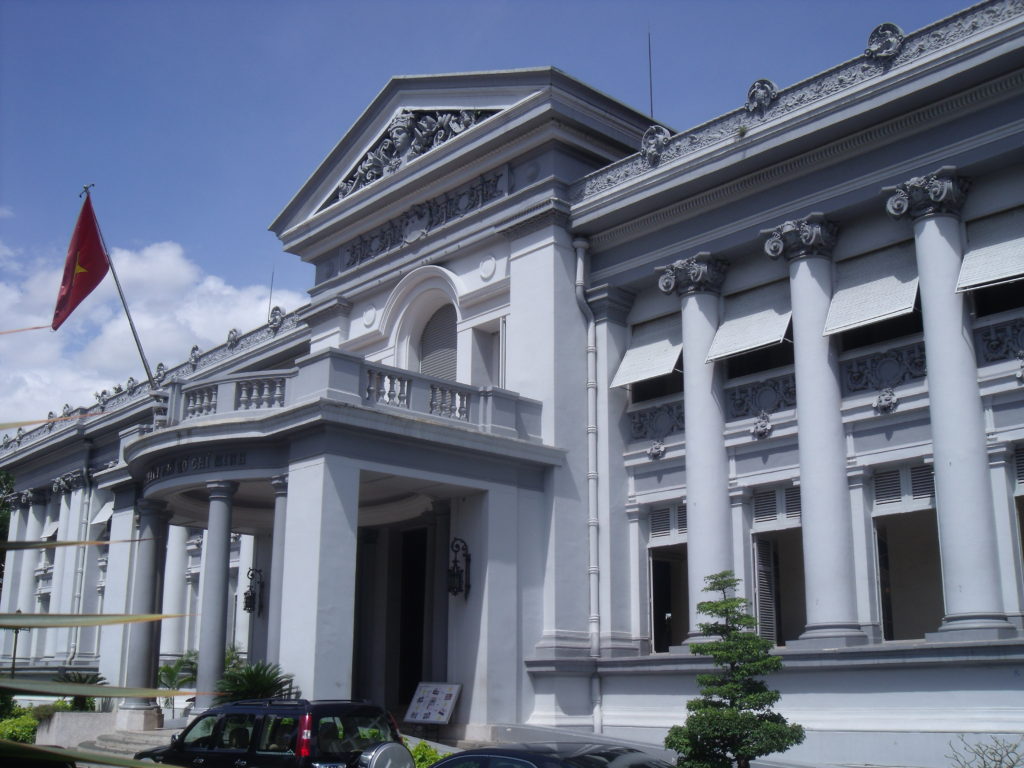
    5: Museum of Ho Chi Minh City

    Ho Chi Minh City Museum

    If you want to learn a little more about Vietnam’s founder, Ho Chi Minh, this is the museum to come to. There’s plenty of information about Ho Chi Minh’s life, and lots of photographs and objects from his life.

    Ticket Price: 10,000 VND

    6: Bitexco Financial Tower

    When I go to cities, the first thing I do is try and find a good view. And the Bitexco Financial Tower has the best views in the whole city.

    It’s a little pricey, but you can go up to the observation deck where there are panoramic views and information about the city’s most prominent buildings.

    When I visited, I wanted to get higher up than the observation deck (because can you believe it, the observation deck isn’t even on the top floor!). So I asked if I could go for a cocktail in the bar which was slightly higher up.

    To get to the bar we had to go up in a private elevator and pay extortionate rates for a drink, but it was worth it to be able to sit down and take in the views with a good cocktail.

    Ticket price: 200,000 VND for entrance to the observation deck. The drinks in the bar were around 220,000 for one of the cheapest cocktails. 

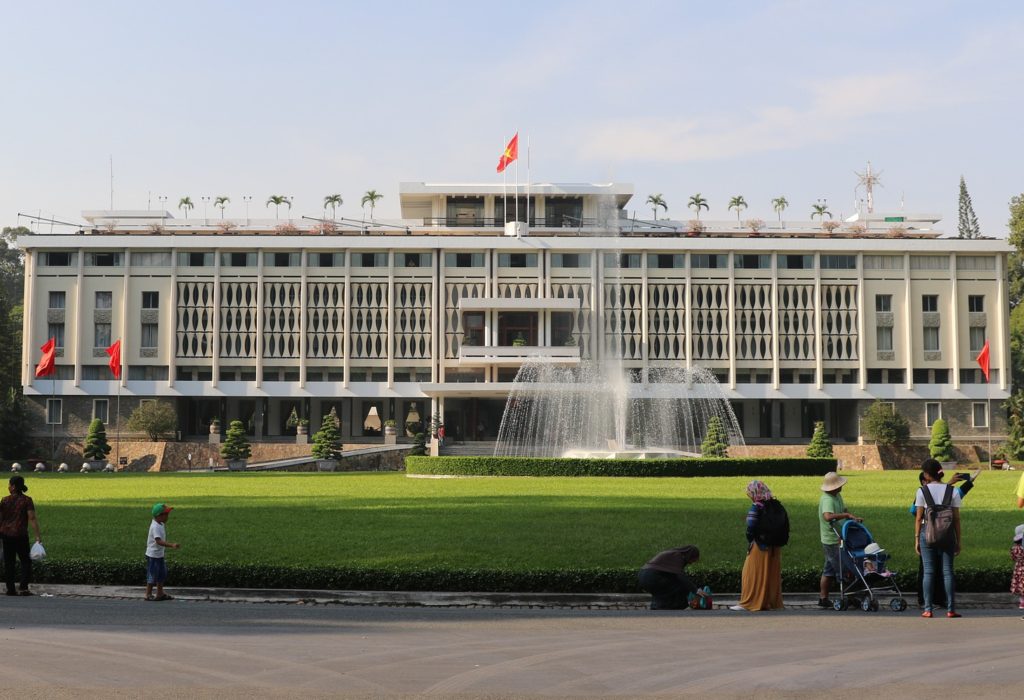
    7: Independence Palace

    Vietnam Independence Palace

    The Independence Palace is another popular tourist attraction. It was a government building before Communist tanks crashed through the gates in 1975, and now it’s still used for a lot of important official events.

    The Palace feels quite eerie, as everything has been left or displayed exactly as it would have been back in the day. The décor is in perfect condition, and the chairs are still sat around the tables in meeting rooms.

    It’s a great place to visit if you want to learn more about Vietnam’s history. But even if you’re not a history buff, walking the gigantic corridors and waving from the balcony can make you feel like royalty.

    Ticket price: 30,000 VND

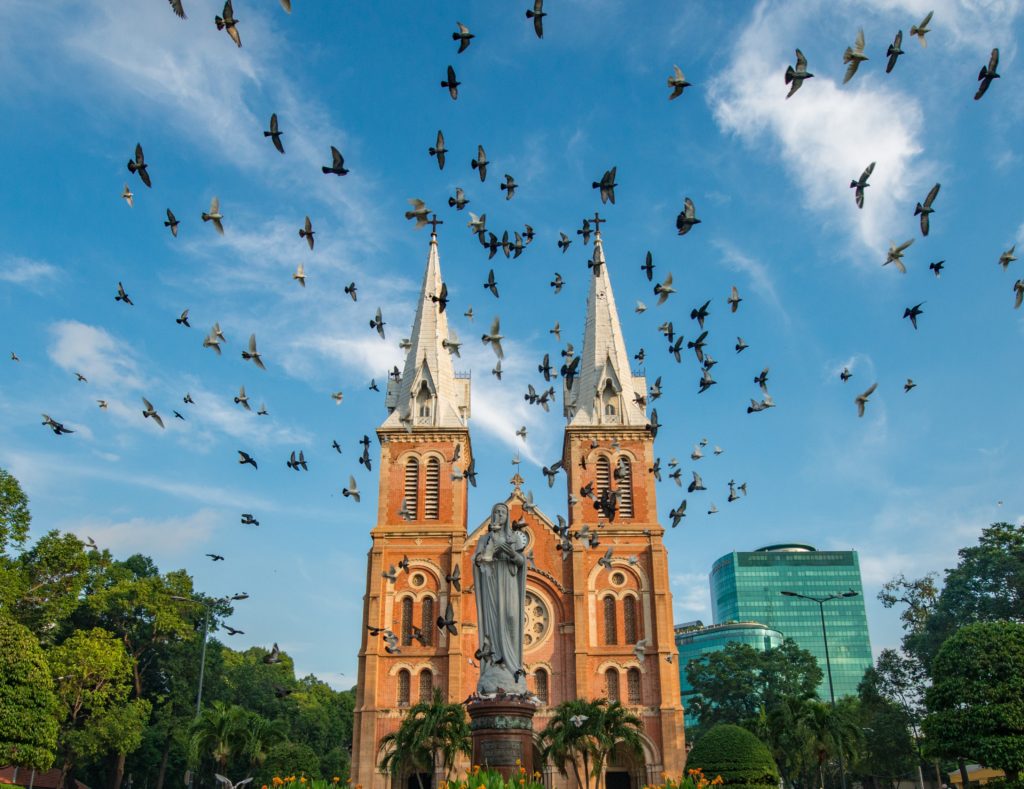
    8: Saigon Cathedral of Notre Dame

    Saigon Notre Dame Cathedral

    The Saigon Notre Dame Basilica is one of the most famous landmarks in Ho Chi Minh City. The red brick, European style makes it stand out from the rest of the modern city, and with the Central Post Office just across from it it’s like stepping back in time.

    You can go into the Cathedral during mass, or you can admire it and take photos from outside. There’s always lots of birds who fly in groups round and round the Cathedral, which makes for great photos and videos.

    Cost: free!

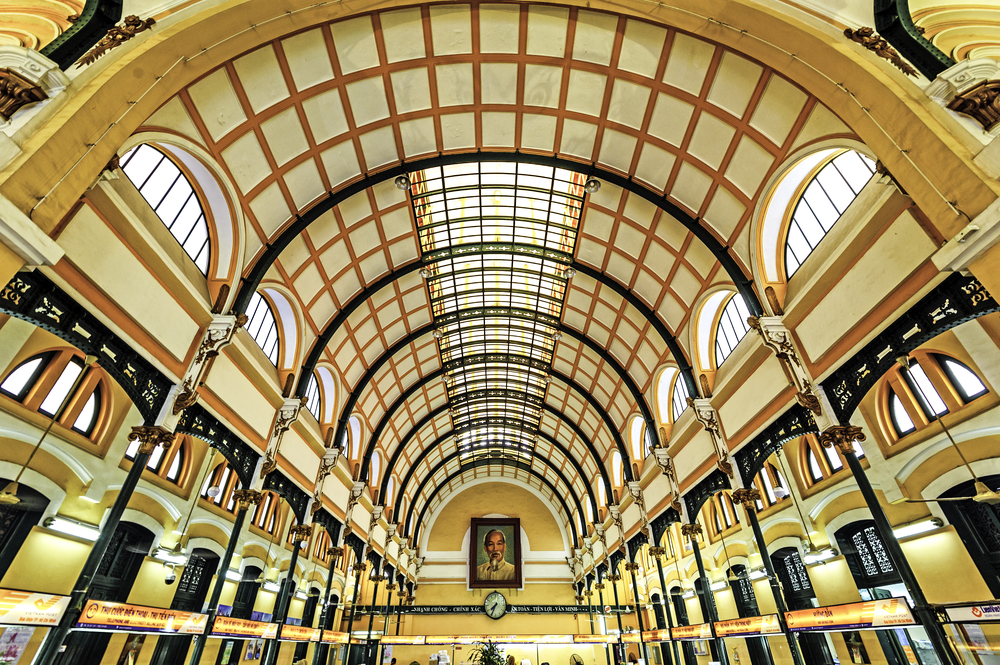
    9: Central Post Office

    Saigon Central Post Office

    The Central Post Office is just across from the Notre Dame Basilica, so it’s worth combining these two attractions. The Post Office doesn’t look like much from the outside but once you step inside, it’s really quite grand.

    The ceiling is so high it feels as though it’s miles away, and there are huge paintings of maps on the walls, with old fashioned booths beneath and clocks for different time zones.

    There are several businesses within the Post Office, including several local services and a few little souvenir shops.

    Cost: free! 

    10: A O Show

    The Saigon Opera House is definitely something you should consider seeing, but rather than just visiting the building, why not watch a show?

    Don’t panic, you don’t have to sit through an opera, there are several shows about the history and development of Vietnam, the best being the A O Show.

    You’ll see gymnastics, interpretative dance, and clever performances that demonstrate the growth of Ho Chi Minh City. And afterwards, you’ll have the opportunity to meet the performers!

    Ticket price: 700,000 VND, 1,150,000 VND or 1,600,000 VND depending on what seats you choose

    12: Fito Museum

    If like me, you’re a fan of quirky museums, you’ll definitely want to visit the Fito Museum. It’s full of traditional medicines and set up like a pharmacy. You’ll be shown around by a guide who will fill you in on the history of Vietnamese medicine. You’ll even learn about stone-age remedies.

    Ticket price: 120,000 VND

    13: Starlight Bridge

    Star Light Bridge Ho Chi Minh

    The Starlight Bridge in District 7 is beautiful after dark. From the side of the bridge pours a multi-coloured waterfall that makes for great photos and a romantic setting. It might not be a whole day out, but it’s definitely worth taking a stroll by the bridge at least once during your stay.

    Cost: free!

    14: Cu Chi Tunnels

    Cu Chi Tunnels

    The Cu Chi Tunnels were used by the Vietcong during the Vietnamese War. I went on a cheap $7 tour to these tunnels and it was one of my best days in Saigon.

    You get to see machines like tanks and helicopters used during the war and even venture into different tunnels. The tunnels have been widened for tourists, but be warned, they’re still terrifyingly small.

    I’d definitely recommend going with a tour group, as the tunnels are two and a half hours out of the city. And tour guides are able to give much more information than you’d get on your own.

    Cost: Anywhere from $7-$160 (there are basic tours, combination tours, or luxury tours by limo)

    15: Jade Emperor Pagoda

    If you’re hoping to check out some Vietnamese temples or architecture, the Jade Emperor Pagoda is over 100 years old and it’s a sight to behold. The temple has some beautiful and intricate carvings, and inside you’ll find some interesting statues of characters from both Buddhist and Taoist legends.

    Cost: Free!

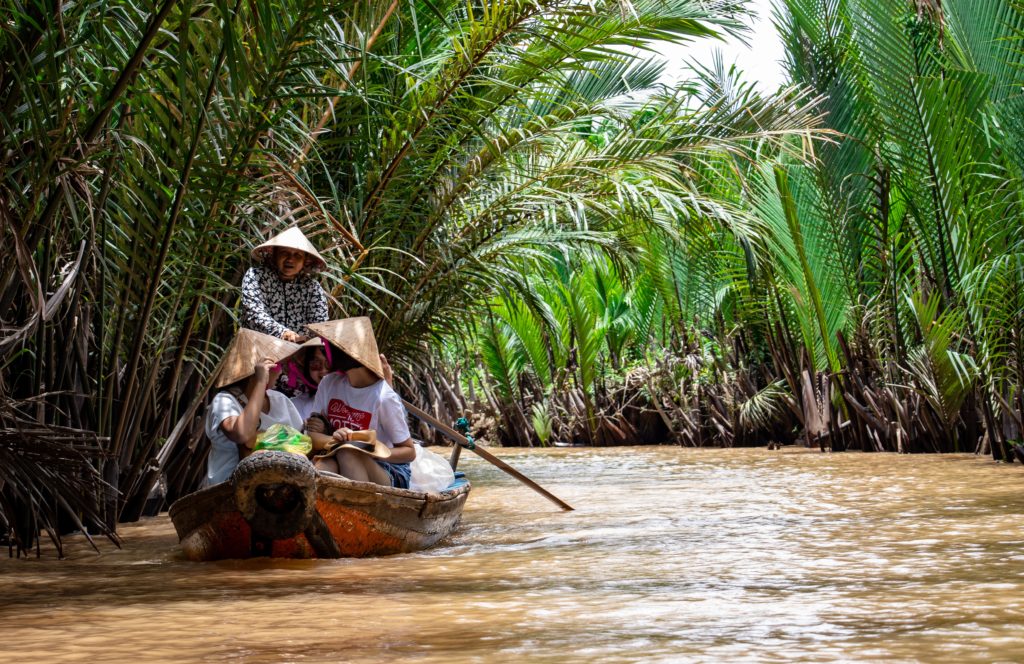
    16: Mekong Delta

    Mekong Delta Saigon

    There are so many different ways to see the famous Mekong Delta, but one thing’s for certain, you NEED to see it.

    You can kayak down the river, take a speed boat, luxury boat or a tour boat. Most tours will also show you around the riverside villages, so you can see what life is really like in rural Vietnam.

    As you cruise down the river you’ll learn about Vietnamese history and culture, whilst passing locals, wildlife and spots that were once home to the combat of the Vietnam war.

    Tours range in price, some will involve basic boat trips, bike hire and a coach for large groups. But if you want to experience a luxury tour, you can get a private car (or limousine!) to the Mekong Delta region and then enjoy a speedboat ride down the river.

    Cost: $30-200

    17: Go Shopping At One Of The Many Mega Malls

    Ho Chi Minh City has some pretty impressive malls if you’re interested in shopping. There are malls with boutique shops, global brand stores, and some malls even have a level dedicated to pop-up market stalls. You can also find delicious and cheap meals in mall food halls.

    Lots of the Saigon malls are so large they even have entertainment complexes with arcades, cinemas, and in one case, an ice rink!

    Some of the best malls I visited included the Vincom Mega Mall, the Vincom Centre and the Diamond Plaza. If you’re in Saigon in rainy season, these malls are the perfect place to spend a rainy day.

    18: Take to the Ice at the Vincom Mega Mall Ice Rink

    Ice skating is probably the last thing you thought you’d be doing in Saigon, a tropical city. But this was the most refreshing activity after walking around in the heat. The ice rink here is huge, and it was rarely busy. It filled up after schools finished but most of the time it was fairly quiet. And I often came across professional skaters practising dance routines on the ice.

    Cost: Approximately $5 for 1 hour

    19: Play Arcade Games or Go Bowling at Diamond Plaza

    Diamond Plaza, a mall in District 1 of the city, has a whole level dedicated to entertainment. You’ll find a huge arcade with some of the best games, and tokens are affordable — you can buy a handful of tokens for around $5-15 depending on how much you want to play.

    There’s also a bowling alley so if you want to challenge your partner/travel companions to a game this is the place to go. The bowling is a little expensive though, so if you’re on a budget it may be worth giving it a miss. They charge per person, per game and for shoe hire (you’re not allowed to wear your own shoes). For two people, for two games it cost us about $18.

    20: Take on an Escape Room

    There are several escape rooms in Saigon, including one in Diamond Plaza. These challenges are considerably cheaper than escape rooms you’ll find in Europe or the US, and they usually cost around $5-10 per person. There’s even a live-action, haunted-themed escape room for those wanting a scary experience.

    Cost: $5-$10 

    21: Hit the cinema (they’re incredible)

    Before I went to a cinema in Vietnam, I thought cinemas were all the same. Oh how wrong I was. I’m used to paying about $15 for a cinema ticket, and all that includes is an uncomfortable seat.

    But in Ho Chi Minh City, there are some of the most luxurious cinemas you can imagine. Standard cinema tickets start at about $3, but many cinemas also offer sofa seats or armchairs, tickets that include a cocktail and snacks or even a meal (served by a waiter once the film begins). And don’t panic, almost all cinemas in the city show films in English.

    Cost: $3-$8

    22: Rock climbing at Push Climbing

    If you fancy being active, Push Climbing has a range of indoor climbing walls for all abilities. There are lead climbing walls, and routes for top ropes. You can climb independently, or if you’d rather climb with the help of an instructor, they offer climbing classes.

    Rock climbing here is good fun and great value — you can get a day pass with all the equipment you need for about $9.

    Cost: $9 for a day pass. 

    23: Bouldering at the Vertical Academy

    This place is really tucked away but you can easily drive there if you have a bike, or take a Grab taxi. It’s worth making the trip out of the centre if you’re a climbing fanatic.

    It’s a bouldering place, so there’s no ropes or harnesses, you just climb and land on the mats below. The walls include high climbs, overhangs, and different coloured routes of different difficulties.

    The staff are super friendly, they’ll help you figure out climbing techniques, and they speak great English too.

    You’ll need to hire climbing shoes when you arrive, but even so, it’s great value and you can climb for as long as you like. One thing to note though is they only have climbing shoes of sizes up to a UK Men’s 12.

    Cost: Roughly $5 

    24: Dining in the dark

    This is a quirky experience that I’d never heard of before arriving in Saigon. It’s basically a tasting experience where you taste different dishes without being able to see them.

    You really won’t know what to expect! But don’t worry, if you’re vegan or vegetarian, they can cater for that, so you won’t end up accidentally eating meat.

    This is a slightly pricey experience if you’re on a budget, but it’s definitely worth a try if you consider yourself a foodie.

    Cost: $30 

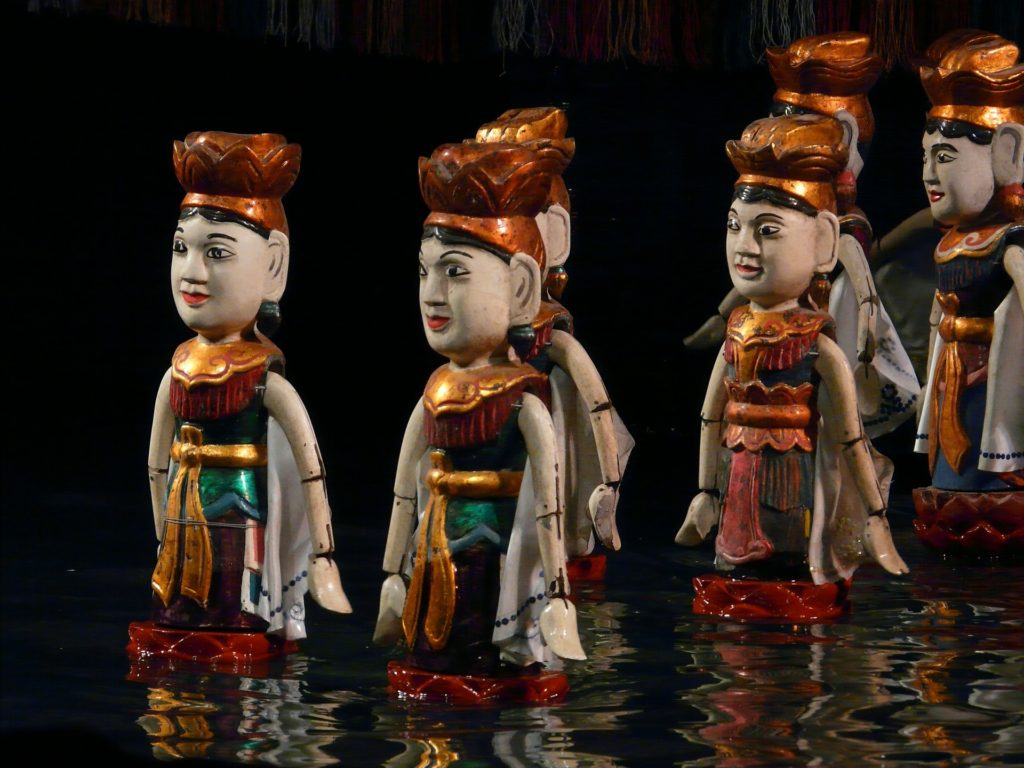
    25: Watch a Water Puppet Show

    Water Puppet Show Saigon

    The Saigon Water Puppet Show is a famous show in Vietnam. Puppeteers act out traditional stories and legends while waist-deep in water. The performances are accompanied by traditional Vietnamese music, played with authentic instruments. These shows used to be performed in the rural rice paddies.

    Cost: Approximately $5 for a ticket

    26: Go to a bug café

    Dining on bugs has become a popular tourist challenge, so if this is what you’re into, there are bug cafes that can satisfy your cricket cravings. You can try insects cooked and prepared in any which way — dine on gourmet bugs, or challenge your travel companions to eat a creepy crawly.

    27: Meet Furry Friends at a Pet Cafe

    Visit a cat cafe in Ho Chi Minh City

    Pet cafes are super trendy in Vietnam — you’ll find cafes with cats and/or dogs roaming around and customers are free to cuddle, stroke and play with them. So if you want to make some furry friends, check out one of these pet cafes.[/et_pb_text][/et_pb_column][/et_pb_row][et_pb_row _builder_version=”4.4.2″][et_pb_column type=”4_4″ _builder_version=”4.4.2″][et_pb_code _builder_version=”4.4.2″]

    [/et_pb_code][/et_pb_column][/et_pb_row][/et_pb_section]

  • The Best Travel Hair Accessories in 2024: Tame Your Hair On The Go

    The Best Travel Hair Accessories in 2024: Tame Your Hair On The Go

    When I first started travelling, my hair was so long it reached my belly-button, and I struggled to keep it tamed. I have naturally frizzy, slightly curly hair that gets even frizzier in humid climates.

    Any fans of Friends will remember the one with Monika’s crazy hair in Barbados — my hair is pretty similar to that.

    So while I’ve tried travelling without any hair tools or accessories, au naturale hair is just not a good look for me.

    So after trying lots of different products and hair accessories, and meeting people on the road with even longer hair than mine, I think I’ve figured out the best hair accessories for travel.

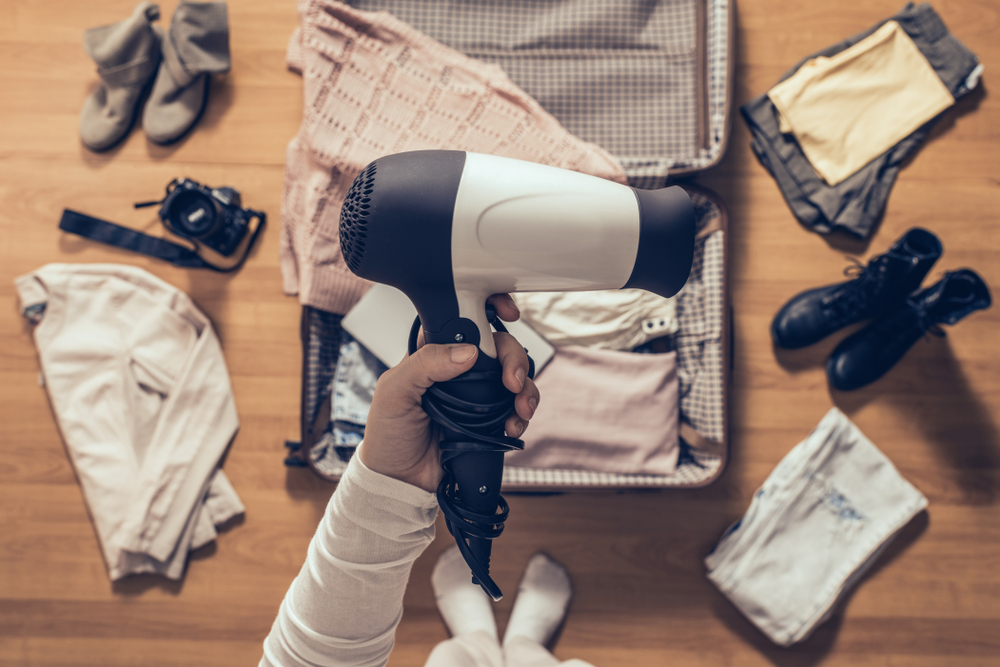
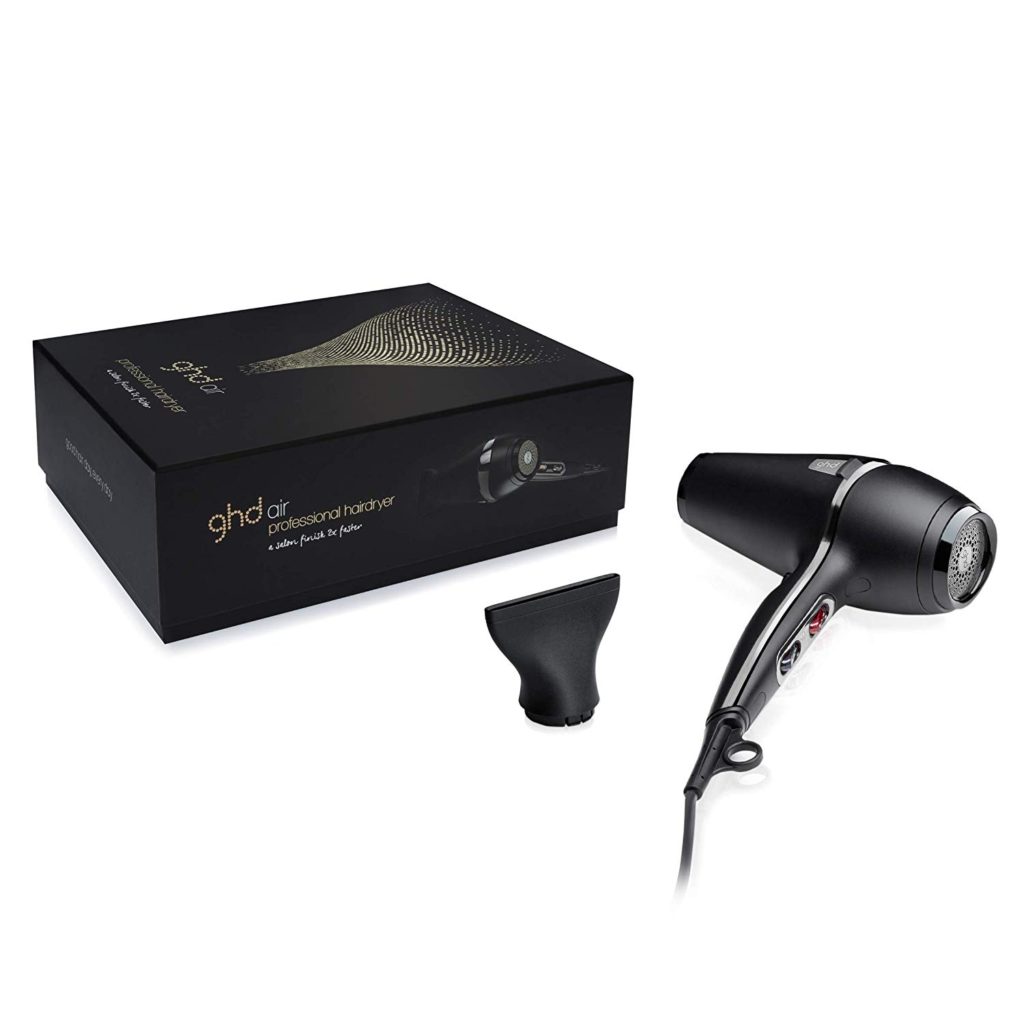
    1: GHD Air Hairdryer

    GHD Air Travel Hair Dryer

    I’ve tried so many travel hair dryers before, from the GHD Flight, to Babyliss and Remington ones, but was never impressed. Then I came across the GHD Air. I stayed with a friend in London and ended up using her hairdryer — she had a GHD Air and I was instantly impressed.

    It dried my hair quickly and left it much less frizzy than normal. I was so impressed that I ordered one for myself the next day, and I’ve taken it on every trip ever since.

    While the GHD Air isn’t strictly a travel hairdryer, it is THE best hairdryer I’ve ever used, and it’s lightweight, small frame means I can easily pack it in any backpack or suitcase.

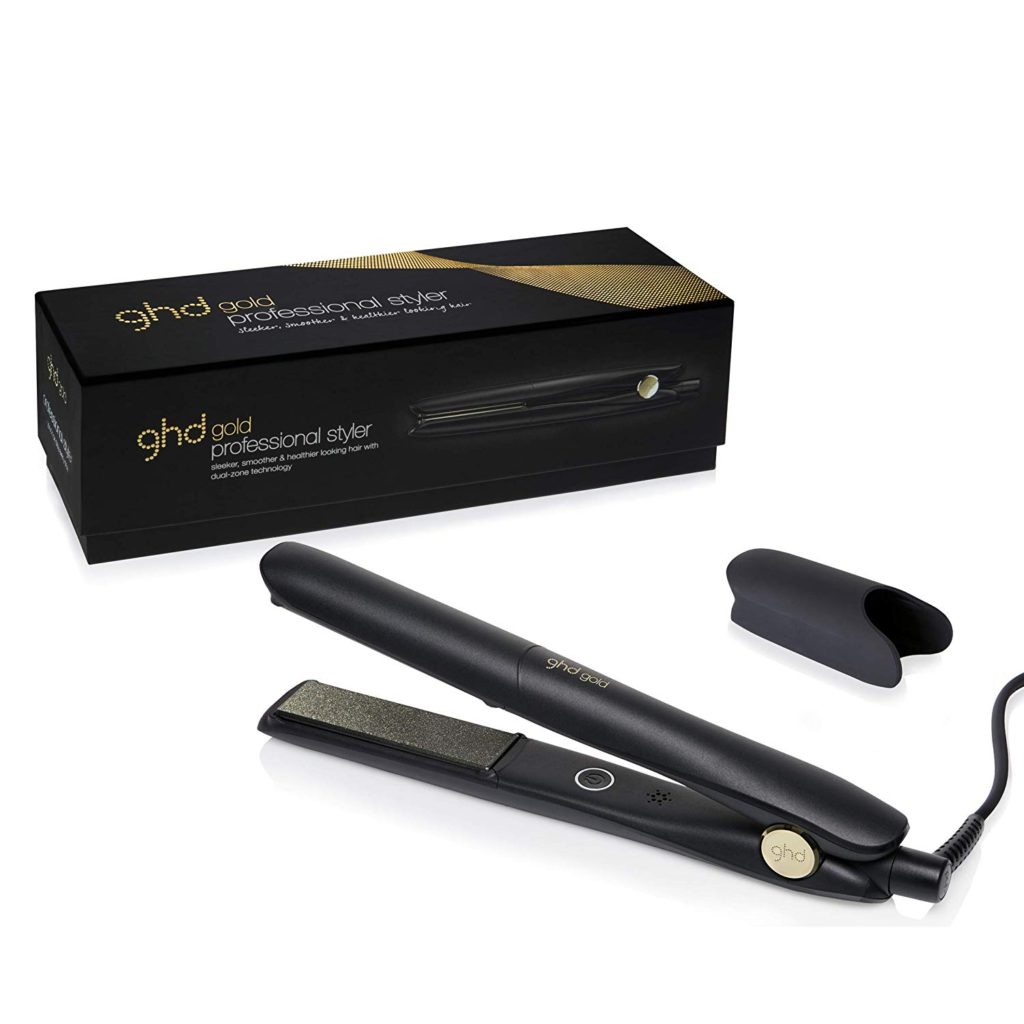
    2: GHD Gold Straighteners

    GHD Gold Straighteners for Travel

    Once I’d bought my GHD Air, I was sold on GHD as a brand. So I took a look at their straighteners too. I was able to try the GHD Mini Stylers and the latest, top of the range GHD Platinum+, but decided the GHD Gold straighteners were best for travelling.

    While the GHD Minis are designed with travelling in mind, they took quite a while to straighten my hair. The GHD Golds were a little larger, but they were still sleek and lightweight.

    These straighteners, combined with the Air Hairdryer, make the perfect hair tools for travelling. With these, I can achieve non-frizzy straightened or curled hair in any climate.

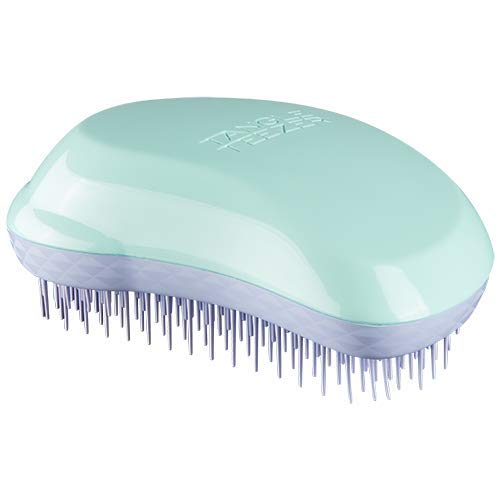
    3: Tangle Teezer Brush

    Tangle Teezer Travel Hair Brush

    Tangle Teezer brushes somehow manage to detangle hair without pulling at all. I can brush my hair with one of these bad boys without cringing in pain at all. They’re also fairly compact and come in different colours.

    My personal favourite is the mint coloured brush, simply because it matches a few of my other travel accessories like my Seafoam Yeti bottle and pastel blue Antler suitcase and rucksack set).

    4: Hair Ties and Clips

    This one kind of goes without saying, but hair ties and clips deserve a place on this list. Sometimes it’s so much easier to just to throw my hair up into a bun or pony than take the risk of my hair being knotted by wind or waves. From elastic hair ties to scrunchies to bobby pins, you should take a load of these hair accessories with you on any trip. If you’re anything like me, you’ll lose most of your hair ties by the time you’ve got to the airport, so it’s best to pack many, many spares.

    5: Headbands

    Travel Hair Style With Headband

    Headbands are one of the best travel hair accessories you can pack. A headband will keep your hair out of your face and opens up so many different hairstyle opportunities.

    You can wear them with your hair down, up in a bun, and they even work with short hair. And they have two secret superpowers: 1) they can cover up greasy roots if you don’t have time to wash your hair, and 2) they’re basically stylish sweatbands, which comes in useful in hot climates. In colder destinations, you can wear thick, woolly headbands that keep you warm.

    6: Argan Oil

    Argan Oil For Traveling

    If your hair gets ridiculously frizzy in humid destinations, argan oil is a great way to make sure your hair stays smooth and frizz-free. It also keeps your hair in great health, preventing split ends and encouraging growth. Plus it doubles as a great anti-wrinkle moisturiser.

    Argan oil usually comes in bottles that are 150ml or smaller, so if you’re travelling light with only cabin luggage, you won’t have a problem getting it through customs. And even though bottles of this oil are pretty small, a little goes a long way, and a 100ml bottle will last a while.


    7: Hair scissors

    Depending on where you’re travelling and for how long, it can be a good idea to pack your own hair scissors. I’ve been to several destinations where there aren’t really any hairdressing salons around, and rather than letting my hair get out of control, I’ve trimmed my own hair to keep split ends at bay.

    I bought a pair of hair scissors online, watched YouTube videos on how to cut my own hair, and now they’re one of my essential travel hair accessories.

    8: Hair Turban Towel

    Travel Hair Towel

    As soon as I get out of the shower, I want to wrap my hair up in a towel turban. But it’s just not practical to pack both a normal towel and a hair towel if you’re travelling light. So instead of a regular towel, which takes up a fair amount of room., I use a lightweight hair turban towel. They’re fairly small so they tuck easily into your suitcase or backpack, but they can still wrap up long hair.


  • Cockroaches Broke My Nose In Vietnam (I Wish I Was Joking)

    Cockroaches Broke My Nose In Vietnam (I Wish I Was Joking)

    Follow my blog with Bloglovin

    Three years ago, I sat in an English pub, listening to a friend tell me stories about their trip to Vietnam. From whirlwind romances to charming locals, beautiful sights and oh-so-cheap and delicious food, as they told me about their travels my mind was filled with beautiful images and I knew I had to go.

    Ever since that evening, I’ve had this idea of Vietnam as the most beautiful destination on Earth. So when I finally booked a ticket there, three years on, I was overwhelmed with excitement.

    I travelled with my then-boyfriend and we decided to spend a month in Hanoi/Halong Bay and a month in Ho Chi Minh City. We decided that since this was a trip I’d dreamed of for such a long time, it was worth allowing two months to really experience life in Vietnam.

    My First Taste of Vietnam

    The first month in North Vietnam went well, although as with any over-hyped dream, it didn’t quite live up to my expectations. I quickly realised the image I had of peacefully driving scooters alongside the river, and walking hand in hand around lakes and pagodas was as far from reality as possible. The roads were filled with thousands of motorbikes and scooters, each one of them slamming their horn as many times as humanly possible. Attractions were heaving with tourists and locals who would push past us or pester us to buy something, or pay for a picture with their props and animals. The entire experience was overwhelming and nothing like I imagined. The only respite we got from the madness of the city was in Halong Bay, on Cat Ba Island and the deserted Tuan Chau Island. 

    I quickly realised that I’m definitely not a city person, which didn’t bode well for the second month I was due to spend in Southern Vietnam, in the apparently busier Ho Chi Minh City.

    Any time we told locals how long we planned on staying in Saigon, they would look at us shocked and confused, or they’d laugh. Almost all of them asked ‘why would you do that?’. So by the time came for us to board our flight to HCMC, we were well and truly worried about what to expect from the Southern City.

    The Saigon Apartment

    We had booked a Saigon apartment that looked like pure luxury. It was modern, it had air con and a rooftop area with swing seats and a pool. The apartment was located in District 3, so not too far from the city centre.

    When we arrived at the apartment, we saw a baby cockroach on the stairs leading up to our flat. My boyfriend looked at it with disgust while I insisted that it was cute.

    ‘I have no idea why people are so scared of these little things’ I said, ‘I don’t think they even bite, and they run a mile when they see us coming anyway’.

    Oh, how naive I was. This was before I realised that cockroaches are living embodiments of the devil. These guys are pure evil. And before any animal-lovers jump to defend them, I have my reasons (below) for now hating these insects! 

    Anyway, we let ourselves into our room and were amazed by beautifully modern and clean it was. We took pictures before dumping our massive rucksacks in the wardrobe and running up to admire the rooftop area. It was incredible — the pool had a beautiful view of the city. We were impressed.

    Cockroach Infested Bedroom, Saigon Apartment

    Rooftop Area Saigon Apartment

    Ho Chi Minh City Apartment

    Oolong Tea Garden Apartment Saigon

    But the first night, the problems began. When we switched out the lights and went to bed, we heard scuttling sounds. Switching the light back on, we saw a group of 5 or 6 cockroaches that had emerged from underneath the wardrobe. Still convinced that these little critters were completely harmless, we switched off the light and went to sleep not giving it a second thought.

    The Invasion of the Cockroaches Begins

    But the next night, we awoke to the same scuttling sound, and this time there were even more — probably more than 10 cockroaches all running around on the floor of our bedroom. One had even made its way on to my bedside table. That was a little too close for comfort, so the next morning we asked the housekeeper if there was a spray we could use that would get rid of them. She gave us a spray and we went crazy, spraying every nook and cranny we could find.

    We let the spray work its magic for a while, and sure enough an hour later, 7 cockroaches had crawled out from their hiding places and died in the middle of the room. It’s a little grim, and cruel, I know, but trust me, they deserved it for what their buddies did the following night.

    At 3 am the next day, I woke up in a panic. There was something crawling on me, lots of things,  on my legs, on my chest, my arms. My face. Yep, there were cockroaches all over me. And one of the buggers was on my face.

    In a split second, I went from being someone who couldn’t care less about cockroaches, to sobbing like a maniac and screaming ‘please help me’ over and over while these horrible creatures carried on crawling all over me. And these weren’t small ones or babies, they were absolutely massive — the length of a finger, the width of a big toe. 

    Cockroach Horror Story

    My boyfriend tried to slap them off, but they were adamant that they wanted to continue their party on my body. And these guys are fast. They avoided every whack and carried on running all over me. It took a while to get them all off, by which point I was a mess. I was sobbing, and frantically scratching where tiny cockroach feet had been running all over me.

    The Frightful Facts About Cockroaches

    Eventually, I calmed down, but there was no way I could go back. I stayed awake googling cockroaches, what diseases they carry, their habits, and whether it’s common for them to crawl on humans while they sleep. I found myself reading academic papers on these insects — what else could I do? I couldn’t sleep.

    And what I learned from my frantic google searches and academic reading only made me feel worse. If you see one cockroach, the chances are there are thousands of them hiding nearby. THOUSANDS. But the worst cockroach fact I found out was that the smell that comes from our mouths and nose when we sleep is a pheromone for cockroaches. So if you sleep in the same room as a cockroach, they will likely make it their mission to crawl inside your mouth, or up your nose. Once I found this out, I definitely wasn’t going back to sleep.

    There was just one useful fact I learned, and that was that cockroaches don’t like light. If they can help it, they’ll only come out in the dark. So I tested this theory, I turned the light off for two minutes in the kitchen and closed the door. Then I switched the light back on, and sure enough, saw a bunch of cockroaches in the middle of the kitchen floor.

    So now I knew I could sleep as long as the light was on.

    But my boyfriend wasn’t having that. So I set up camp on the sofa in the kitchen, with the LED lights blaring. But still, I couldn’t sleep.

    The Nightmare Continues…

    I noticed that my face felt bruised and I gently touched my cheek, near my nose. It felt swollen, and if I pushed a little harder, it made a loud squeaking sound. It’s safe to say, I was super freaked out.

    I panicked that I’d had an allergic reaction to the cockroach who waltzed his way across my face. But the more I searched google for answers, the more I came across videos of people with cockroaches stuck up their noses or in their ears. And this only fuelled my panic even more. Now I was panicking that a cockroach had actually crawled up my nose. Most of the cockroaches we’d seen were much bigger than my nostril, but we’d seen babies too, and one of these could have wiggled its way up my nasal passage.

    I spent a further three nights too scared to sleep, and I don’t know if you’ve ever seen someone who hasn’t slept for three nights, but it’s not pretty. Each day I became more worried about my face. Most of the swelling in my cheek had gone down, but my right nostril had completely swollen shut. It was interfering with my ability to breathe, and I was having frequent panic attacks at the thought of a cockroach living in my sinuses.

    So on the fourth day, I decided to go to see a doctor. I had an Amex card that included travel insurance, so I gave the number a call, only to find out that my card (and the insurance) had expired the week before. I was in Vietnam, potentially with a cockroach up the nose, with no travel insurance. I know, I know, this was my own fault — it was my first big trip, and I guess you live and you learn. 

    At this point, I should also mention I had almost completely run out of money. I was financially unprepared for the long trip, I was working as a freelancer and that month four of my clients had decided they couldn’t afford to pay me on time, so the bank account took a hit and I had about £20 to my name. So a doctor was out of the question. And my lack of money also meant we couldn’t move apartments. We told the staff at the Oolong Tea Garden Apartments what had happened and asked if we could have a refund on all or even some of the money we had paid so that we could get a different apartment, but they just shrugged and said ‘no refunds’.

    They say money can’t buy you happiness, but I’d have been a whole lot happier if I’d had the money for a doctor, or the money to move to an apartment that wasn’t infested.

    I waited a month until payday, by which point we were so close to flying home that I decided to wait to see a doctor until I got back to England.

    So after continuing the rest of my travels with very little money, and a swollen, squeaky face, I finally arrived back in England.

    I went to the doctor as soon as possible, who transferred me to another doctor, who transferred me to another ENT (ear, nose and throat) specialist. After being sent to a handful of different doctors, and having several nasal endoscopies, I was told that the good news was that there was no cockroach in my nose. The bad news was that I’d had an allergic reaction and the swelling had caused the cartilage in my nose to break. And to be able to breathe through my nose again I’d need surgery.

    So the outcome? In three months, I have to have surgery to fix the broken nose. Surgery. All because of cockroaches.

  • Suffering From Dengue Fever In A Shared Hostel Dorm In Bali

    Suffering From Dengue Fever In A Shared Hostel Dorm In Bali

    During my first few days in Bali, I fell ill with Dengue Fever. I was travelling solo and staying in an 18-bed dorm room in a hostel, sharing two toilets between 36 hostel guests. Here’s what happened. 

    The Incident That Started It All: The Mosquito Bite

    My first ever visit to Bali started with a trip to a coworking space. I wanted to get some work done before planning any adventurous day trips, so I set off with my laptop and found my way there. I took a seat in the garden to enjoy the sun while I worked and within minutes I felt a sharp stinging on my arm. And sure enough, there was a big black and white striped mosquito on my arm, with its mouth still firmly attached to my skin. I knew the type of mosquito: the Aedes Aegypti.

    I knew it only because I’d researched dengue fever the year before, while travelling through Thailand, and this was the type of mosquito that carried the illness.

    Once I’d smacked the mosquito off my arm and the stinging had stopped, I sighed. I bet I get dengue fever or typhoid, I thought. That would be just my luck. Contracting dengue on my very first day in Bali.

    Dengue Fever Mosquito Bali

    My Descent Into Illness

    I carried on the rest of the day, and the day after the bite as normal. But on my third day in Bali, I woke up feeling absolutely bloomin’ awful. I told myself I was just tired and hauled myself out of bed and into the shower. I had a new members meeting at the coworking space at 10:30 am, so I rushed to get ready and started the 20-minute walk.

    A few steps down the road I felt even worse than I had when I first woke up. My head was pounding, my back was aching like crazy and I felt the same sort of nausea you get with a hangover. I didn’t really think anything of it — I just put it down to not having had any breakfast. I’m a bit of a diva when it comes to breakfast.

    I arrived at the meeting late and sat at the bark on a bench. The pain in my back was getting worse and I shuffled and fidgeted throughout the entire meeting, drawing my knees to my chest, twisting, turning and arching my back just to try and alleviate the pain.

    Once the meeting was over I ordered a chocolate muffin (because what better way to try and get better than with a large serving of something chocolatey). Each mouthful was a struggle. Halfway through the muffin, I realised I was unwell. Normally I devour anything chocolatey in seconds, but the muffin was a struggle, and each mouthful made me feel worse. And the pain in my lower back had spread down to my knees and to my upper back and shoulders.

    I’d only completed a measly seven minutes of work, but I slammed my laptop shut and started to walk back to the hostel. I quickly came across a guy with a motorbike yelling ‘taxi taxi’ (they’re everywhere in Ubud), and decided there was no way I could walk back to the hostel. So I got on the back of the taxi driver’s motorbike and did my best to cling on as he drove me home. Looking back, I should have found a taxi driver with a car. I barely had the strength to hold on as he swerved through the Ubud roads and tiny streets to get me home.

    A Shared Hostel Dorm: The Worst Place To Be Ill

    I got back to the hostel at about midday and went straight to my dorm. A team of about 7 cleaning staff were in there changing sheets, sweeping and mopping the floor and carrying out their cleaning routines. My heart sank, I had to lay down, and I couldn’t get to my bed.

    I made my way down to the pool, where there were beanbags and sun loungers. I collapsed onto a bean bag and fell asleep almost immediately. I woke up about an hour later, feeling hot, thirsty and downright terrible. I had to make it to my bed.

    Luckily the cleaning staff had finished up while I slept by the pool, so I stumbled into the room, kicking off one shoe before falling into bed. I drew the horribly thin and transparent curtain around the bed to give myself at least the illusion of privacy and again fell asleep, with one shoe still on.

    I woke up about 8 hours later, in the evening, when a drunken man who was in the bunk bed above me fell against my bed, knocking the curtain open. He started to apologise, but his ‘sorry’ faded into muttering — he was clearly shocked by my appearance. I looked rough. And I knew that was probably just the first encounter I’d have with a drunken gap-year traveller that night. I was in a party hostel, and I knew from the previous nights I’d spent there that the partying and drinking wouldn’t stop until 4-5 am.

    Sure enough, throughout the night I had to deal with the sound of girls vomiting in the bathroom, people having sex in the beds around me, music thumping on the offbeat of my throbbing headache. The worst part though was the bathroom situation. There were only two toilets for over 30 people, and the illness meant I needed those babies pretty regularly.

    Each time I staggered to the toilet, which was only a few steps away from my bed, the aching pain got worse. My ankles, knees and hips felt like they were breaking each time I put weight on them. The pain was so intense it felt like I could hear my joints crunching and creaking. And when those few steps to the toilet were finally over, I would have to wait for the gaggles of drunken girls to finish weeing, vomiting and using the toilets to have heart-to-heart conversations.

    The Quest for a Private Room

    There was no way I could stay in the hostel. But every step I took felt like setting fire to my joints and muscles. I didn’t know what to do, how could I summon the strength to pack my rucksack, and carry the massive 15-kilogram pack to a new place?

    A couple of days after being ill in the hostel I knew I had no choice but to face the pain and move to a private room in another guest house. I booked a room online and prepared to make a move. Packing up my things took the best part of four hours. After shoving each item into my backpack I laid back, breathing deeply, giving myself a pep talk to keep going. Eventually, I had packed and had pulled my backpack onto my back. The pain was excruciating.

    I made it to reception to check out and was met with ‘Oh my goodness, are you okay?’ from the receptionist. It was at that moment I realised I couldn’t talk. I knew I had a sore throat, but next to all the other symptoms I hadn’t really given it a second thought. But no, trying to talk sent me into a coughing fit that seemed to last forever.

    After coughing over the receptionist, and trying to say thank you through tear-filled eyes and spluttered sounds, I made my way to the main road. A taxi driver found me instantly, thank God. He took my rucksack and put it in the car, ignoring my attempts to ask him how much he charged. My guest house was only a ten-minute walk away, a five-minute drive maximum. It hurt to talk, it hurt to stand so eventually I gave up trying to ask how much and got in. He was grinning, and I knew instantly he was going to rip me off.

    After a few minutes in the car we arrived near the guest house, he said he couldn’t get closer despite many other cars driving down the same road, and jumped out, threw my rucksack to the pavement and charged me 150,000 IDR — about £9. The journey shouldn’t have cost more than 60,000, but I didn’t have the strength to argue and he knew it.

    I tried to pick my rucksack up of the floor where he had dumped it and didn’t even have the strength to lift it onto my shoulders. Eventually, someone helped me lift it up, and I stumbled a few minutes down the road to the guest house.

    My room wasn’t ready yet, but I couldn’t stand, or even sit any longer. I laid down on a bench in a lobby — I don’t think I’ve ever looked more homeless. I was shivering despite the hot Bali weather, my hair was unbrushed, and I smelt like I hadn’t showered in weeks. But I had made it, I had my own private room, and I didn’t have to carry my stupidly large rucksack anymore.

    Recovering From Dengue Fever

    I was ill for another week and a half, but gradually I started to get better. Having my own room made the illness so much more bearable, but still, I was unable to leave the hotel to get food. Luckily there was water just a few steps from my room, but it took me six days to be able to leave the room to get something to eat. And if there’s one thing I’ve learnt from this whole ordeal, it’s that going six days without food is horrendous.

    After a week I made it to the hospital to receive the care I needed, and now, about two weeks on from that silly mosquito bite, I’m doing much better.

    So if you’re suffering from Dengue fever in Bali, or any other illness really, here are my tips to you:

    • If you’re in a hostel, leave immediately and find a private room, before the illness gets worse!
    • Go to a hospital or Doctors as soon as possible. Bali healthcare is actually very good.
    • Don’t go six days without food, you’ll just make yourself feel worse.
    • Wear mosquito spray! I literally never did this before I got ill, now you won’t see me out and about in Asia without it
    • Ask for help — I struggled through most of the illness on my own, but if I’d just asked for help there were so many people around me who would have given it gladly. The Balinese are such lovely people, and apart from the taxi driver, so many people did their best to help me.
  • The Best External Hard Drives for Photographers 

    The Best External Hard Drives for Photographers 

    Whether you’re a professional or amateur, if you’re into photography you’ll know the struggle of constantly backing up images. Gone are the days when you could only take a certain amount of pictures on one film. Memory cards nowadays can store thousands of images, so there’s nothing to stop you from snapping photos left, right and centre. 

    And if like me, you have an incredible ability to take hundreds of photos in just a few moments, you’ll need a top-quality external hard drive to store all of your many, many snaps.

    Here’s everything you need to know about external hard drives, and where you can find the best external hard drives for photographers. 

    What is an External Hard Drive?

    An external hard drive is a portable device that can store thousands of digital files. Usually, external hard drives have 1tb or more of storage space, so they can hold much more than most laptops or computers. 

    You can use portable hard drives to store documents, images and even videos, freeing up space on your laptop and camera. 

    Why Photographers Should Use External Hard Drives?

    Most photographers nowadays use DSLRs, rather than film cameras, which means they can take as many pictures as their heart desires. A single day out can result in hundreds, if not thousands of pictures. 

    And storing thousands of images on your computer isn’t the best idea. Filling up your computer’s storage is going to slow it down majorly. So rather than overloading your laptop or computer, external hard drives can store all the photos you need. 

    Using an external hard drive also means that if your laptop fails you and dies unexpectedly, you don’t have to worry about your photos — they’ll be safe and sound on your hard drive. 

    What To Look For In An External Hard Drive

    If you’ve never bought an external hard drive before, there are a few things you need to look for in your search for the right one:

    • Storage capacity — your hard drive needs to be large enough to store all of your photos.

    • Price — some hard drives can be pretty pricey, and you don’t want to break the bank by investing in an overly
      expensive one. At the same time though, if a hard drive has a price tag that seems too good to be true, it probably is too good to be true.

    • Device Compatability — your hard drive needs to be compatible with your devices (mainly your camera and your laptop).

    • Portability — if you’re the type of photographer who likes to go for adventures in the wilderness, just you and your gear, you’ll need a hard drive that’s portable enough for you to tuck into a rucksack.

    The 10 Best External Hard Drives For Photographers

    1: Porsche Design 1TB External Hard Drive

    I thought I’d start with the hard drive that I use for most of my photos: the Porsche Design 1TB external hard drive. For me, 1TB is plenty of storage, and the sleek, lightweight and portable design makes it the perfect shape and size to take everywhere with me.

    If you need more storage than 1TB though, you can also purchase this hard drive with a storage capacity of up to 8TB, so it’s a great hard drive for professionals and amateurs alike.

    Pros

    • Large storage capacity (up to 8TB)
    • Sleek and portable design
    • Compatible with both PC and Mac
    • Automatic back-up software

    Cons

    • It’s a little pricey


    2: Seagate 1TB Backup Plus Slim USB 3.0 Portable 2.5 Inch External Hard Drive

    The Seagate 1TB Backup Hard Drive provides 1TB storage capacity and an NTFS driver for Mac. So you can easily use the Seagate 1TB Backup interchangeably between Mac and Windows computers. This Seagate device also provides the Seagate software with features that make it easier to backup data — your photos will be protected from accidental deletion. 

    Pros

    • Supports Android, iOS, and Windows
    • Available in 10 colors
    • Lightweight
    • User-friendly
    • Photos are protected from accidental deletion

    Cons

    • Slightly expensive
    • Can wear over time

    3: Kesu 2.5″ 120GB Ultra Slim Portable External Hard Drive 

    The Kesu Ultra Slim Hard Drive provides a total of 120 GB storage space.  It combines both USB 3.0 and 2.0 speeds to give you faster results. So if you want quick photo transfers, this is the device for you.

    Additionally, it just needs a simple, plug-and-play installation that makes it is easy to work. And as it’s formatted in ExFat, it can be used for most Windows, Linux, Mac, and Android OS computers. However, older devices may require reformatting, so if you have an older model camera or computer you can consult their customer services for more details.

    Pros

    • Affordable
    • Easy to install
    • It’s compatible with most devices
    • Three years warranty
    • Helpful customer service

    Cons

    • Eject drive does not work with Macbook air
    • Doesn’t work with smartphones or tablets

    4: Maxone 2.5″ Aluminum Portable External Hard Drive

    Maxone Aluminum Portable External Hard Drive does not need any software or additional power supply. It comes ready to use with any Windows and Mac OS device. You can connect your laptop and perform fast transfers of all your photos, videos, and other files. 

    However, it’s preferable that you connect with a USB 3.0 port for maximum speed as USB 3.0 transfers a file ten times faster than USB 2.0 with a speed of 5 GB/second. 

    The Maxone External Hard Drive also comes with a LED indicator, so you know when your device is connected and when the transfer is finished. 

    Pros

    • Relatively affordable
    • Three years warranty
    • Available in different colors, including a great rose gold colour
    • Fast transfer
    • Compatible with a range of devices

    Cons

    • Instructions are a bit hard to read

    5: Toshiba HDTB410EK3AA Portable External Hard Drive

    The Toshiba HDTB4 is a hard drive from a well-known brand, and you can buy this hard drive with a storage capacity of up to 3TB. It has a super high transfer speed with USB 3.0 and will transfer data on all Windows devices. 

    The package comes with a USB cable, a user manual, and a two-year warranty if you register your purchase at their website.

    Pros

    • Very lightweight
    • Recommended by users
    • Safe and reliable
    • Lots of storage (3TB)
    • Well-known brand

    Cons

    • Slightly expensive
    • Only compatible with Windows

    6: Seagate Expansion USB 3.0 Portable 2.5 Inch External Hard Drive

    Another hard drive from Seagate, this external storage device comes with 1TB, 2TB, or 4TB of storage capacity. Simply drag and drop your photos and videos onto the Seagate Expansion Hard Drive to save all your important data. As you can view, save, and share multimedia files, this device can be used for multiple purposes. 

    The device uses a simple USB connection, so there is no need for main plugs. Also, the device is compliant with Windows 7, 8, and 10 but can be used for Mac computers with an adapter or by reformatting. 

    Pros

    • Two-year warranty
    • Can also use for Xbox or PS4 video games
    • Large memory (up to 4TB)
    • Easy to install

    Cons

    • Slightly expensive
    • Only for Windows computers

    7: Sonnics 320GB Blue External Portable Hard Drive

    The Sonnics Blue Hard Drive has a 320GB storage with a USB transfer speed of 5GBs/second. It does not need any external power source as it works with a USB 3.0 or 2.0 port. Furthermore, it is formatted to FAT32, which is compatible with Windows and Mac OS systems. You can also use the Sonnics Hard Drive to view your photos and videos on larger television screens as it is compatible with most smart TVs. 

    Pros

    • One year warranty
    • Relatively affordable
    • Lightweight
    • High user rating

    Cons

    • Doesn’t include a user manual
    • Only 320GB of storage

    8: Bipra S2 2.5 inch USB 2.0 NTFS Portable External Hard Drive

    The Bipra S2 NTFS Portable Hard Drive is available in multiple storage capacities with the highest being 750GB. It’s a reasonably priced answer to your storage problems. It’s formatted to NTFS so it can support multiple Windows and Mac devices. The Bipra device is USB powered and can be connected to your device with a simple plug-and-play. 

    Pros

    • Affordable
    • No power source needed
    • Easy to use
    • Available with multiple storage capacities

    Cons

    • No warranty specified
    • Slightly heavy for a hard drive

    9: WD Elements Portable External Hard Drive

    The good thing about the WD Elements External Hard Drive is that it has two layers of protection for your data. Transfer all your images to this device by installing the WD SmartWare Pro software. The software will automatically save your photos and backup your cloud data online. 

    The device requires USB compatibility, so it is supported by all Windows 10 and 8.1 computers. For other versions, it needs to be reformatted. 

    Pros:

    • High user rating
    • Free trial available for software
    • Good customer service
    • Fast transfer
    • Large storage capacity (2TB)

    Cons:

    • Requires reformatting for Mac OS
    • No warranty specified

    1o: Seagate 8TB Backup Plus Hub USB 3.0 Desktop 3.5 Inch External Hard Drive

    The Seagate 8TB backup is the perfect external hard drive for serious photographers. It provides 8000 GBs of storage space. Like the Seagate 1TB, the Seagate 8TB Backup comes with the Seagate Dashboard software or mobile app allowing you to use different tools. For example, you can schedule syncing to backup data automatically at a specific time. You can also make use of a two-month free subscription to Adobe Creative Cloud when you sign up for the Seagate software.  

    Pros:

    • One year warranty
    • Great customer support
    • User-friendly
    • Also, available in different colours
    • Two-month free subscription to Adobe Creative Cloud when you sign up for Seagate software
    • It has all the storage capacity you could ever need

    Cons:

    • Expensive
    • Heavyweight

    11: SanDisk Extreme Portable SSD

    You’ve probably used SanDisk memory cards before, but now you can use a SanDisk external hard drive too. With a transfer speed of about 550 GB/ second, the SanDisk Extreme Portable SSD provides fast transfer of all high-resolution pictures and videos. You can use this device on all Windows 10, 8, and 7 computers as well as Mac OS 10.4 and above. 
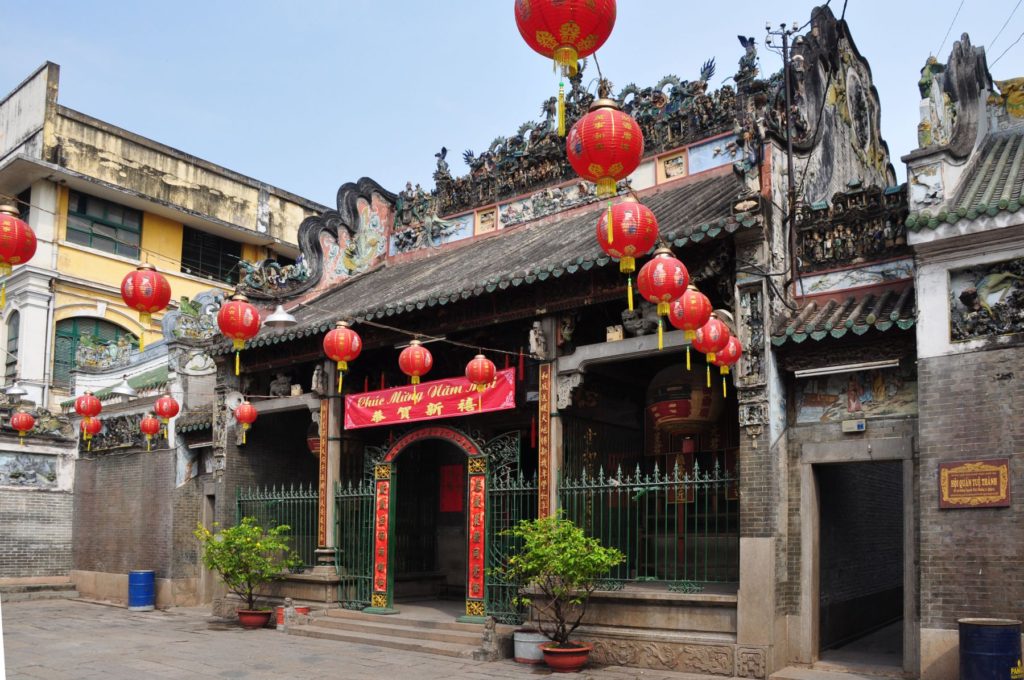
    The SanDisk hard drive is extremely durable with special impact-resistant and waterproof technology, so it can withstand whatever adventure you throw at it and you can rest assured that it won’t lose quality over time. It comes with an OTG cable, USB hub, memory card reader, and more. You can buy this hard drive with a storage capacity of 250GB, 500GB, 1TB, or 2TB. 
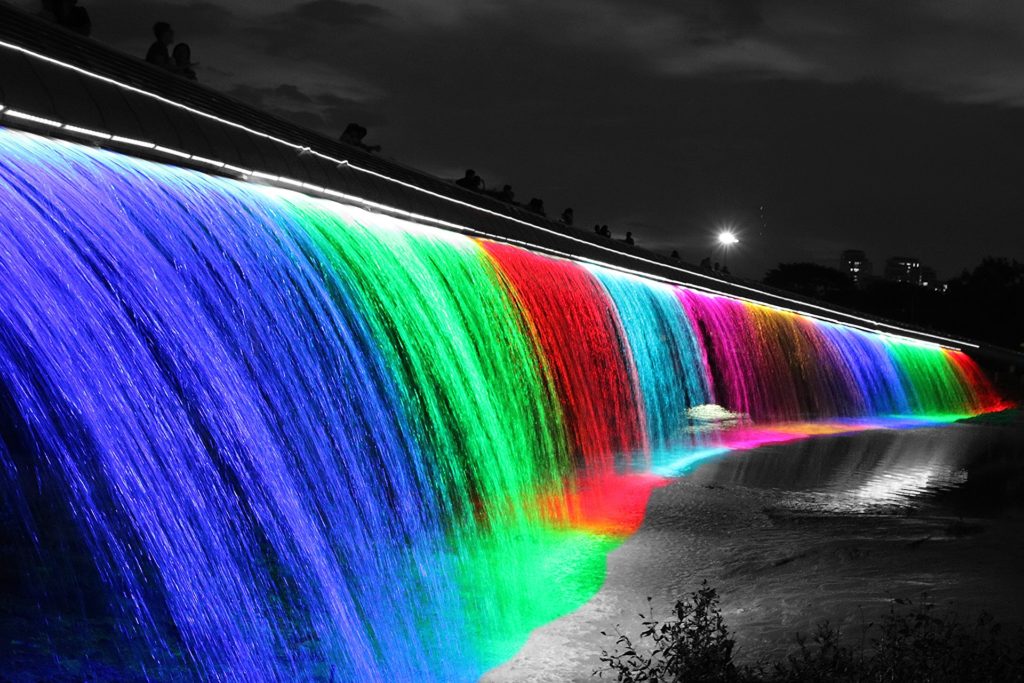
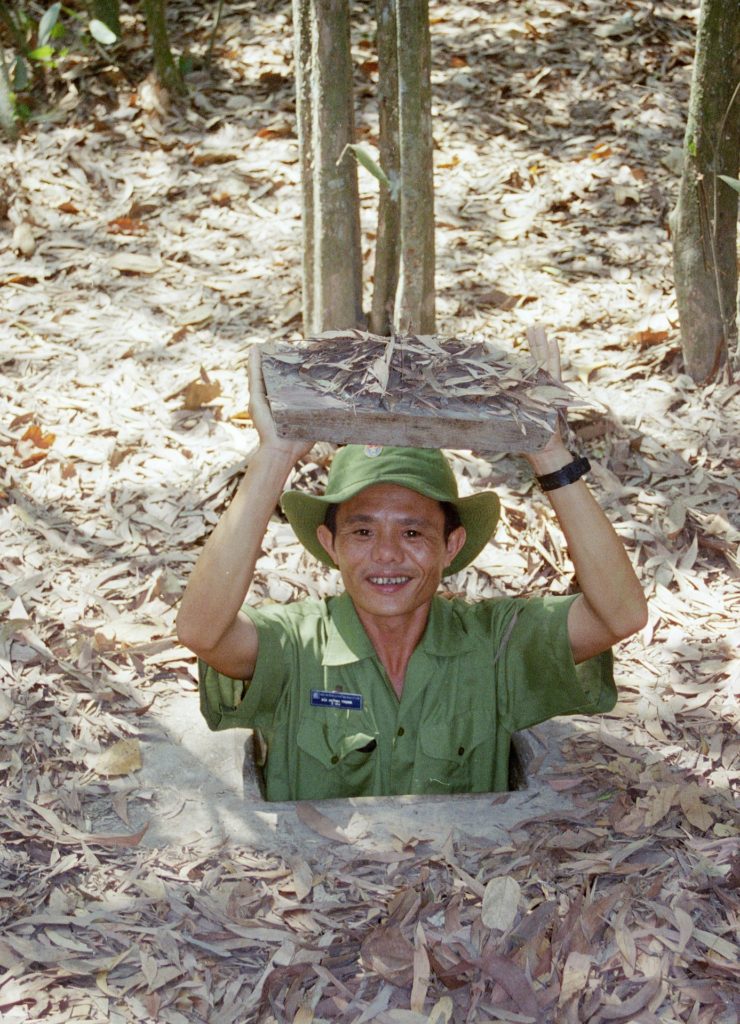
    Pros:

    • Waterproof
    • Dust resistant
    • High user rating
    • Large storage capacity (up to 2TB)
    • Compatible with most devices
    • Fast transfer speed

    Cons:

    • No warranty specified
    • Expensive