Author: Hannah Leigh

  • Everything You Need To Know About Tuk Tuks in Siem Reap

    Everything You Need To Know About Tuk Tuks in Siem Reap

    You might be used to Grab taxi or Uber, but in Siem Reap, it’s all about tuk tuks. Seriously, they’re everywhere, and they’re the main method of transport for most tourists.

    Now I don’t know about you, but before I visited Siem Reap, I’d never been in a tuk tuk, and if I’m quite honest I wasn’t entirely sure what they were.

    But after spending a number of weeks in Siem Reap, traveling by tuk tuk at least once a day, I came to love them.

    Here’s everything you need to know about traveling by tuk tuk in Siem Reap.

    What is a tuk tuk?

    A tuk tuk is a kind of open carriage with two wheels that’s attached to the driver’s motorbike. It can seat up to four people, and it’s the main form of transport in Siem Reap.

    Personally, after being in Siem Reap for a few days, I decided that tuk tuks were by far the best way to travel. You get to take in the fresh air, and enjoy the view. Plus, the lack of a seat belt gave me all the adventure I could hope for in one day.

    Hiring a Siem Reap Tuk Tuk driver

    You don’t need to worry about where to find a tuk tuk driver in Siem Reap, they’ll find you. Tuk tuk drivers are everywhere around the old market and the temples, so wherever you are and wherever you’re going, you’ll be spoilt for choice.

    If you’re staying in a hotel, it’s worth asking if they offer a free tuk tuk service, as a lot of the bigger hotels offer free tuk tuks to the old market area.

    If you’re hoping to visit the temples, you’ll want to hire a Siem Reap tuk tuk driver for the day. This way you’ll pay a set rate, and they can work out the best route based on what you want to see.

    Siem Reap Tuk Tuk Prices 2018

    The cost of a tuk tuk journey will depend on how far you’re going and what tuk tuk you’ve chosen.

    There are a few different tuk tuks around the city that have been pimped up, like the Bat Mobile Tuk Tuk and the entirely pink and fluffy tuk tuk, and naturally these cost more than your standard, non-pimped tuk tuk.

    But for a journey from one part of the main town to another, your ride should be between $2 and $5. And it’s not like taxis, where the cost goes up after or before a certain a time. So if you’re coming back from pub street in the early hours of the morning you’ll pay the same sort of price. To give you a better idea, it cost me $2-3 each day to travel 1km away from the old market.

    For day trips to the temples though you’ll pay considerably more, because they’re quite a way out and your driver will be with you all day.

    Tuk tuk prices for Angkor Wat and other temples generally range between $30 and $50. But they’ll drive to a range of different temples of your choice, help you plan your day, recommend restaurants and some even supply you with ice cold drinking water throughout the day.

    If you want to get the best tuk tuk price, it’s worth finding a driver and staying loyal. If tuk tuk drivers know you’re planning on using them for most of your day trips they’ll often offer you a better deal.

    Angkor Wat: Should you go by tuk tuk or car?

    If you’ve never been in a tuk tuk before it can be tempting to go with what you know and pay for a car and a driver. But this is going to cost you more and it’s not actually as enjoyable.

    Tuk tuks are maybe a third of the price of cars in Siem Reap, and you’ll get the experience of traveling like a local and feeling the wind against your face as you race through the bumpy streets.

    Best tuk tuk in Siem Reap

    Most tuk tuks are basically the same – it’s a motorbike with a carriage attached. But if you’re looking for a truly unique experience, you could always go for one of the novelty tuk tuks.

    There are movie-themed tuk tuks, colour-themed tuk tuks, and simply tuk tuks with booming sound systems (and before you ask, yes you can plug in your own phone and choose your own music).

    Tuk Tuk safety

    I’m a great advocate of tuk tuks, but I’ll admit, they’re not as safe as cars. They’re more prone to accidents, mainly because they’re more unstable and can’t cope with bad roads as well as cars.

    However, they’re great for short rides around the city and to the temples, just maybe consider a car for the further out temples like Beng Mealea and Phnom Kulen National Park.

    You can also make your tuk tuk ride much safer just by keeping your wits about you.

    Tuk tuks are a bumpy ride, and there’s nothing really to keep you or your belongings in. So hold on to your hats and sunglasses, and try not to drop anything valuable whilst you’re on the go.

    You should also always clarify a price before getting in, you don’t want to get ripped off, and a tuk tuk driver will always stick to the quote he gave you.

    Tuk Tuk tipping etiquette

    People often ask if you should tip tuk tuk drivers, but the short answer is no, not usually. Tipping is a western tradition, and most tuk tuk drivers don’t expect it, not for short one-off trips anyway.

    It’s okay to say ‘keep the change’ and drivers won’t be offended by a tip at all, just know that you’re not obliged to, and you won’t be frowned upon if you don’t.

    However, if you’ve hired one driver for most days of your trip, and they’ve treated you well, it’s usually the done thing to give them a tip at the end of your stay. It doesn’t have to be a lot, maybe $15-$30 at the end of your trip.
  • The 6 Best Packing Cubes For The Osprey Farpoint 40

    The 6 Best Packing Cubes For The Osprey Farpoint 40

    Packing everything you need can be one of the most stressful parts of traveling, especially if you’re visiting multiple destinations. Packing and unpacking at every place takes time and effort, and then there’s the frustration of not knowing where abouts anything is in your backpack.

    If you want to stay organised throughout your backpacking trip, you need to find an efficient packing method.

    You’ve probably seen packing cubes around, there’s quite a few of them on the market right now. But if you haven’t yet tried them out, honestly, once you’ve used them once, you won’t ever travel without them again.

    The trouble is most packing cubes are best suited to suitcases, so in this post we’ll look at six of the best packing cubes for the Osprey Farpoint 40 backpack, and other similar bags.

    The 6 Best Packing Cubes For Backpacks Like The Osprey Farpoint 40

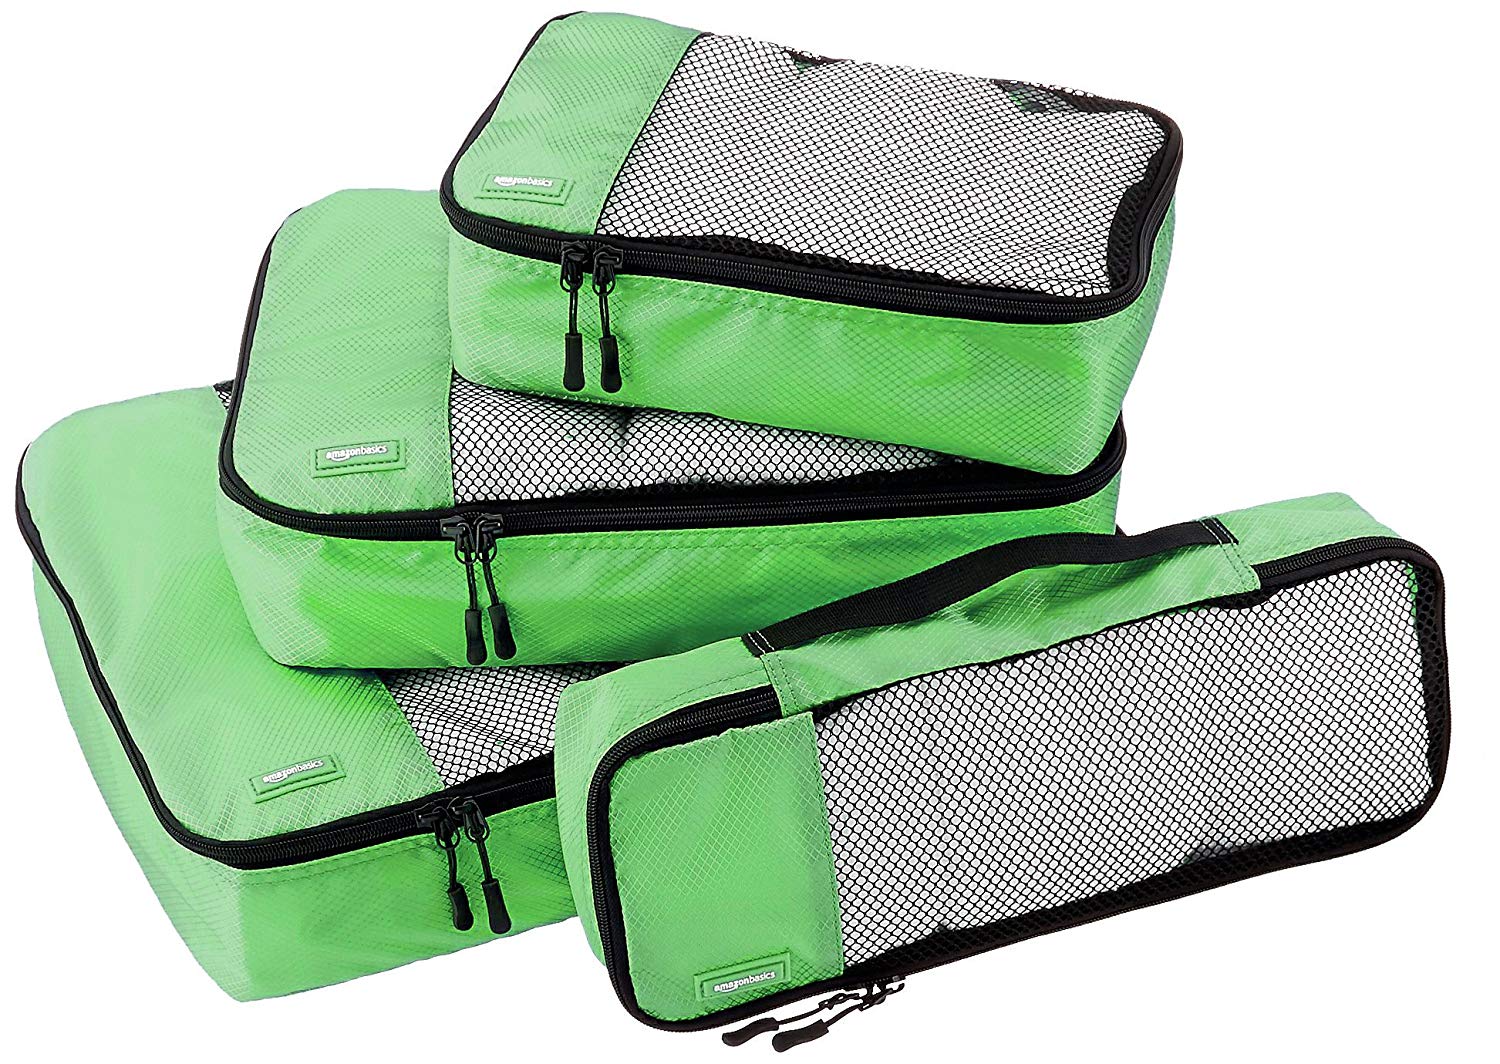
    1: AmazonBasics 4-Piece Packing Cube Set

    Amazon Basics products are usually pretty reliable – you always know exactly what you’re getting, and you get it for a great price too. And these packing cubes are no different.

    In this set you’ll get one small, one medium and one large cube. Then the fourth piece is a long thin rectangle shape that’s perfect for a rolled towel, blanket, bottle of wine, or as us backpackers normally do, you can also jam various items of clothing into it.

    The cubes all have a double zipper, which is great for quick access, and mean the zipper is less likely to snag.

    The mesh design of these cubes makes it easy to exactly what’s inside each cube, so no more digging around blindly in your bag, pulling out items that may or may not be what you’re looking for.

    Pros

    • Mesh Design
    • Durable  
    • Gentle Interior
    • Machine Washable
    • Great value

    Cons

    • Privacy – mesh design means your traveling companions can also see what’s in your cubes

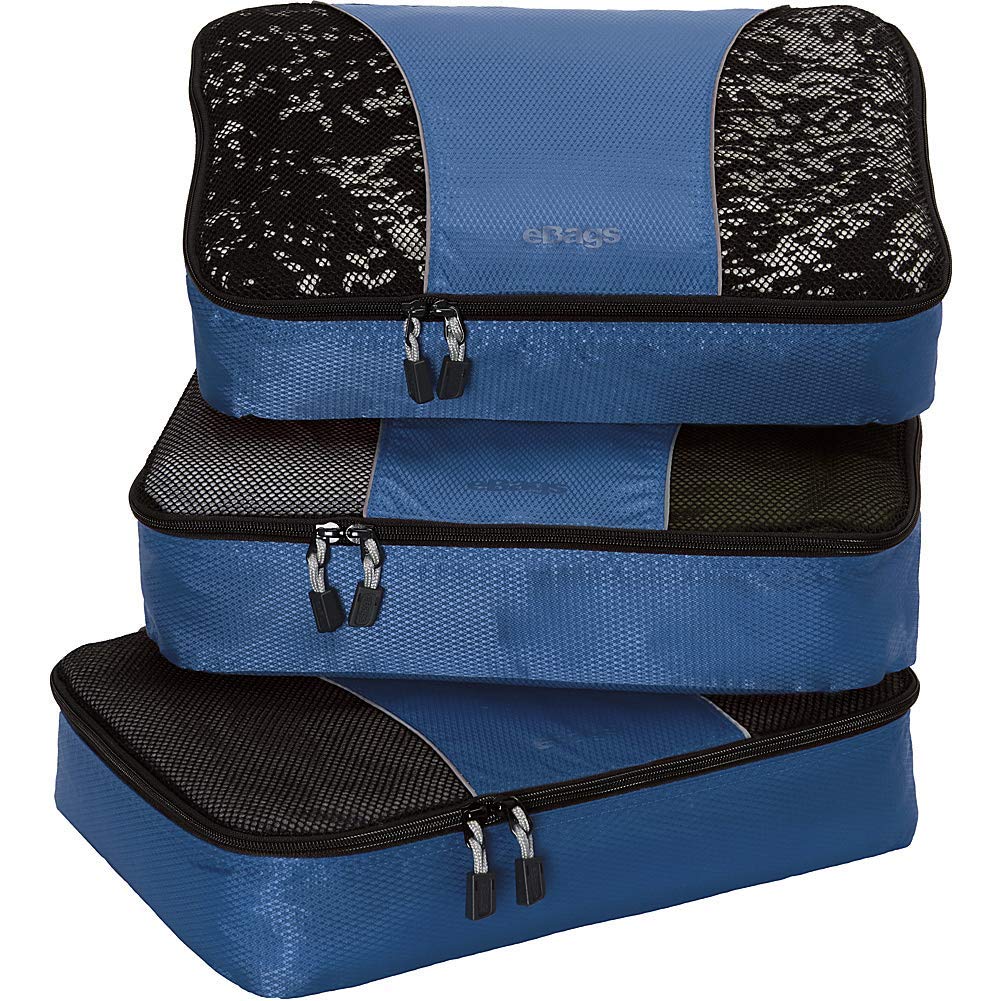
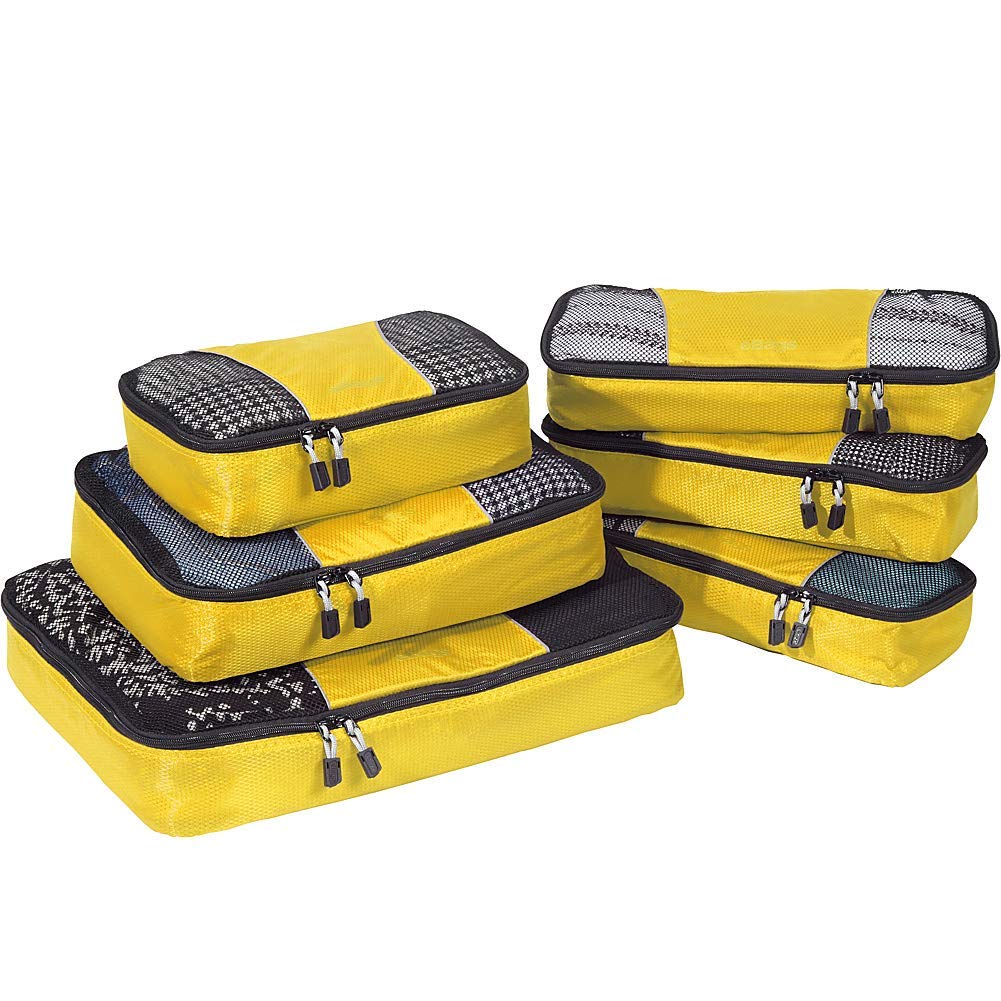
    2: eBags Packing Cubes 3pc Set

    This 3-piece set again has a mesh design, making it easy to find things at a glance, but these cubes also feature a ‘self-healing’ zipper. This basically means your zipper isn’t going to get damaged, regardless of how often you use it.

    The exterior material of these cubes is weatherproof, and isn’t going to let any dirt in, which is great if you plan on doing a lot of outdoor activities like camping. The inside material though is soft, which is great for more delicate items.

    The cubes are also machine washable, which is definitely a handy feature. We’re all guilty of shoving our dirties back in our bag with our clean clothes, and after a while, packing cubes can start to smell a little grim.

    The main issue with this set though is the fact that it only comes with three cubes. The cubes will fit perfectly in your Osprey Farpoint 40 or other similar backpack, and you’ll have plenty of room spare as well. If you’re not taking too much with you on your trip, or if you only want to pack some of your clothes in cubes, this shouldn’t be too much of an issue. Otherwise, you might want to buy a couple of sets.

    Pros

    • Lifetime warranty
    • Mesh design
    • Machine washable
    • “Self-Healing” zippers
    • Protects your clothes

    Cons

    • Less total packing space with only three cubes
    • Privacy – mesh design means your traveling companions can also see what’s in your cubes

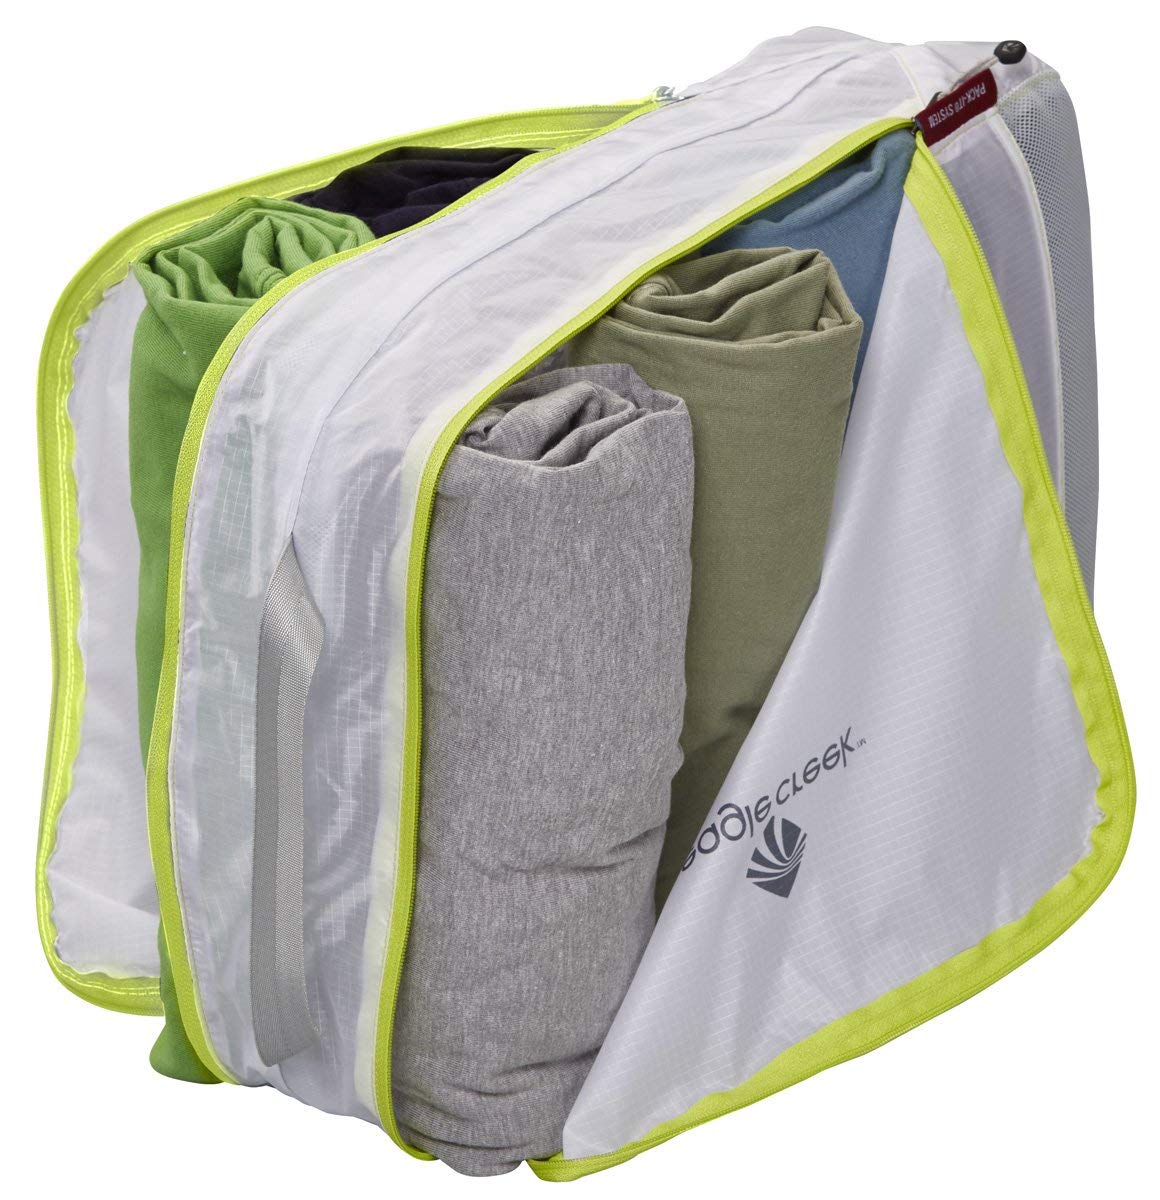
    3: Eagle Creek Pack It Specter Clean Dirty Cube

    This is one of the most innovative packing cubes on the market, with the cube split into two sections, you can use one section for your clean items and the other for your dirty laundry.

    The divider prevents any dirt or smell from crossing into the clean section. Even if you pack smelly wet clothing, you’re not going to smell it from outside the cube, and the smell won’t affect your clean clothes.

    The materials used are specifically chosen for outdoor use, so this cube can take a battering. It’s also waterproof, and odour-proof.

    Eagle Creek is also big on environmentally friendly materials and products, so you know that by buying this cube, you’ll be doing your bit for the environment.

    This may only be a single set, but you can fit loads in it, and if you need any extra cubes, Eagle Creek also have a set of regular packing cubes, and a set of three pack-it dirty cubes if you want more than one.

    Pros

    • Simple Design
    • Space for both clean and dirty clothes
    • Waterproof and odour-proof
    • Great Addition to other Packing Cubes
    • Portable Handle
    • Keeps Moisture in or out
    • Green Company

    Cons

    • Heavy Fabric
    • Only one Compartment

    4: eBags Packing Cubes 6pc Value Set

    This 6 piece packing cube set is great value for money, with enough cubes for you to pack your clothes by colour, type, size – whatever you fancy!

    With more pieces, you can make sure your backpack is better organised. Everything will have its own place. The only troule with more cubes is that it makes it easier to overpack!

    Pros

    • Value for money
    • 6 pieces as opposed to the usual 3 or 4
    • Durable
    • Lifetime Warranty

    Cons

    • Smaller individual cubes
    • Snug fit in backpack
    • More to keep track of on the road

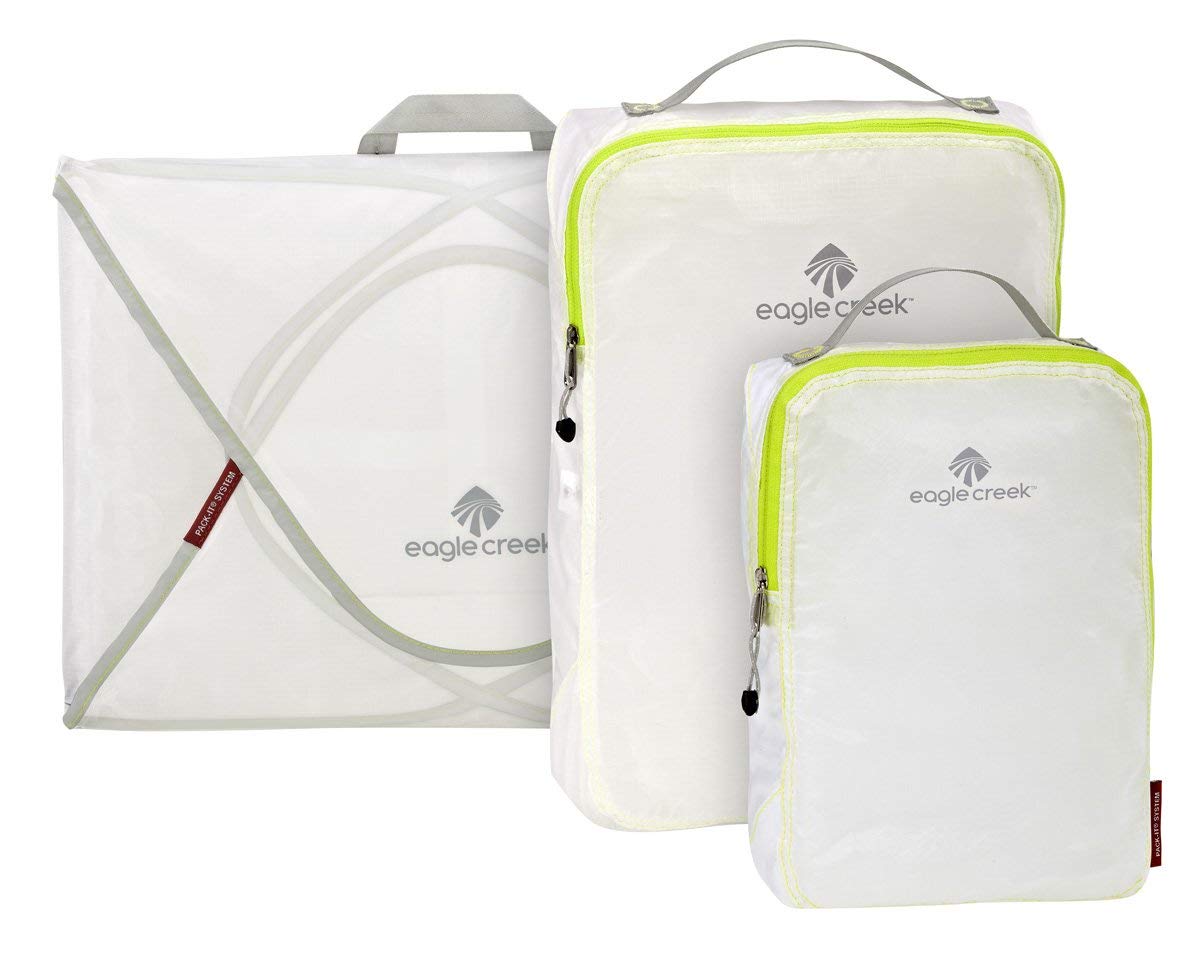
    5: Eagle Creek Pack-It Specter Starter Set

    This Eagle Creek packing cube set is great for those who want a variety of different cubes. It comes with different shaped cubes, and even a garment bag that can be folded, keeping your clothes neat and crease-free.

    These cubes all have handles, so you can easily grab them and keep hold of them (which is more useful than you might think – especially if you’re asked to unpack your bag at airport security).

    Pros

    • Versatility  
    • Light-Weight Fabric  
    • Great for Backpacking Beginners

    Cons

    • Fabric durability – cubes can get damaged when washed on high temperatures
    • Bulky

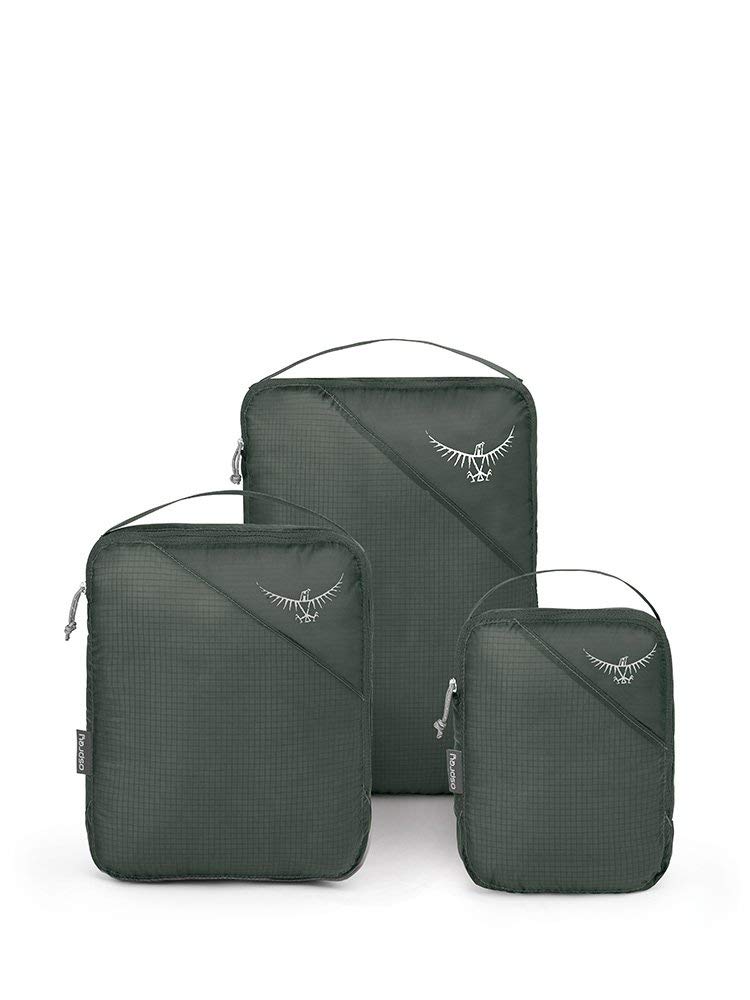
    6: Osprey Packing And Travel Sets – the best packing cubes for the Osprey Farpoint 4o

    If you really want the best money can buy when it comes to finding perfect packing cubes for your rucksack, it’s worth sticking with the Osprey brand.

    As well as rucksacks, Osprey have brought out several different travel organisers and packing cube sets, specifically designed to accompany their rucksacks. So getting an Osprey packing cube set would be like giving your rucksack tailor made compartments.

    Pros

    • Specifically designed to fit the Osprey Farpoint 40 and other similar rucksacks
    • Immaculate quality – you can throw these things around as much as you want, they’re not going to break or tear
    • Stylish appearance – the trouble with packing cubes is that you can tell the cheap from the high quality, and these certainly look like they’re high quality
    • There’s a range of different organisers and packing cubes within the Osprey packing range, so you can choose the packing cubes that are best for you

    Cons

    • Sticking with a brand you trust can come at a cost, these packing cubes are slightly more expensive than their alternatives.

    So to sum up…

    Packing cubes can definitely transform the way you travel, so it’s worth investing in a set you get on with. The ultimate packing cubes for the Osprey Farpoint 40, and other similar rucksacks are definitely the Osprey cubes. They’re specifically designed to fit snugly in Osprey backpacks, and they’re made with top quality material.

    If you’re just looking for a kit that can separate your clean from your dirties, the Eagle Creek clean dirty cube is probably best for you.

    However, if you’re looking for a good set of packing cubes that can help you organise your clothes and gear, I’d suggest the Amazon Basics 4-piece set. This has everything you need for a small trip, and it’s great value for money.

    Whichever cubes you go for, they’ll make your Osprey Farpoint 40 much more organised, giving you different compartments. The same goes for other similar backpacks. Trust me when I say, once you’ve used packing cubes, you won’t want to go back to one-compartment backpacks without them.

  • The Ultimate Guide To Road Trippin’ With A GoPro: GoPro Tips & Tricks

    The Ultimate Guide To Road Trippin’ With A GoPro: GoPro Tips & Tricks

    If you’re heading out on a road trip, and you want to capture some of your journey, whether for a travel vlog, to show friends and family or just for fun, you NEED to take a GoPro with you.

    Thanks to their size and the different available mounts, you can mount them almost anywhere in or on your car. So you can get unique angles of the journey, the car, the driver and the passengers. You’ll be set up for your very own Top Gear special.

    Before you hit the road with your GoPro though, here are 13 GoPro driving tips to help you capture the best possible driving footage. Or if you were hoping to use your GoPro more as a safety measure, like a dash cam, we’ve got tips for that too!

    The Best GoPro For Road Trips

    So if you want to capture some quality footage of your road trip, you’ll need to find the best GoPro for the job.

    GoPros have come a long way in recent years, which means there’s quite a few big differences between the different models.

    It’s easy to get drawn in by cameras that offer the highest resolution, but for road trip driving footage, you also need to consider frame rate.

    If you want to get clear shots of the road, the scenery and the moving car, you’ll need a GoPro that can shoot in a high resolution at a high frame rate. And if you have to sacrifice one or the other, sacrifice a bit of resolution.

    For example, if you’ve got the option of 4K at 10fps, or 2.7k at 60fps, in this case you want to prioritize frame rate.

    When you’re on the road you’re going to be moving pretty fast (hopefully, unless traffic slows you down). And for your GoPro footage to look smooth and clear, you’ll need that higher frame rate.

    GoPro Hero 7 Black – The Ultimate Road Trip Camera

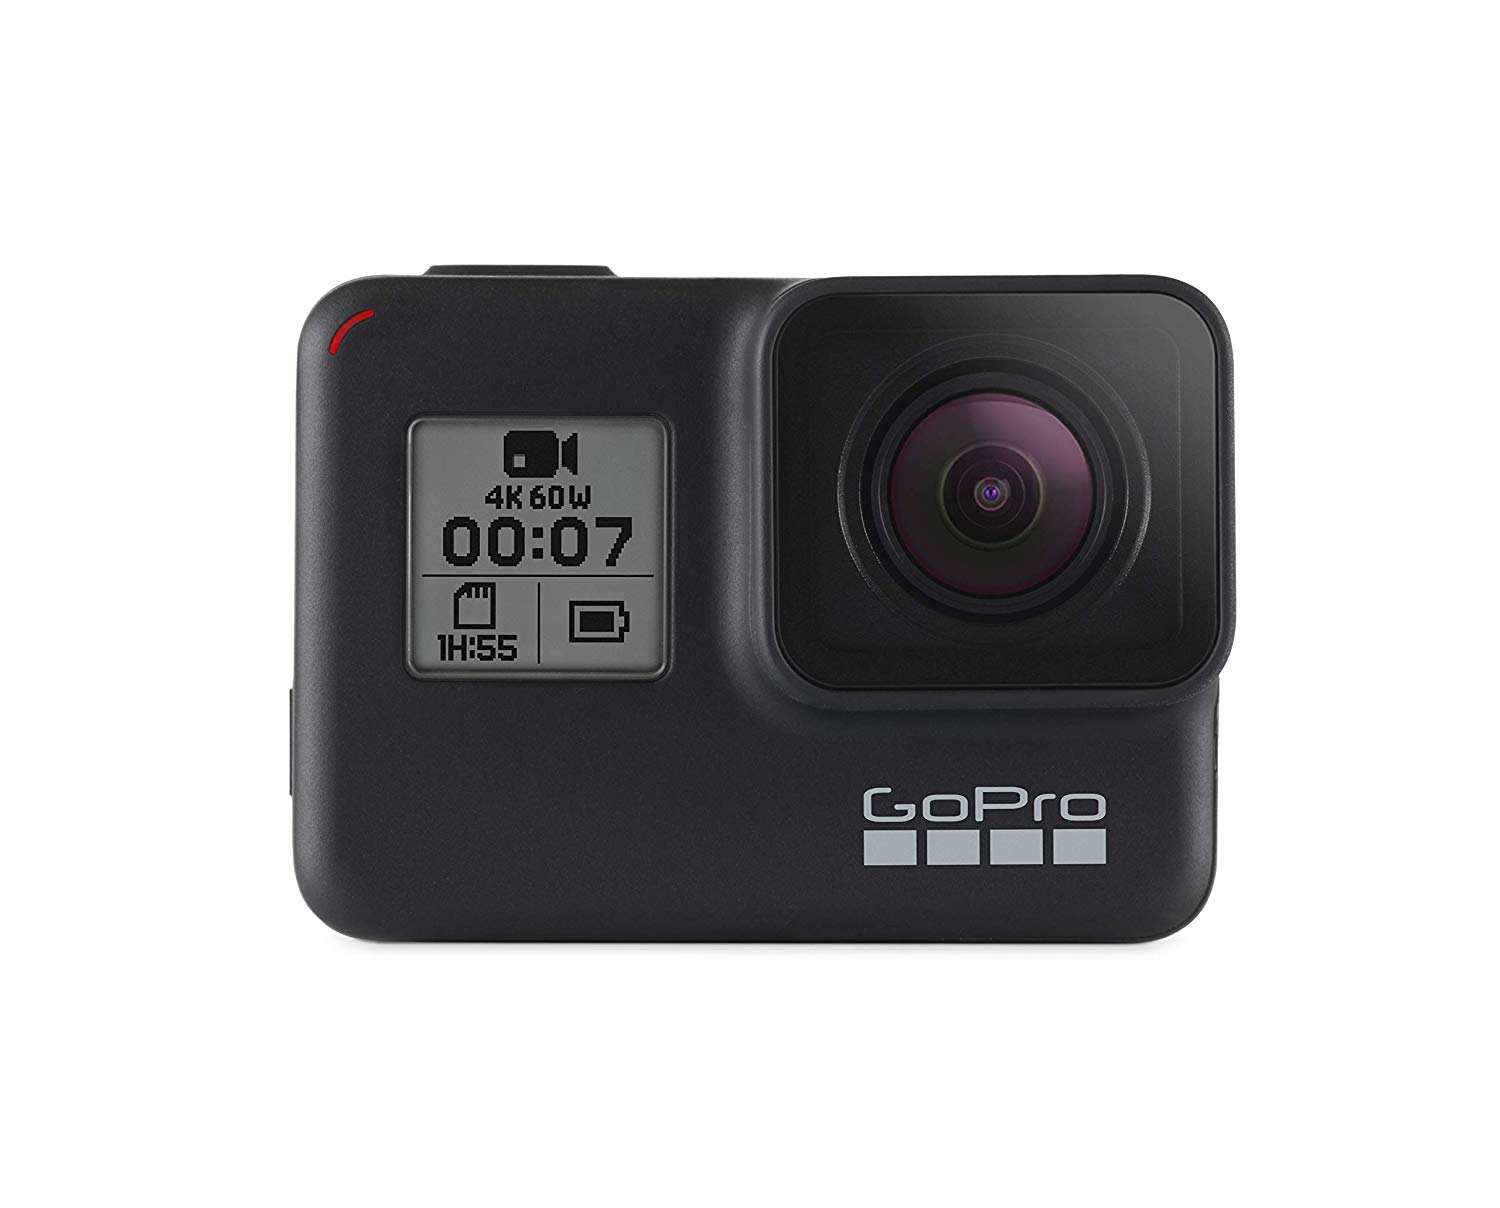
    If you want the very best GoPro model to take on your road trip, it has to be the GoPro Hero 7 Black. This new release is a huge improvement on the other GoPros, and as well as being great fun to use, it’s going to create professional looking, top quality road trip videos.

    In terms of 4K, it can shoot at 60fps, same as the Hero 6, so there’s no real change there. But if you wanted a really high frame rate, you can shoot in 2.7K at 120fps. You probably wouldn’t opt for 120fps for standard footage, because of motion blur, but this is great if you want to slow down your footage later.

    The Hero 7 also has the best stabilisation we’ve seen on a GoPro yet. Hyper Smooth will record, well, hyper smooth footage, even on the bumpiest of roads. So you can even go off-roading, and still get perfect footage.

    The stabilisation even works whilst you’re live streaming. That’s right, you can live stream your road trip videos right to Facebook or Instagram.

    The voice control is also a great feature for those on a solo road trip, as you’ll be able to start and stop your camera recording, and even change settings or take a picture, all without taking your hands off the wheel.

    The waterproof and shockproof nature of the Hero 7 means that you really can mount it anywhere on the car, even on the exterior, in the rain.

    GoPro Hero 6 – The Second Best GoPro For Road Trips

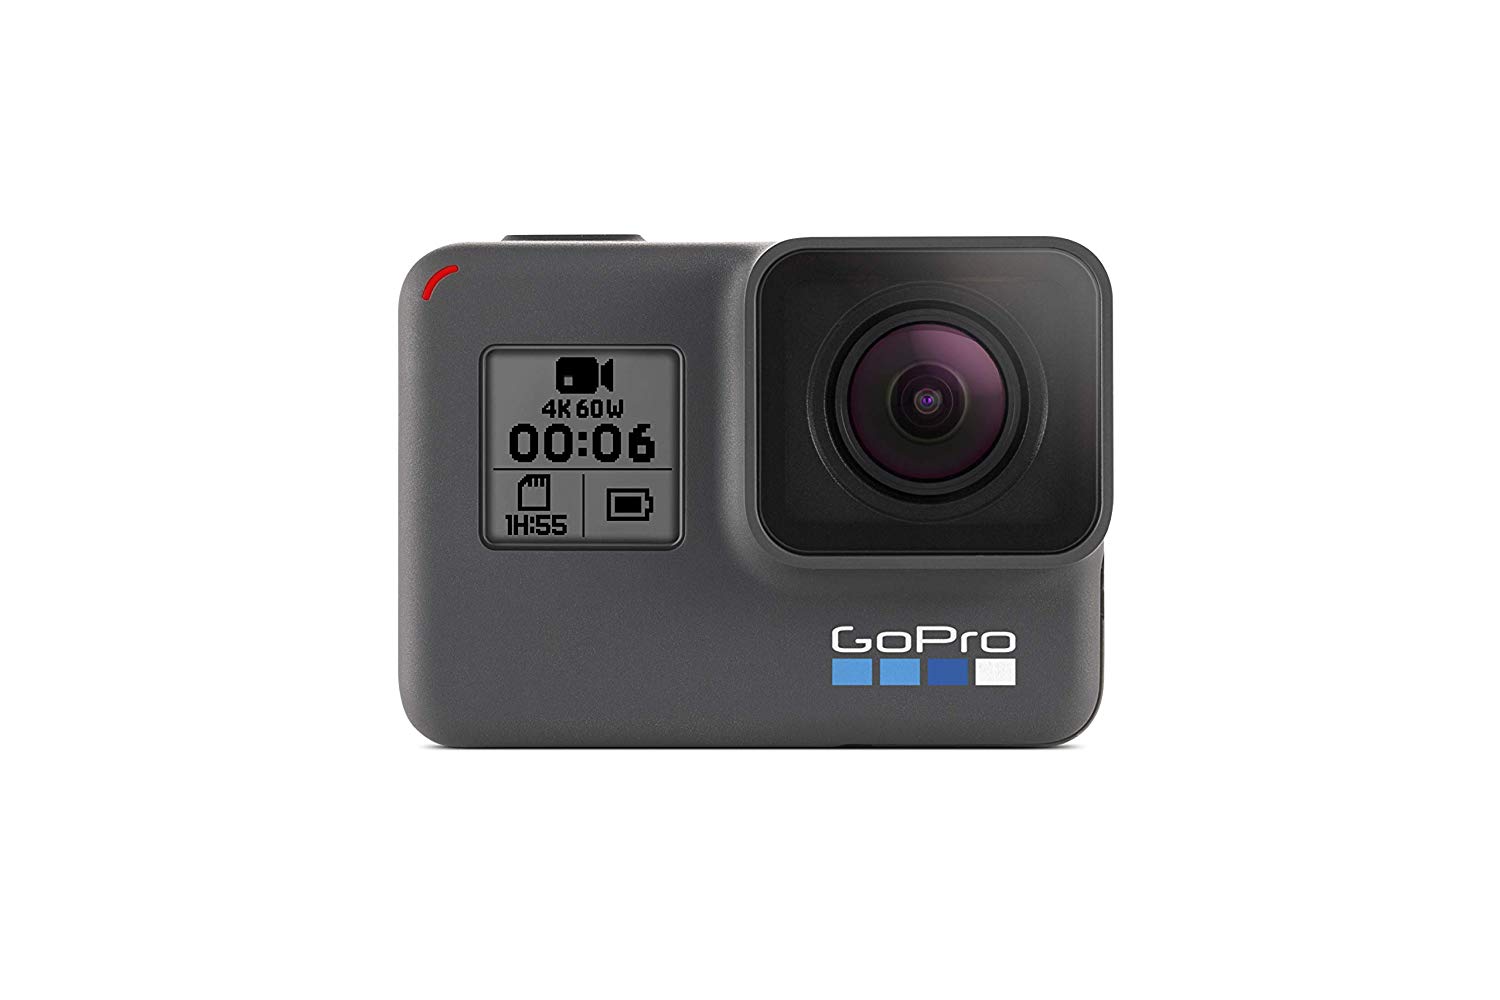
    The Hero 6 takes it one step further, shooting in 60fps in 4K, which gives you the best of both worlds. It also has some good image stabilisation, which make the bumps in the road less of an issue.

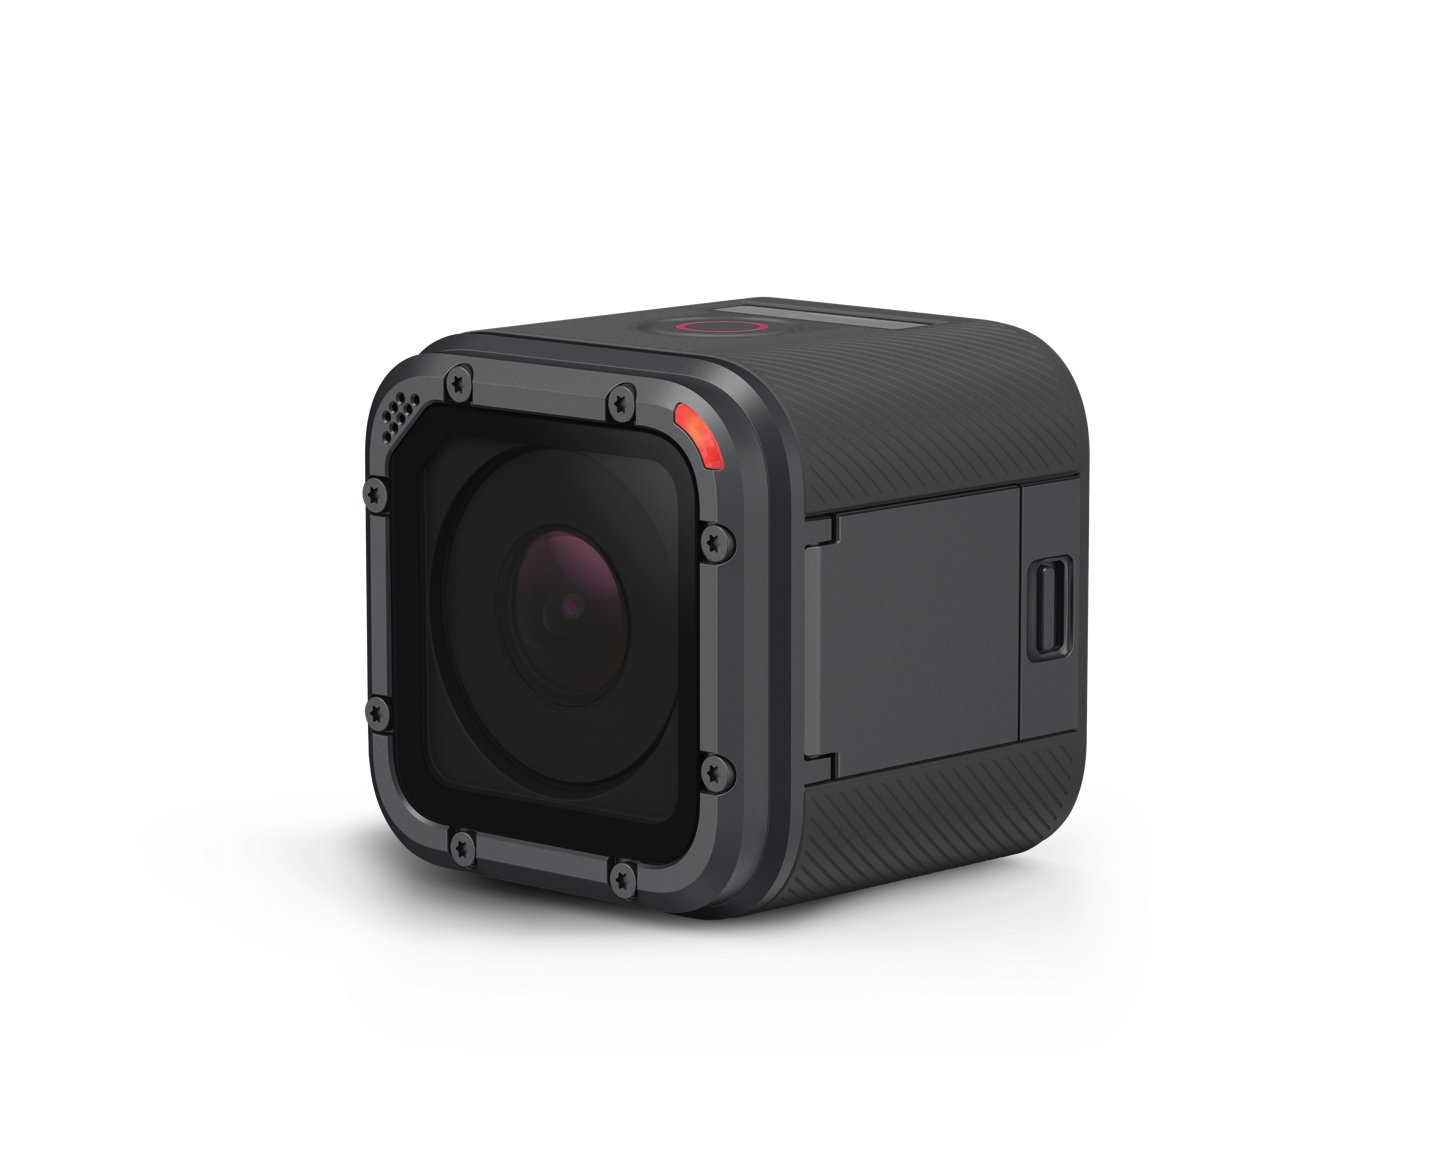
    The Best Budget GoPros For Road Trips: Hero 4 Black, Hero 5 and Hero 5 Session

    I’ve grouped these GoPro cameras together because they can all film with a frame rate of 60fps at 1440p, so they’re all going to give you more than adequate footage.

    These models are also much more affordable than the latest GoPro, and whilst the footage won’t be as stable, you can still capture some great footage and artistic shots.

    9 GoPro Road Trip Tips

    1. Mix up your angles and mounting positions

    If you’re hoping to create an interesting film or vlog from your road trip, the last thing you want to do is just stick your GoPro on the dashboard and leave it there for your whole trip. No one’s going to watch hours of the same thing.

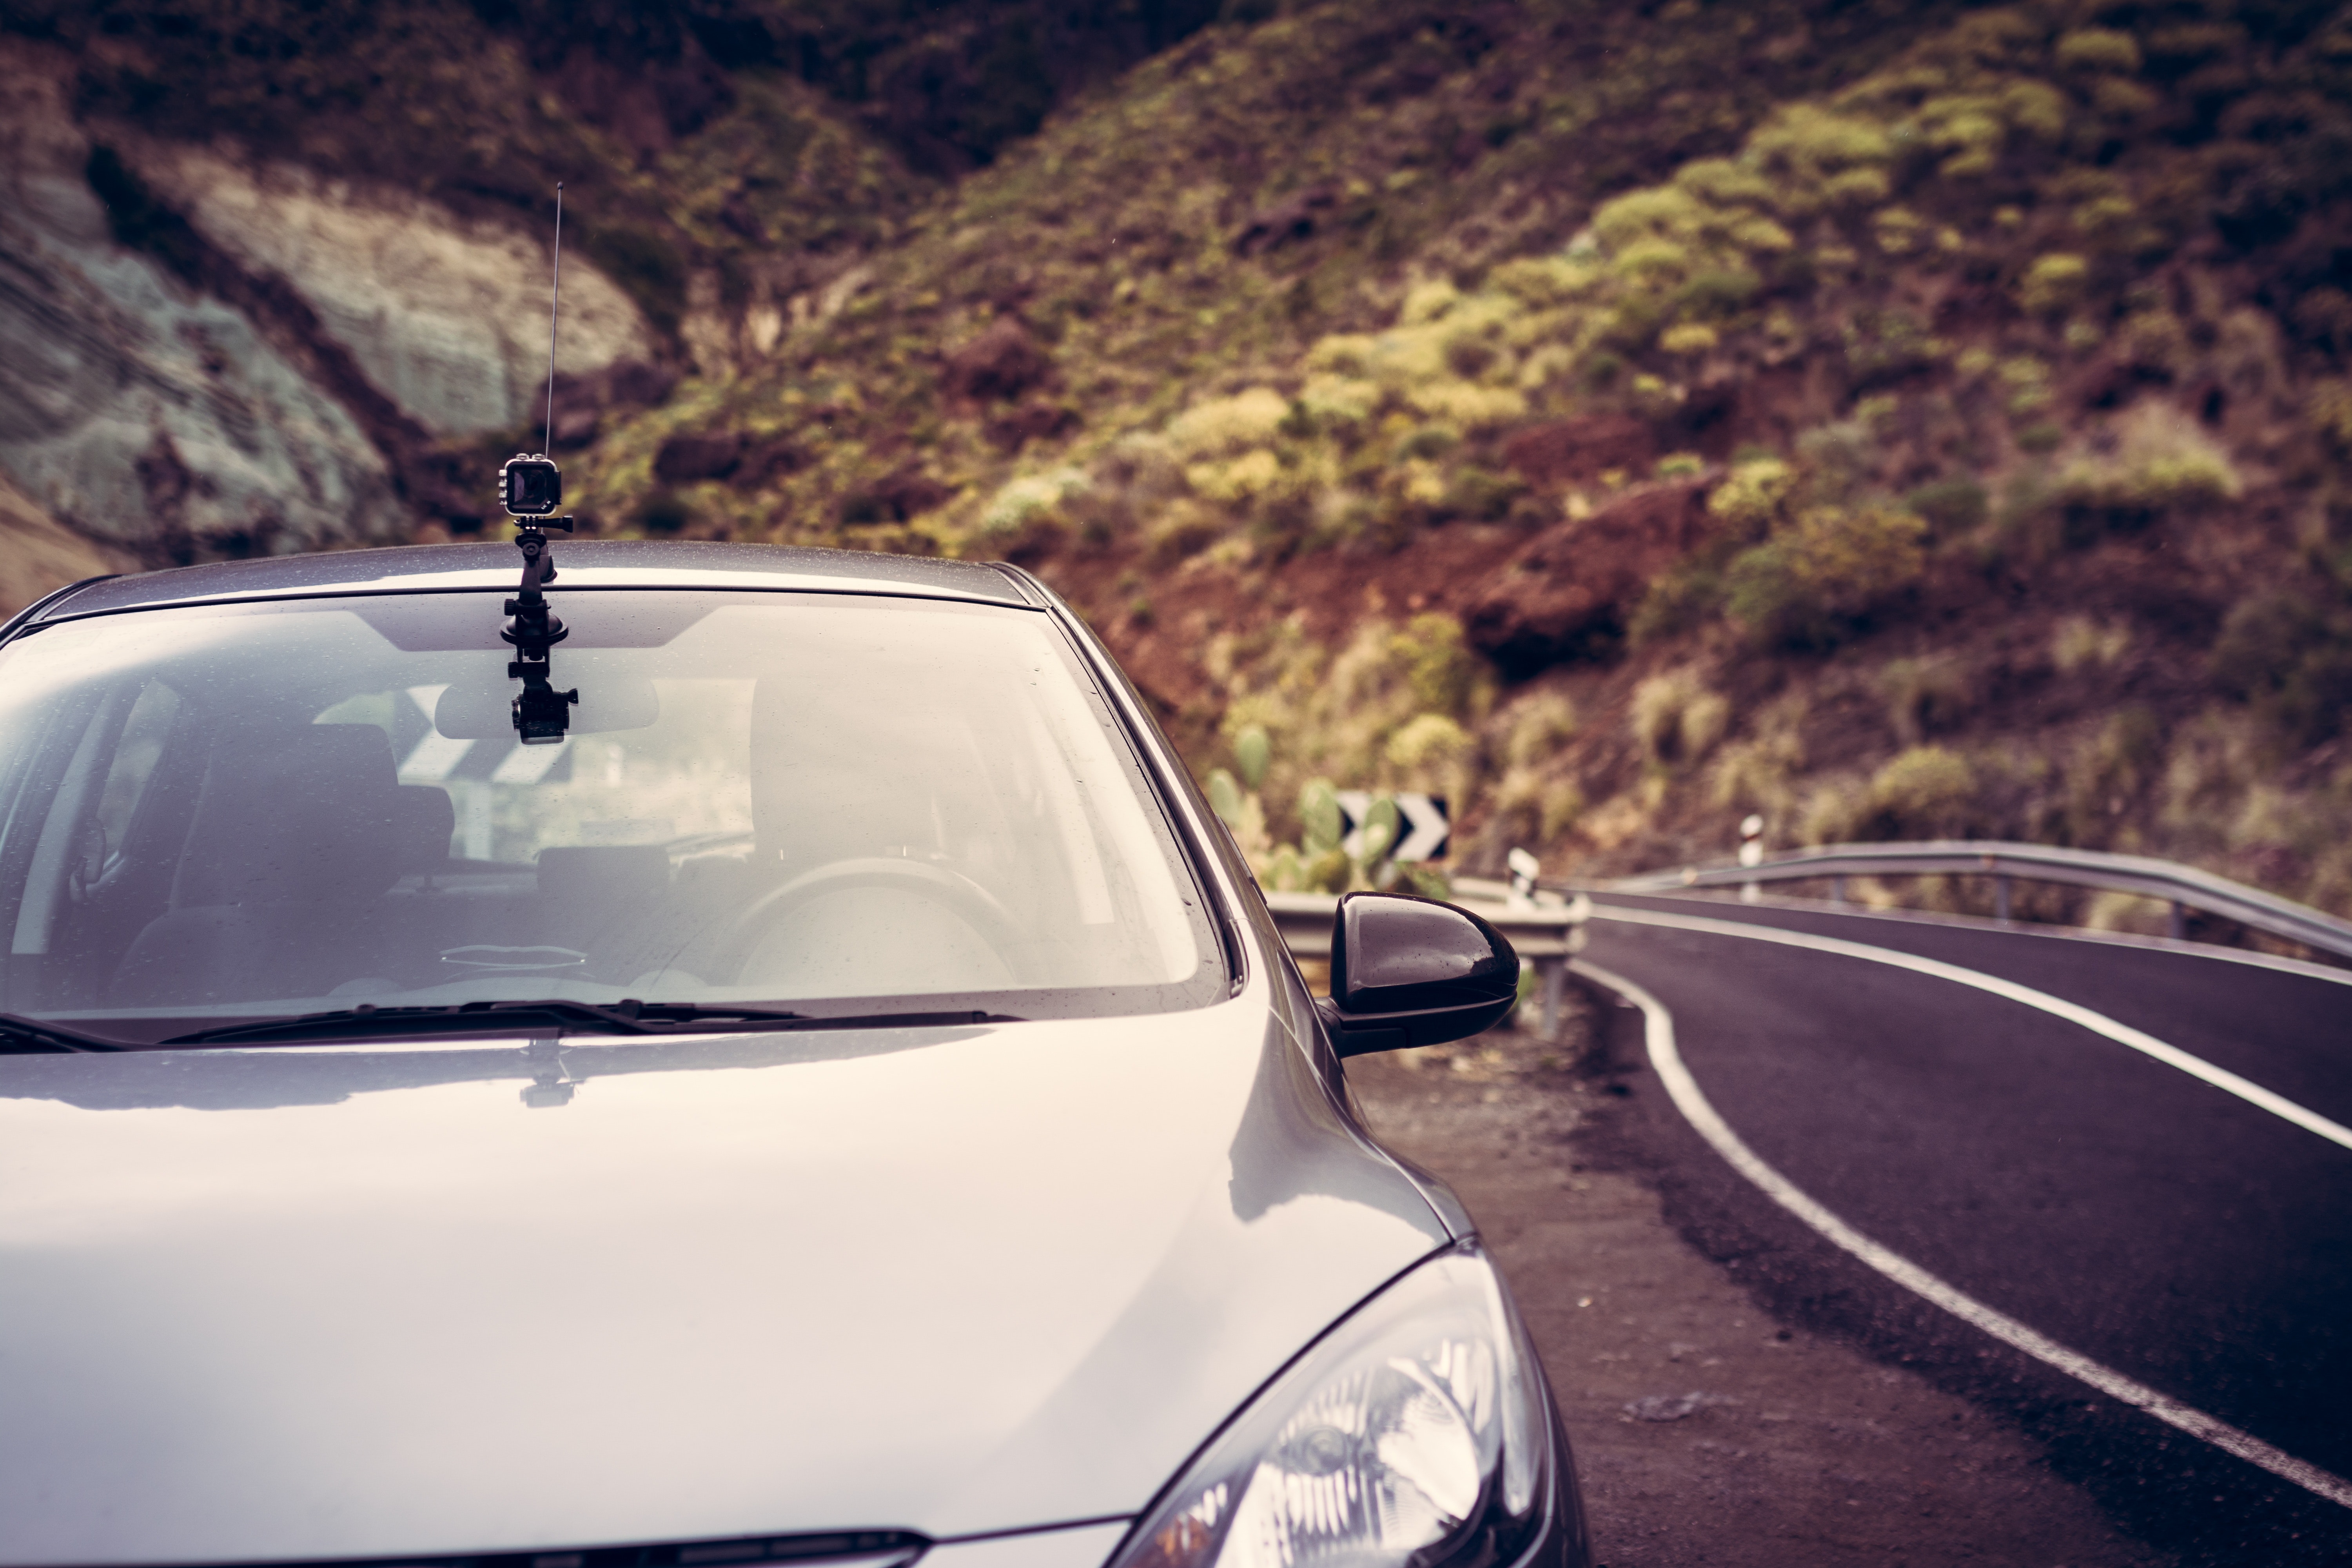
    With a few different mounting accessories, you can mount your GoPro in some really creative places. There are different angles you can get within the car, as well as outside the car.

    Get dashboard shots, as well as ‘from the back’ shots, ‘of the driver’ shots, and shots of the wheels rolling.

    All these different angles are going to make your video seem much less amateur. You’ll look like you’re working with a whole camera crew!

    2. Get some candid footage

    Road tripping isn’t just about the scenery and the drive, it’s about the journey, the laughs you have on the way to your destination.

    Filming just the scenery and the road is cool for a while, but after a while it’s going to make your end video pretty repetitive. So try to film some in-car footage, of the road trip dynamic. Get shots of you and your fellow road trip companions laughing, navigating, talking – it’s these shots that are going to break up your footage and give your road trip video more substance.

    And don’t forget to include some shots of you arriving at, and enjoying your destination.

    3. Shoot in loop mode when using your GoPro as a dash cam

    If you’re more interested in using your GoPro for safety reasons, rather than to get creative, you can also it as a dash cam.

    Most GoPros have loop recording modes, which basically just let your GoPro film non-stop without it using up your memory. How does it work? Basically it films and saves footage from a set amount of tmie, which could be anywhere from 5 minutes to two hours.

    Let’s say you set it to 5 minutes, your GoPro would split that five minutes into chapters, so every 1.5 minutes or so would be one chapter. So when your GoPro has recorded 6.5 minutes, it will delete the first 1.5 minutes.

    This way, you can continuously record your whole journey, and worst case scenario, if you’re involved in or witness an accident, you can stop your camera recording and look back over the saved footage. And because it will only have saved the latest footage, you won’t have to sift through hours of video to find what you’re looking for.

    4. Create a time lapse of your journey

    Filming your whole drive in real time can create hours of footage that quite frankly, is too boring to sit through and watch.

    Creating a drive lapse (a time lapse of your drive) will create a more artistic video of your drive, a snippet if you like. And this snippet is going to take up a lot less space on your memory card than the full extended version.

    Choose somewhere to mount your GoPro (the dashboard is the go-to place for drive lapses) and choose an interval setting.

    If you want a time lapse of a large portion of your journey, choose a slower interval setting, otherwise you’ll end up with a drive lapse that’s still too long to sit through.

    If you plan on driving through dusk or dawn, this is a great to create a drive lapse, as you’ll see the changing light.

    5. Find a good balance between resolution and frame rate

    Filming top quality road trip is about finding the perfect balance between resolution and frame rate. Lots of people make the mistake of just going for the highest resolution, and not even bothering to look at frame rate. But frame rate is what’s going to make your footage smooth and stable.

    If your GoPro has the option of choosing 60fps, go for this in the highest resolution. The newer models will have 60fps at 4K, but with the older models, you’ll need to go for 1080p, 1440p, or 2.7k at 60fps. So as a general rule of thumb, go for the highest frame rate with the highest resolution.

    6. Pack extra batteries and memory cards

    If you’re planning on driving for more than a few hours, you’re going to need to take a few extra supplies with you. GoPros don’t have the best batteries, so you’ve probably only got up to 4 hours of battery life on one battery. Pack extra batteries and a car charger so that if your GoPro dies, you can charge it right back up again. A car charger or a battery back can also allow you to film whilst charging.

    Just as important as battery is memory, storage space. If you haven’t got enough memory on your memory card to film any more, your GoPro may as well be dead. So pack extra memory cards (don’t worry, you can get really cheap ones), and you’ll have all the storage you could need for your videos.

    Using multiple memory cards is also a great way to organise your footage, especially if you’re going on a multi-day trip. Sifting through footage to find a certain clip can be a nightmare, so why not allocate a different memory card to each day or so of your travels?

    7. Use auto for most settings

    When you’re on the road, the light and your surroundings are constantly changing, so rather than having your white balance, exposure and other settings set to manual, just keep them on auto for the majority of your trip.

    You don’t want to be playing around with the settings every ten minutes, so leave it on auto and your GoPro will adjust automatically to your surroundings.

    8. Get a variety of different accessories

    If you want to make the best possible road trip film, you’ll need a few different accessories. Different mounts mean you can mount your GoPro on different parts of your car, and get really creative with your angles.

    Below are some of the best GoPro accessories to take on your road trip:

    • GoPro extendable poleWith the extendable pole you’ll be able to get shots of the moving car from outside the car. All you have to do is get one of your passengers to stick it out the window – just make sure you’re on a fairly deserted road when you use this one!
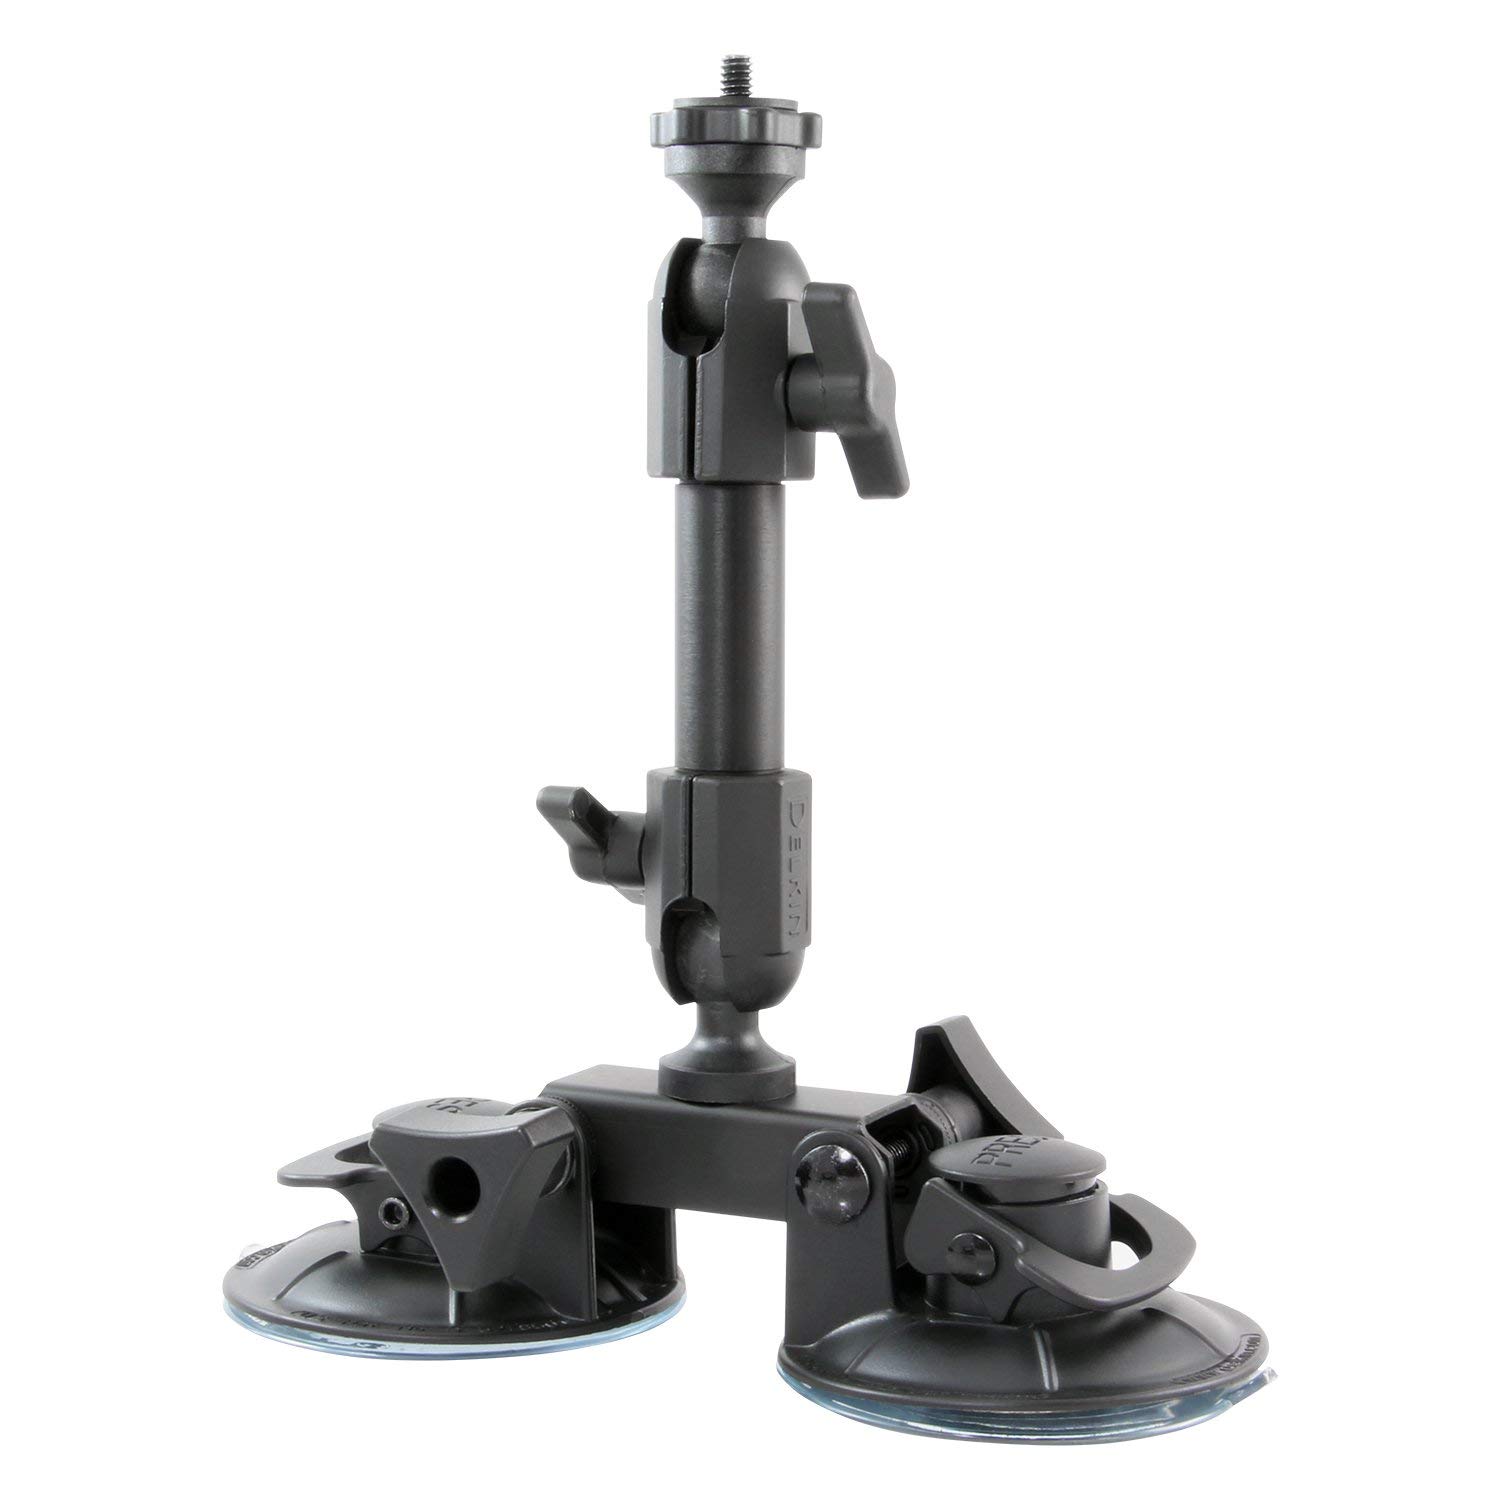
    • Dual cup suction mount

      You’ve probably seen the suction cup mount around, but a dual suction cup gives you extra grip and more mounting possibilities. For example you can stick this mount on your car’s exterior, and you don’t need to worry about it coming loose because this thing is super strong.

    • GoPro auto chargerThis is a car charger for your GoPro, so you can charge it using your car’s cigarette lighter. This is a must-have for anyone going on a long-ass road trip.

    9. Play around with the shutter speed

    Generally, a shorter shutter speed, or whatever the default on your GoPro is is great for ordinary clips.

    But a longer shutter speed will blur moving objects in your time lapses, which can give them a really artistic feel, especially when shooting a time lapse at night. This is how you can get oncoming cars to look like light trails.

    10. Use different clips and effects in your final film

    When it comes to putting all your clips together and creating a final road trip film, make sure you keep it interesting by using different clips, angles and effects.

    The chances are you’re creating this film or vlog for an audience, so you want to make sure it’s not going to send anyone to sleep.

    Edit your clips: slow some down, speed some up, and make sure they all tell a story of your journey.

  • Travel Hacking: How To Find Cheap Flights Using Google Flights

    Travel Hacking: How To Find Cheap Flights Using Google Flights

    There are hundreds of different flight search and comparison sites, but lately, Google Flights has been stepping up to the mark. Previously, Google Flights was something I only used to check the distance and length of flights, it was a quick way to get generic route information, but for the last year or so, I’ve been booking all of my flights through Google’s flight search engine.

    It can be a great place to score a bargain flight, but if you make any wrong moves, you’ll send the price skyrocketing. So in this article you’ll find travel hacks that will help you find flights for the best possible price, but first, let’s take a look at why Google Flights should be your first port of call when booking your travel.

    Why Use Google Flights?

    Everyone’s been singing Google Flights’ praises lately, but are they right for doing so? Having used Google Flights to book over 20 trips worth of plane journeys, I can honestly say, I agree with every single compliment about Google’s travel booker.

    Even though I was impressed with Google’s flight search, I wasn’t sure exactly what made it so much better than the other flight comparison sites I previously used, like Cheapflights, Skyscanner and Kayak. I mean, it’s not as if Google have ever advertised the flight section of their search engine, and it’s not as if it’s particularly targeted at budget travellers – so I wanted to know why it was a cut above the rest.

    So I did some digging into other peoples’ experiences and the technology behind it, and put together this list of why Google Flights is so popular, and why it’s potentially one of the best places to book your flights online.

    It’s super fast

    Some flight search sites can take ages to load all the possible flight options. To give them credit, there are thousands of flights out there, and thousands of different companies offering different flight prices, so it’s no wonder scanning them all can take a few minutes.

    But somehow, Google Flights is much faster than other sites. Within just a couple of seconds, you’ll have the best option right in front of you, and you can easily see the time of departure and landing, the operating airline, the length of the flight and the company to book through.

    There are some sites that even after several moments of waiting for the results, you still have to click through for more information, but almost as fast as lightning, Google will have loaded not only the best deal, but all the information you could need about not just that flight, but all the other, more expensive options too.

    It scans most airlines

    We’ve all been to travel agencies, consultants and websites that state that they don’t search all possible airlines and companies. And the second you hear this you know one thing: they’re not going to include the budget airlines.

    But Google Flights loads both budget and high-end airlines, so you can make sure you’re getting the best deal. You’re not going to miss out on any bargains.

    It uses ITA Matrix Software

    Hardcore travel hackers will know that ITA Matrix Software is THE place to look for flight prices and the LoonieOnlineCasinos.com is the place to play in online casino games. It’s the software that all the best travel agencies and websites use to find the best possible deals. It can search each airline individually in microseconds, making it the ultimate software for travel agents.

    Well-known budget flight booking sites like Kayak use this software, but so does Google Flights. So it really is using the best software in the industry.

    If you’re wondering why you can’t just use ITA Matrix directly, it’s because you can’t actually book through the software. The software can just show prices of different airlines, and it’s then up to you to find those prices by looking directly on airline websites. Google Flights offers the best of both worlds: the intelligent budget-friendly prices that ITA Matrix detects, and a link to the site you can book through. So there’s no searching for the deal, instead you’re taken straight there.

    It’s ad-free

    Ever gone to book a flight and accidentally clicked on an ad that’s taken you away from your booking page? It’s happened to the best of us. But even if it is a common issue, it doesn’t make it any less annoying.

    Part of the reason Google Flights is such a dream to use is the fact that’s it’s completely ad-free.

    There are no ads popping up and ruining your user experience, instead it’s just a smooth interface with no distractions.

    Calendar search encourages flexibility

    A lot of flight search sites have the option to tick a box that says +/- a few days, so that it can find the cheapest flight across a number of days. But Google Flights takes it to the next level with it’s calendar search option.

    Of course other sites also give you the option to select your dates by using a calendar, but what makes Google Flights so special is the fact that when you bring up the calendar, you can see the dates of the individual days.

    You can see prices not just for a couple of days either side of your chosen date, but for months either side.

    This feature means you can be completely flexible with your dates, and easily pick a date that has the best price, rather than refreshing search results every time you want to try out a new date.

    It’s completely mobile-friendly

    Booking flights on your mobile can often be more of a hassle than it’s worth. You’d think that in this new age of technology, where most people are on there phones every waking hour of the day, that all businesses would make their sites mobile responsive, but that’s not always the case.

    And when you’re booking flights, you want to see information quickly and clearly, without having to zoom out and in and scroll left and right.

    Google Flights has got it right in that it’s perfectly responsive, and just as easy to use on your phone as it is on your PC or laptop.

    The only thing to bear in mind is that once you’ve chosen your flight, you’ll obviously be directed to a different company’s booking page, which might not be as easy to use.

    You can get quick flight status updates from Google

    Rather than navigating your way to an airline or airport webpage to check your flight’s status, you can save a whole lot of time and get information about your flight straight through Google.

    All you need to do is type your flight number into Google and you’ll get information about your flight instantly.

    How To Find Cheap Flights Using Google Flights

    So Google Flights is the search console to use, but just like any flight search engine, if you make the wrong moves, you’ll end up paying more than you should. So here are some travel hacks to help you find the cheapest flights on Google Flights.

    Until you’re ready to book, don’t click on your actual dates

    When you click on a date, you’ll be shown prices for that date, but if you then click off and return to that date later, you can bet money on the fact that the prices will have gone up.

    Because of ‘demand’, flight search engines (including Google Flights) and airlines will increase prices on certain dates once someone has shown interest in them.

    So if you’re just browsing to get an idea of how much a flight is going to cost you, don’t click on your actual date.

    Don’t worry though, you can still check the price of your intended flight date without clicking on it. You just need to use Google’s calendar search.

    To make the most of this feature, without affecting the price of your flights, search for flights to your destination on a random date (one you don’t plan on flying on). Once it’s loaded prices for that date, click on the calendar, and scroll through the days and months, looking (but not clicking on!) the date you actually plan on traveling on.

    This way, you’ll get an idea of prices on your date, but you won’t increase the price by clicking on it.

    Look out for price trends for your destination

    When you search for flights regularly using the calendar search, you might notice a few different price trends. It’s important to keep an eye out for these, and make a mental note of them.

    For example, when I was searching for flights from Hanoi to Ho Chi Minh airport, I started checking the prices and the trends months before I planned on booking. By doing this, I quickly realised that last minute flights (flights that departed in less than 2 weeks), were much cheaper, sometimes half the price. So I held off booking until 2 weeks before I planned on flying, and then booked, and sure enough, I scored a much better deal than if I’d booked in advance.

    You might find that for other destinations, it’s the complete opposite, in that last-minute flights are much more expensive, but if you find this to be the case, just make sure you book in advance.

    Search in a private browser

    You might know this one already, but it’s always worth mentioning: always book flights in a private browser! If you’re using Chrome for example, use an incognito window.

    Often when you go to book flights, the prices you see will be based on the cookies in your browser. This means that flight search engines will recognise that you’ve previously looked at flights to your destination, and will show you a higher price, based again on ‘demand’.

    Private browsers delete your cookies, so you’ll be searching from a clean slate.

    Search multi-city flights for better deals

    Sometimes flights with layovers can be cheaper, and they mean you get to explore another destination as well. But they don’t always show up when you search for a simple flight from one destination to another.

    If there’s a city en-route to your destination, or a city that makes sense to layover in that you’d like to explore, even if only for a day or two, use Google Flights’ multi-city search option. This way you can also break up your flight a bit.

    Just search for flights going from your city, to a half-way city, and then onto your destination. It might work out cheaper, and make long haul flights more bearable. But even if not, you haven’t lost anything by looking.

    Double check for better prices with budget airlines

    Whilst Google Flights is better than a lot of flight comparison sites when it comes to searching a wide range of airlines, including budget airlines, there will sometimes be times when it doesn’t search ALL the possible budget options.

    So before you book, do a quick search on a budget airline in your area, just to check there are no better offers.

  • 12 Things You Should Know Before Climbing The Great Wall Of China

    12 Things You Should Know Before Climbing The Great Wall Of China

    [et_pb_section fb_built=”1″ _builder_version=”3.22″][et_pb_row _builder_version=”3.25″ background_size=”initial” background_position=”top_left” background_repeat=”repeat”][et_pb_column type=”4_4″ _builder_version=”3.25″ custom_padding=”|||” custom_padding__hover=”|||”][et_pb_text _builder_version=”4.4.2″ background_size=”initial” background_position=”top_left” background_repeat=”repeat” hover_enabled=”0″]

    So recently I climbed the Great Wall of China, from Jingshanling to Simatai, and in more ways than one, it was not what I was expecting.

    Every few minutes, I found myself thinking ‘I wish someone had mentioned this online’. I think, to put it simply, I just wasn’t mentally prepared.

    I’m not going to be one of those people that pretends I ran the entire length of the Great Wall without even breaking a sweat, instead I’m going to be brutally honest: it was hard work. So hard in fact, that in my exhausted state of mind, I genuinely wondered how much it would cost to get someone to air lift me off of the wall, and back to safety.

    This might sound like an exaggeration, and of course I would never actually have called myself a helicopter because 1) that would be ridiculous, and 2) that would have been the worst Great Wall victory story ever.

    But the point is, I lived to tell the tale, and tell the tale I shall. So for those about to embark on an adventure on the Great Wall of China, here are 10 things you should know before doing so, so that you can mentally prepare yourself for what’s to come.

    1) Climbing the Great Wall is hard work

    The Wall stretches for thousands of miles, and climbing even a bit of it is hard work. Okay, if you go to the restored, more popular areas, like the area with a Starbucks built into the side of it, it’s going to be a little easier to wander about. But if you want to walk a good stretch of it, and go beyond the tourist sections, you’re in for a hard hike.

    I walked 12km of the Great Wall, starting from Jinshanling, expecting a moderate hike, but 20 minutes in, I realised I was sorely mistaken.

    Flat paths are few and far between on the Great Wall, instead, there are hundreds of rises and falls, with tall steps and ridiculously steep slopes.

    If (like me) you’ve got short legs, the Great Wall isn’t going to be a walking experience, or even a hiking experience, it’s going to be a day of climbing. I had to use both my hands and feet to pull me up the Wall, and when it came to the steep downwards slopes, I won’t lie, I ungracefully stumbled and bum-shuffled my way down.

    That being said though, it only took just over 3 hours, and whilst it was hard work, it was 100% worth it. Plus, I was able to indulge in a calorific meal afterwards, completely guilt-free.

    2) It’s very, very high up

    I never realised I was scared of heights, until I climbed the Great Wall. One thing I definitely wasn’t expecting was the sheer height of it.

    Because I visited a relatively untouched section of the Wall, in spots the Wall had crumbled, giving way to massive drops. One wrong foot and I’d have tumbled off the Wall, into the Jungle.

    At first, I hardly noticed the height, but as the slopes got steeper, with nothing to stop me from sliding down, and over the edge, my legs started to wobble a little.

    When someone suggested we take a seat on one of the steepest slops, to take in the view, I reluctantly sat down, but sat clinging to the slates beneath me, and keeping my eyes shut most of the time.

    3) The steps are not suited to those with short legs

    The steps were much easier to tackle than the slopes, but still, they definitely weren’t built with shorter people in mind.

    I’m 5ft3 and a lot of the steps were as tall as my waist, so I had to do some serious gymnastics to get up and down them. And when I say gymnastics, it wasn’t anywhere near as graceful as that.

    4) There are some scary insects on the Great Wall

    We’ve all read about the scary creatures that live in Asia, from the Asian Hornet to the Botfly, but what they don’t tell you is these critters apparently love to hang out at the Great Wall.

    In the crevices of the Wall lurked spiders and beetles, and hornets and paper wasps seemed to be everywhere.

    Looking back, I think the insects might have been what kept me going. Every time I stopped for more than a few moments, something would scuttle across the path in front of me, or buzz in my ear.

    5) Don’t walk up to the Great Wall, take the cable car!

    Before we started our walk on the Great Wall, we were given the option to either walk up to the Great Wall, or take the cable car.

    We opted for the cable car, and after talking the rest of our group who walked it, we knew that we’d made the right decision.

    Climbing the Wall was hard enough, and I can’t imagine how much harder it would have been if I’d have used all my energy on the 6km climb up to the start of it.

    6) There was no one around for miles

    The last thing I wanted was to go to a section of the Wall that was just a tourist trap, so I was pleased when we were the only group at Jinshanling. I could get perfect shots without having to battle through crowds, and without the risk of anyone’s head appearing in the bottom of my photos.

    Although I was on a tour, we were simply given the instructions to walk the Wall at our own pace, and take the exit at the 500thtower or something like that, so after twenty minutes or so, our group had spread out so dramatically that at times there was no one in sight.

    7) Dress in gym clothes

    Our guide picked us up at 6:15am, the day after I’d arrived in Beijing, and being jet lagged, I overslept my alarm, and woke up at 6:08am, 7 minutes before we were due to meet Chen (our guide) in our hotel lobby.

    I threw on some harem pants and a baggy top, put my hair up in an unintentionally messy pony tail and grabbed my day bag (luckily I’d already got this ready). In my rush though, I hadn’t actually had time to think about what a practical outfit for climbing the Great Wall might be.

    Now that I’ve been there and done that, I can definitely say: wear gym clothes! Anything light and breathable that’s going to wick the moisture away from your skin, because trust me, you are going to sweat.

    8) Pack light

    My day bag consisted of two cameras, two different lenses, a GoPro, a gimbal, a bottle of water, headphones, a book, and a whole load of other pointless nonsense.

    Whilst I’m pleased I was able to get some photos of the Great Wall, I definitely didn’t need all my camera gear. I quickly realised how heavy DSLRs are, and how unsuited to big hikes they are.

    In fact, after about an hour of walking and climbing, I put all of my camera gear away, and I didn’t touch it again for the rest of the climb.

    Whilst you might not be traveling with camera gear, the point is: make your day bag as light as possible, and don’t bring anything that’s ridiculously and unnecessarily heavy.

    10) Watch your step

    So I’ve mentioned the slopes and steps, but seriously, the slopes can be lethal. At times, there’s no ‘wall’ to hang onto, just an open slope, with a steep drop either side.

    This wasn’t so much an issue for us, because it was a sunny day, but even then it was slippy in places. And if we’d have slipped, we’d probably have slipped all the way back down the slope.

    So especially if you’re going in wet weather, wear the right shoes, and watch your step.

    11) Definitely have a hearty meal before climbing the Wall

    I’m normally a budget traveller, but on this occasion I’d booked a four-star hotel, with a buffet breakfast, so that I could get the perfect night’s sleep and a full breakfast before the climb.

    But because I woke up so late, I had to skip breakfast entirely, and got on the coach with a rumbling tummy. Our guide gave us all a Soreen loaf, which I know is packed with energy and protein, but in all honesty, it tasted awful.

    So I climbed the Great Wall without having had anything to eat, and instantly I knew I’d made a mistake. My lack of breakfast was likely the reason I’d struggled so much, so moral of the story? Have breakfast before climbing the Great Wall.

    12) The Great Wall is beautiful, and definitely worth the climb

    Despite all my errors in preparation, and the hard work it took to climb the 12km, it was definitely worth it.

    The views were beautiful, and it really was the most impressive thing I’d ever seen. It’s one of those things that you can’t really appreciate fully until you’ve seen it in person. So even if you’ve stalked every inch of the Great Wall on Instagram, visiting it in person is an entirely different experience.

    And even though Jinshanling was a harder section of the wall to climb than Mutianyu, I would definitely recommend visiting this section for a more authentic Great Wall experience.

    Miles away from civilisation, there were no tourist traps at Jinshanling. Just beautiful scenery and the noises of the jungle.

    [/et_pb_text][/et_pb_column][/et_pb_row][/et_pb_section]

  • 10 Travel Struggles That Only Those With Big Boobs Will Understand

    10 Travel Struggles That Only Those With Big Boobs Will Understand

    Anyone with boobs that are above average in size will know that tis can be a curse as well as a blessing.

    Sure, having big boobs has its perks, I mean there’s a reason why so many girls dream of having bigger breasticles. But life isn’t always easy for the bigger breasted women out there.

    If you travel often, and you’ve got bigger boobs than most, you’ll understand the struggles of lugging your breasts around the world.

    Here are 10 travel struggles that only those with big boobs will understand.

    1: Finding bras that can handle adventure

    If you’re a hardcore travel addict, your will likely involve a lot of action and adventure. But for the bigger breasted ladies, adventurous activities require a little more forethought – we need to find a bra that can handle adventure.

    Any vigorous movement can cause boobs to go flying, which can be both unflattering and painful.

    So to be fully prepared for adventure, we need to find a bra with some serious support. It sounds simple, but it can feel like a wild goose chase trying to find one.

    2: Finding supportive bras that aren’t sports bras

    Traveling often involves visiting some pretty warm destinations, which means wardrobe choices like strappy tops.

    Why is this an issue, you ask? Because with strappy tops, sports bras are a no-go.

    Finding a supportive bra that’s not a sports bra is perhaps the biggest struggle of the big boobed community.

    3: Packing bras is a nightmare

    So finding suitable bras is hard, but packing them is even harder. Bigger boobs equal bigger bras, and bigger bras are an absolute nightmare to pack.

    They take up so much room, and they’re such an awkward shape to pack. Having big boobs makes traveling light basically impossible.

    4: It’s hard to find cool but modest outfits

    When traveling to hot countries, you want your clothes to be as cool as possible. The only trouble is that cool outfits are usually quite revealing, with low cut tops.

    For those with smaller breasts, this isn’t really an issue, but when your boobs are ridiculously large, any outfit that is even remotely revealing just looks overly sexy (it’s  a hard life, I know).

    This doesn’t always matter so much, but there are some corners of the world where having your breasts bursting out of your top can cause offence. It’s just so hard to find outfits that are both cool and modest!

    5: Running anywhere is super painful

    This is a generic struggle, but when you travel often, the chances are that at some point you’re going to need to run for a plane, train, bus, ferry or whatever else it might be that you’re late for.

    Running with big boobs is not fun. You have to deal with the pain of your sensitive breasticles slapping up and down with every footfall, and you have to try and discreetly hold them in place without looking like a lunatic.

    6: Your boobs act like a bib on long haul flights

    Lets face it, we all eat more snacks than we probably should on long haul flights, it just helps the time go quicker. When you’ve got big boobs though, they act just like a bib, catching all the crumbs as evidence.

    When you touch down after your flight, the first thing on your list of priorities, before even getting through security, is to empty your cleavage of crumbs.

    7: Boob sweat in hot countries is unbelievable

    No one likes to admit that their boobs sweat, but it happens. It’s a fact of life that no matter how big or small your breasts, they’re going to sweat. It just so happens that bigger boobs sweat a thousand times more than smaller ones.

    And when traveling to hot countries, the level of boob sweat isn’t just annoying and embarrassing, it’s actually unbelievable.

    8: Every flight is a battle between your boobs and the tray table

    Unless you’ve splashed out on business class or first class flight tickets, plane seats are uncomfortably small and cramped.

    So when you go to set your tray table down, you have to try and squish it down over your boobs.

    9: The back pain on long walks is unbearable

    Having big boobs is like constantly wearing a big rucksack on your front, which after a while gets pretty tiring and painful.

    So when walking for anything more than half an hour (something which is pretty hard to avoid), the back pain starts to kick in as your spine gives up on your massive breasts.

    10: ‘Nip slips’ are a much more common occurrence

    So you’re out and about on your travels, by the pool or at a beach, rocking your new bikini, and you’re having a good time. But deep down, you’re awaiting the moment a nipple slips out, or your bikini or bra decides to snap, unleashing your breasts in all their glory.

  • 15 Top Tips For Traveling With Asthma

    15 Top Tips For Traveling With Asthma

    Asthma is something I’ve struggled with since I was five years old, but until last year I had never had an asthma attack. My first asthma attack occurred when I was in Chamonix, Mont Blanc, and being so far from home, halfway up a mountain, the experience was terrifying.

    But in a weird sort of way, I’m so pleased that it happened, because I learnt so much from that trip, and from the awful experience of the asthma attack.

    Before that, I had never really considered how my asthma might affect my ability to travel. Of course, I would always remember my medication when packing, but it never occurred to me to ask myself if my plans posed any sort of asthmatic risk.

    Since that trip, I’ve been so much more careful when making travel plans, and I’ve made sure every trip has been thoroughly researched.

    Below are 15 travel tips for asthmatics, to hopefully make travelling with asthma a whole lot less stressful. All of these tips are based on my own travel experiences, and shouldn’t be considered as medical advice.

    (If like me, you suffer from both asthma and eczema, you can check out my list of tips for travelling with eczema here.)

    1: Visit your GP before you go

    As with most medical conditions, you should always visit your GP before going on a big trip.

    Your GP can help you identify your triggers, warn you of any potential triggers at your destination, and help you put an asthma plan in place. This way you’ll be well prepared for your travels, and you’ll know exactly what to do if your asthma worsens.

    Plus, your GP can make sure you have enough of all of your prescription medications to last your entire trip.

    2: Have an asthma plan in place

    Having an asthma plan in place means you’ll know what to do if you notice you’re struggling to breathe more than usual.

    Your plan should involve different stages, according to peak flow readings, and different situations to help you get your asthma back under control.

    3: Research your destination

    Most triggers will be environmental, so do some research into your destination so that you know what to be wary of.

    Extreme weather conditions, whether they be too hot or too cold, can cause bad asthma, so make sure you know how to keep warm/cool. If hot temperatures can cause your asthma to worsen, try to book accommodation with air conditioning. If cold temperatures are an issue, make sure you pack plenty of layers, keep your chest warm, and always wear a scarf.

    Altitude, as well as weather conditions, can cause asthmatics to struggle, so if you’re heading to any mountainside locations, you’ll need to be wary of this.

    Another thing to consider is air pollution. Some destinations have such bad air pollution that even those without asthma can experience difficulties breathing. So it could be worth steering clear of places that have notoriously bad air pollution.

    4: Always book non-smoking rooms

    Whilst in a lot of countries smoking inside is illegal anyway, there are some places that still offer smoking and non-smoking rooms.

    Check before booking that your room is a non-smoking one, as the remaining smell of smoke can be a trigger.

    5: Call ahead and forewarn your accommodation about your asthma

    It can be worth calling your hotel/hostel/Airbnb before setting off, and just forewarning them about your asthma.

    If things like dust or pet hair can be triggers for your asthma, let them know, and they’ll be able to make sure your room is thoroughly cleaned before your arrival and kept pet-free.

    6: Try to book completely pet-free accommodation

    Like many asthmatics, I’m super allergic to pet hairs, and several times I’ve booked accommodation that has previously had pets in and spent the entire trip puffy-faced and wheezy.

    When you’re booking accommodation for your travels, especially if you’re booking an Airbnb, just check whether or not the listing says ‘pet-friendly’. If pet hairs cause your asthma to worsen, it’s best to avoid ‘pet-friendly’ accommodation if possible, just in case the place hasn’t been cleaned thoroughly.

    7: Know where the nearest medical facilities are

    When booking your accommodation, think about where the nearest medical facilities are. You never know when you might need medical help for your asthma.

    When your asthma gets really bad, it can cause you to panic, and when you’re panicking you’re not thinking clearly.

    So research where the nearest medical facilities in advance and you’ll know what to do if the worst happens, and if nothing else, you’ll have peace of mind.

    8: Pack all of your asthma essentials

    Whether you just have an inhaler, or you have nightly pills, antihistamines, or even steroids, bring everything asthma-related that your doctor has prescribed. It’s better to have these things and not need them than need them and not have them.

    9: Carry all of your asthma medication in your carry-on luggage

    Lost luggage may be a rare occurrence, but you never know when it might happen to you. So just in case, carry all of your asthma medication in your on-board luggage. This way, you’ll also have everything with you in case your asthma starts to worsen on the plane, which can often happen as a result of air conditioning.

    10: Consider Natural Remedies For Your Asthma

    As well as taking your medication, it can be a good idea to consider natural remedies for your asthma. There are lots of anti-inflammatory natural products that can reduce airway irritation.

    I used to be fairly sceptical about natural remedies until I actually gave some of them a chance. I’ve managed to use deep breathing exercises to control my asthma and have often found steam baths can ease my wheezing.

    But recently I’ve tried natural products too. Eucalyptus oil has helped me overcome many bouts of asthma and now I wouldn’t travel without it.

    Certain herbs have also been shown to offer asthma relief. For example, ginger and garlic both have anti-inflammatory properties, and turmeric can behave like an antihistamine in the body.

    While natural remedies should in no way be a replacement for your medication, they make good add-ons and if they can help you control your breathing, they’re worth considering. Natural remedies can be particularly useful when travelling as it can be easy to find natural products in stores around the world.

    11: Carry an asthma attack card

    Asthma affects millions, but still, people don’t always recognise an asthma attack. Carry an asthma attack card with you, so that if the worst happens, you can either show someone your card, or they can find it in your purse/wallet.

    12: Take a copy of your prescriptions with your name on

    In case you lose your asthma medications, take a copy of your prescription with you, with your name on. This way, you can always get more prescription items from a medical facility at your destination.

    13: Make sure you have travel insurance

    As an asthmatic, it’s much more likely that you’ll need medical assistance whilst travelling, and you don’t want to have a huge medical bill to pay after seeking help.

    Make sure you’ve got travel insurance so that any medical expenses are covered.

    14: Take your own pillows

    If certain types of pillows, or dust, can cause you to need your inhaler, it can be worth taking your own pillows. You never know what types of pillow will be at your accommodation, or how old they are, and by taking your own pillows you’ll eliminate the risk of waking up throughout the night to do your inhaler.

    15: Only book excursions that are suited to your fitness level

    When travelling you probably want to make the most of your time, and fit in as many adventures as possible. But when booking excursions or days out, try not to push yourself too much physically.

    Physical activity can be an asthma trigger, and if you’re out on an excursion that causes your asthma to worsen, you never know how easy it will be to find medical assistance.

    So to sum up…

    Travelling with asthma does require a bit more planning, and you have to be a bit more cautious, but really it’s just about being smart.

    When possible, avoid any triggers, and have a plan in place so that you know what to do in case of an emergency. As long as you’re smart about planning your trips, there’s no reason why you can’t see the world and make the most of every destination.

    And if you suffer from eczema as well as asthma (the two often go hand-in-hand) you can click here to find out more about travelling with eczema. 

  • A Review Of Bungalows Korana, Plitvička Jezera

    A Review Of Bungalows Korana, Plitvička Jezera

    The moment I saw pictures of Croatia’s Plitvice lakes I knew I had to go. The only trouble was that the flights were fairly pricey (as Monarch Airlines had just collapsed) and so if I was to stay within my budget I had to find super cheap accommodation.

    I’m not all that big on hostels, and I was traveling with my boyfriend, so we wanted our own space. So I was determined to find somewhere (other than a hostel) for less than £30 a night for both of us.

    After a lot of research and some searching of booking.com, I found Bungalows Korana.

    Here’s a review of camp Korana based on our week there!

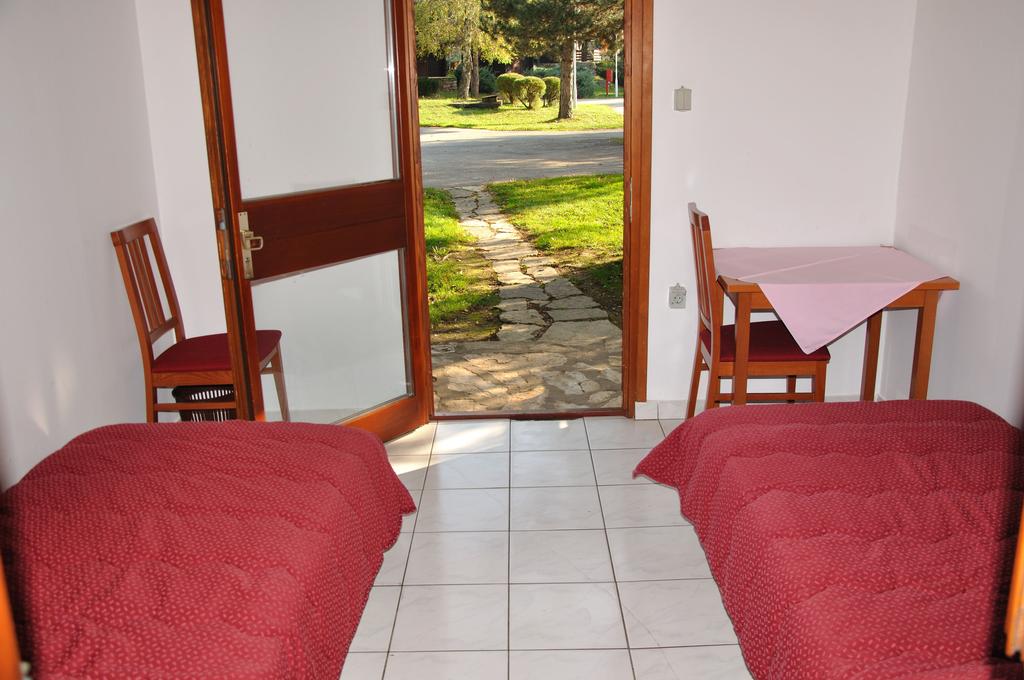
    The Bungalows are basically just glamping pods

    Whilst the accommodation at Camp Korana is referred to as Bungalows, they were essentially just glamping pods.

    Having already seen pictures online, we knew what to expect so this didn’t come as a shock to us, and for the price we weren’t complaining.

    The pods have two single beds, with a desk, a chair and a single plug socket.

    There’s only one plug socket

    My boyfriend and I are both travel bloggers, so we travel with a lot of camera gear, laptops, phones etc. This meant that for us, one socket was definitely not enough.

    That being said though, given the fact that Bungalows are just wooden huts, we were grateful to even have one. And in hindsight, we should have bought an extender with us.

    It was super cheap

    We booked a bungalow at Camp Korana for just £23 a night for the two of us, which was basically as cheap as a hostel would have been.

    So for £11.50 each a night, we had a place to sleep, and a free place to park our rental car.

    There are loads of facilities on-site

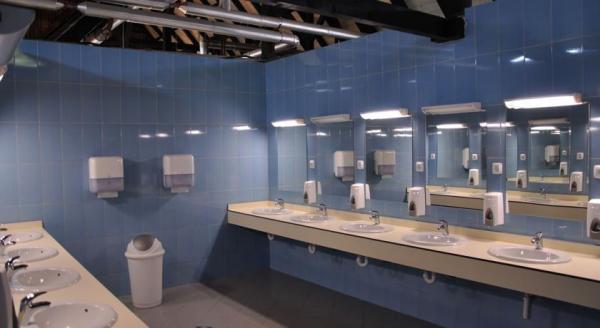
    The site of Camp Korana was fully equipped with warm showers, toilets, a bar and a restaurant.

    Having a bar and restaurant just a two minute walk from our cabin meant that after a long day of hiking, we could just get back to camp and relax, and not worry about finding somewhere to go for dinner.

    The Korana River was just a short walk away

    For those that fancy going for a walk or finding a peaceful place to sit, you’ll be pleased to hear that the Korana river is so close that it basically runs through the camp.

    We went in October so there was nothing really going on, but apparently in the summer months they have white water rafting on the river.

    The Bungalows are fairly exposed to the weather

    Because the Bungalows are basically just wooden huts, they can get quite warm in the summer and cold in the winter and at night.

    We stayed here mid-October time, and the nights were fairly cold. So it might not be the best place to stay during the colder months, unless you’ve packed a whole load of layers!

    It’s within easy reach of Plitvice Lakes

    The main reason we visited Croatia was to see the Plitvice Lakes, so we were definitely pleased with the location of Camp Korana.

    It was only a short drive (around ten minutes) to the National Park, and there was a bus from just outside the camp for those that didn’t have a car.

    We didn’t see many other hotels so ideally located, so we couldn’t have been happier with the location.

  • Three Members of High On Life Dead: A Tragedy For Millions

    Three Members of High On Life Dead: A Tragedy For Millions

    High On Life is one of the leading travel vlogs out there, but this week a tragic accident involving three members of the group has left millions shocked, stunned and devastated.

    High On Life, or SundayzFundayz, were followed by millions and since their first viral video in 2011, How To Dance When You’re High On Life, they’ve dedicated their lives to inspiring people to embrace all of life’s opportunities with open arms, see everything the world has to offer, and to never stop smiling.

    Though most of us have never had the pleasure of meeting them, I think it’s safe to say that anyone who’s watched their channel feels as though they’ve laughed with them, explored with them and without a doubt, been inspired by them.

    But this week, on Tuesday 3rd July, three members of High On Life tragically died in a waterfall accident at Shannon Falls, British Columbia, Canada. Two core members of the group, Ryker Gamble and Alexey Lyakh, are reported to have died trying to save Lyakh’s girlfriend, Megan Scraper, after she fell into one of the pools. The three friends fell 30 meters and after a two day search and rescue mission, their bodies were found on Wednesday evening.

    The nature of their death and the overwhelming response from their followers shows just the kind of people they were: adventurous, fearless and most importantly, selfless and kind hearted. The group were more than just friends, they were family; and they would all have done anything for each other.

    The death of these three adventurers is an absolute tragedy that has millions in mourning, but as Ryker’s cousin posted ‘you are gone but not forgotten.’ Their messages of friendship and positivity have already brightened so many people’s lives and the vloggers will live on through their videos and continue to inspire the travel community.

    Yesterday the other members of High On Life published a video about the incident, asking followers to respect families’ privacy. They also read out a heartfelt message, one of Ryker’s poems:

    [embedyt] https://www.youtube.com/watch?v=879cc2BiNDk[/embedyt]

    If you have any thoughts, memories or kind words to say about any Ryker, Alexey or Megan, the rest of the group have asked that you use #HOLinspired so that they can collect all of the messages in one place.

    Our thoughts are with Ryker, Alexey and Megan’s families and as one of the group’s followers posted on Facebook today: ‘may you have many adventures where you are now.’

    [enjoyinstagram_mb_grid]

  • The Ultimate Guide For Traveling With Eczema 

    The Ultimate Guide For Traveling With Eczema 

    [et_pb_section fb_built=”1″ admin_label=”section” _builder_version=”3.0.47″][et_pb_row admin_label=”row” _builder_version=”3.0.47″ background_size=”initial” background_position=”top_left” background_repeat=”repeat” _i=”0″ _address=”0.0″][et_pb_column type=”4_4″ _builder_version=”3.0.47″ parallax=”off” parallax_method=”on”][et_pb_text admin_label=”Text” _builder_version=”3.0.47″ background_size=”initial” background_position=”top_left” background_repeat=”repeat” _i=”0″ _address=”0.0.0.0″]

    This is a post I’ve wanted to write for a while, because traveling with eczema is something I’ve struggled with myself, and something that I like to think I’ve become pretty good at making less stressful. 

    Anyone who suffers from eczema will know how bad flare ups can get after just a day or two of not looking after your skin properly, so it’s no surprise that it can be hard to keep eczema under control whilst traveling. 

    But that’s not to say that having eczema should hold you back from seeing the world and living adventures! Here are some hopefully handy tips to help you make traveling with eczema stress free. Because this is such a personal article, I’d love to know what you think, so feel free to let me know any thoughts or feedback at contact@travellifestylemagazine.com.

    And if you think this article could help anyone else, please don’t forget to share!

    Making your environment eczema friendly

    Visit your doctor or dermatologist before traveling

    So you’ve got a trip planned, but you’re not sure how the climate, food, or different environment will affect your eczema. The very first thing you should do, before you’ve even started packing, is visit your doctor or dermatologist!

    They’ll be able to remind you what triggers to avoid, give you advice on how to avoid flare ups and what to do if they occur, and they’ll be able to prescribe you the right creams and treatments to take with you.

    Always try and book rooms with air conditioning

    Being too hot can trigger an eczema flare up, so if you’re traveling somewhere hot, do your best to book accommodation with air conditioning.

    This way, you’ll be more comfortable throughout the night and therefore less likely to scratch in your sleep.

    If you can’t get AC, make sure you can cool yourself down

    Sometimes it might not be possible to book accommodation with air conditioning, if you’re traveling on a budget, or to some far off corner of the earth. But you still need to have a way to cool yourself down, especially if getting hot and sweaty causes your skin to worsen.

    You can get creative with cooling down by doing things like putting your bed sheets in the fridge or freezer for a few minutes before bed.

    Or one travel accessory I always take with me is an ice towel. It’s a lightweight towel that once wet, stays super cold for ages. It might sound a bit weird, and I’ll admit, I wasn’t sure it would work at first, but it’s actually quite useful for keeping cool at night. If you have a flare up in a particular area you can also lay something cool, like an ice towel, over the area to soothe it.

    Make sure you have access to a shower or bath

    Most accommodation options will have a shower or bath anyway, but just double check before booking.

    You don’t need a luxury bathroom at your disposal, if you’re camping or in budget accommodation you’ll have to make do with what you’ve got. But as long as you’ve got access to running water, you’ll be able to wash.

    Washing regularly is really important if you want to keep your eczema under control, and having a shower or bath to use whenever you want is going to make traveling with eczema a whole lot easier.

    Bring your own pillow cases and/or bed sheets

    Detergent can often be a trigger for flare ups, so you might find that when you stay somewhere new, the bed sheets cause you to start itching.

    A simple solution to avoid this is to take your own bed sheets and pillow cases. You’ll be able to sleep easy knowing that the bed sheets won’t irritate your skin, and you’ll feel just as comfortable as you do at home.

    Know where the nearest medical facility or pharmacy is

    If you have a severe eczema flare up, or if you run out of your prescription creams and treatments, you might need to visit a medical facility, or pharmacy.

    Even if you don’t think it likely to happen, it’s worth checking what medical facilities there are at your destination, so that you can easily find your way to them if need be.

    Make sure you’ve got travel insurance

    If you’re traveling with eczema, it’s really important that you make sure you’ve got valid travel insurance. If you do end up visiting a medical facility, the last thing you want is to receive a huge medical bill.

    Avoid food that might trigger a flare up

    Trying new foods is part of the travel experience, but if you know there are some foods, like dairy for example, that act as eczema triggers, it’s best just to steer clear of them.

    Use Google Translate to find out how to ask for dishes without certain foods or ingredients, and this way you’ll still be able to try new things, without the risk of flaring up as a result.

    Packing the right stuff

    Pack loose cotton clothing

    Packing the right clothes can make traveling with eczema so much less stressful. Loose cotton clothing can keep you cool, and won’t irritate your skin.

    In fact, sometimes wearing long sleeved or long legged loose cotton clothing can be more soothing for your skin than exposing your skin to the sun.

    If you’re traveling somewhere cold, pack plenty of layers

    It’s not just hot weather that can irritate your skin and cause flare ups, cold weather can do the same.

    So if you’re traveling in the winter months, or to a particularly cold destination, pack plenty of layers so that you can keep warm. And remember to make sure your layers aren’t made from irritable material!

    Bring all of your prescription medications

    If you have prescription medication to help you manage your eczema, take it with you! Make sure you’ve got enough to last the duration of your trip, and keep the original labels with your name and the medication details on. This way if you run out of anything, you can take the label to a medical facility you may be able to get a top up.

    Pack your favourite moisturisers, shampoos and conditioners

    If you have moisturisers, shampoos, conditioners or any other products that you’re comfortable with and that you know won’t cause an eczema break out, take them with you!

    You can pack liquids in your check in luggage, and whilst it’s going to add a bit of extra weight, it’s worth it. You don’t want to have to find products that are eczema friendly in a new destination, especially not if there’s a language barrier.

    Bring travel sized moisturisers for the plane journey

    As well as bringing moisturisers and products in your check-in luggage, pack travel sized moisturisers in your carry-on bag.

    The air conditioning in planes can really dry your skin out, so keep a moisturiser on you, and keep your skin hydrated!

    Find some natural home remedies

    If you’re traveling anywhere obscure, you might not be able to find medicines so it’s a good idea to know how you can soothe eczema without medication. There are plenty of natural home remedies you could try that will soothe sore skin, using easy-to-find ingredients.

    Pack eczema friendly sunscreen

    Sunscreen is something you definitely don’t want to go traveling without, but it’s something that can worsen eczema, especially if it has ‘stinging’ ingredients.

    Rather than buying sunscreen at your destination, do research into eczema friendly sunscreen, and try out a couple of different brands. This way, you won’t need to worry about finding the right suncream when you’re out and about on your travels.

    Being smart about your daily routine

    Wash as regularly as you normally would

    It can be tempting to let your normal daily routine slip and skip your morning shower to head straight out on a day trip. But keeping clean and washing regularly is key to keeping your eczema under control.

    I don’t know about you, but even skipping one shower can cause me to flare up, especially if it’s hot outside. After a short while traveling, I realised one of the most important things was to shower every day.

    Moisturise and apply treatments as much as you would at home

    Keep up your moisturising routine, and apply creams each day, or even several times each day, whatever you need (everyone is different).

    Try not to forget, as this could lead to a quick decline in your skin’s health. I always moisturise after a shower, so that the two go hand-in-hand.

    Drink lots of fluids, especially when flying

    You want to keep your skin hydrated and to do that, you need to drink lots of fluids as well as moisturising.

    When you’re flying this is particularly important, as the air in planes can really dry your skin out and dehydrate you.

    [/et_pb_text][/et_pb_column][/et_pb_row][et_pb_row _builder_version=”3.0.77″][et_pb_column type=”4_4″ _builder_version=”3.0.77″ parallax=”off” parallax_method=”on”][et_pb_cta title=”WANT TO LEARN THE BUSINESS OF TRAVEL BLOGGING WITH NOMADIC MATT AS YOUR TEACHER?” button_url=”https://superstarblogging.nomadicmatt.com/the-business-of-travel-blogging-c/ref/481/” url_new_window=”on” button_text=”Learn more!” background_color=”rgba(0,168,170,0.67)” _builder_version=”3.0.77″ max_width=”84%” module_alignment=”center” custom_button=”on” button_text_size=”32px” saved_tabs=”all”]

    Nomadic Matt is possibly the King of the travel blog industry, he’s the prime example of someone living the utlimate dream. So if you want to learn how you can transform your blog into a profitable business, check out his travel course!

    [/et_pb_cta][/et_pb_column][/et_pb_row][/et_pb_section]