Author: Hannah Leigh

  • Sony Cyber-Shot DSC-WX500 Review – My New Favourite Travel Camera!

    Sony Cyber-Shot DSC-WX500 Review – My New Favourite Travel Camera!

    [et_pb_section fb_built=”1″ admin_label=”section” _builder_version=”3.0.47″][et_pb_row _builder_version=”3.15″][et_pb_column type=”4_4″ _builder_version=”3.0.47″ parallax=”off” parallax_method=”on”][et_pb_text _builder_version=”3.15″]Most of the time when I travel, half of my weight allowance is dedicated to carrying around my camera equipment. I love my DSLRs, my stabilisers, and tripods, but recently I’ve been doing a lot of action-packed trips, which all involve a lot of hiking.

    Anyone who’s used to traveling with a DSLR will understand the struggle of lugging it around on long hikes, which is why I decided to invest in a compact camera.

    I did a lot of research before buying the Sony Cyber-Shot DSC-WX500, but boy am I glad I did. It’s everything I could have hoped for, in fact, it’s my new favourite travel camera.

    So here’s an honest review of the Sony Cyber-Shot DSC-WX500!
    [/et_pb_text][/et_pb_column][/et_pb_row][et_pb_row _builder_version=”3.15″][et_pb_column type=”4_4″ _builder_version=”3.0.47″ parallax=”off” parallax_method=”on”][et_pb_image src=”http://travellifestylemagazine.com/wp-content/uploads/2018/06/71ScTckJ6lL._SL1500_.jpg” _builder_version=”3.15″][/et_pb_image][/et_pb_column][/et_pb_row][et_pb_row _builder_version=”3.0.77″][et_pb_column type=”1_2″ _builder_version=”3.0.47″ parallax=”off” parallax_method=”on”][et_pb_button button_url=”https://amzn.to/2RITvRs” url_new_window=”on” button_text=”Check Price on Amazon (US)” button_alignment=”center” _builder_version=”3.15″ custom_button=”on” button_text_size=”36px” button_text_color=”#0badbf” button_bg_color=”#dddddd” button_border_width=”3px” button_border_color=”#494949″ button_border_radius=”35px” button_letter_spacing=”0px” button_font=”Amatic SC|on|||” button_icon=”%%28%%” saved_tabs=”all”][/et_pb_button][/et_pb_column][et_pb_column type=”1_2″ _builder_version=”3.0.47″ parallax=”off” parallax_method=”on”][et_pb_button button_url=”https://amzn.to/2RJgkVb” url_new_window=”on” button_text=”Check Price on Amazon (UK)” button_alignment=”center” _builder_version=”3.15″ custom_button=”on” button_text_size=”36px” button_text_color=”#0badbf” button_bg_color=”#dddddd” button_border_width=”3px” button_border_color=”#494949″ button_border_radius=”35px” button_letter_spacing=”0px” button_font=”Amatic SC|on|||” button_icon=”%%28%%” saved_tabs=”all”][/et_pb_button][/et_pb_column][/et_pb_row][et_pb_row _builder_version=”3.15″ custom_padding=”51px|0px|31px|0px|false|false”][et_pb_column type=”4_4″ _builder_version=”3.15″ parallax=”off” parallax_method=”on”][et_pb_text _builder_version=”3.15″]

    Sony WX500 Specs

    If you know what you’re looking for from a camera, you’ll no doubt be interested in the tech specs. So here are the specs of the Sony WX500 so that you can compare it to other cameras.

    [/et_pb_text][/et_pb_column][/et_pb_row][et_pb_row _builder_version=”3.15″ custom_padding=”0|0px|0|0px|false|false”][et_pb_column type=”4_4″ _builder_version=”3.15″ parallax=”off” parallax_method=”on”][et_pb_tabs _builder_version=”3.15″][et_pb_tab title=”Sensor” _builder_version=”3.15″]

    Max Resolution:  4896 x 3672
    Image Ratio:        1:1, 4:3, 3:2, 16:9
    Effective Pixels:   18 megapixels
    Sensor Photo Detectors:   21 megapixels
    Sensor Size:          1/2.3″ (6.17 x 4.55 mm)
    Sensor Type:        BSI-CMOS
    Processor:            Bionz X 

    [/et_pb_tab][et_pb_tab title=”Optics & Focus” _builder_version=”3.15″]

    Focal Length (Equiv.):    24-720mm
    Optical Zoom:                    30x
    Max. Aperture:                  F3.5-6.4
    Autofocus: Contrast Detect (sensor), Multi-area, Center, Selective single-point, Tracking, Single, Continuous, Face Detection, Live View
    Digital Zoom:                    Yes (2X-4X)
    Normal Focus Range:     5cm (1.97″)
    Macro Focus Range:       5cm (1.97″)

    [/et_pb_tab][et_pb_tab title=”Photography Specs” _builder_version=”3.15″]

    Minimum shutter speed: 30 sec
    Maximum shutter speed: 1/2000 sec
    Aperture priority:      Yes
    Shutter priority:          Yes
    Manual exposure mode: Yes
    Subject/scene modes:   Yes
    Built-in flash:               Yes
    Flash range:                   5.40 m (with Auto ISO)
    External flash:               No
    Continuous drive:        10.0 fps
    Self-timer:                      Yes
    Metering modes:        Multi, Center-weighted, Spot
    Exposure comp:          ±3 (at 1/3 EV steps)
    AE Bracketing:            ±3 (at 1/3 EV steps)
    WB Bracketing:           Yes

    [/et_pb_tab][et_pb_tab title=”Videography Specs” _builder_version=”3.15″]

    Resolutions: 1920 x 1080 (60p, 60i, 30p, 24p), 1280 x 720 (30p)
    Format: AVCHD, XAVC S
    Microphone: Stereo
    Speaker: Mono
    Image Stabilisation: Optical

    [/et_pb_tab][/et_pb_tabs][/et_pb_column][/et_pb_row][et_pb_row admin_label=”row” _builder_version=”3.15″ background_size=”initial” background_position=”top_left” background_repeat=”repeat” custom_padding=”38px|0px|17.8125px|0px|false|false”][et_pb_column type=”4_4″ _builder_version=”3.0.47″ parallax=”off” parallax_method=”on”][et_pb_text _builder_version=”3.15″ background_size=”initial” background_position=”top_left” background_repeat=”repeat”]

    Sony Cyber Shot DSC-WX500 Review

    If you’re not sure whether or not the Sony WX500 is for you, here’s everything you need to know about it – the good and the bad (because nothing’s perfect).

    It’s a great price

    I was expecting to have to fork out loads for a decent compact camera, but I was pleasantly surprised when I found out that the Sony WX500 was relatively cheap (around $250). For a camera this decent, I was expecting it to be much more expensive.

    It’s so compact!

    This Sony camera is smaller than my phone, which means it’s super easy to carry around. It can fit easily in a pocket, and it’s no effort to carry at all, because it’s just so light. This means it’s perfect for those looking for a camera that has the quality of a DSLR, but the portability of a compact camera or phone.

    The quality is amazing

    Lately people have been saying that there’s no point paying for a camera when smartphone cameras are so good, and to a certain extent, they are right. Phone cameras are now as good, if not better, than a lot of the really cheap cameras out there. But even the late iPhone X can only shoot in 12MP, whereas this Sony can shoot 18.2MP photos. This is almost as good as a lot of the super expensive DSLRs out there! And the colours is incredible too, so vivid! Take a look at the picture below, which I took using my Sony Cyber-Shot DSC-WX500.  You might notice it can also focus on certain things, whilst blurring out the rest, something that most DSLR users will be used to doing. The video quality is also quite impressive. Whilst it’s not 4K, the 1080p video quality is more than amazing. You get a crisp and clear shot, and it’s great at automatically adjusting the exposure when you move around and the light changes. If you were certain that you wanted 4K video quality, you could always go for the model up from this one, the only reason I didn’t was because I wasn’t too fussed about it being of professional quality – I just wanted a good travel camera. But if you’re interested in compact 4K Sony cameras, you can find them here!

    The image stabilisation is great

    More and more people are wanting their cameras to have image stabilisation, so don’t worry, Sony thought about that, and you can shoot super smooth videos of ypourself playing at https://www.red-dog-casino.org/. I must admit that until now I hadn’t used a camera with image stabilisation, I’d just been using a handheld gimbal, so I was more than impressed.

    There are so many different modes!

    I was so impressed by how many different modes and setting options there were on the WX500. There are beauty modes which make your skin look softer, scenery modes depending on what type of setting you’re shooting in (snow, night, fireworks, restaurant etc.) You can even edit pictures a little on the camera in playback mode. You can add smooth skin effects, teeth whitening effects, you can even make your eyes look wider! The intelligent auto mode also means you don’t have to worry about knowing what settings do what. It picks the best mode and settings for you so that your pictures and footage always look top notch.

    It’s really easy to film with it

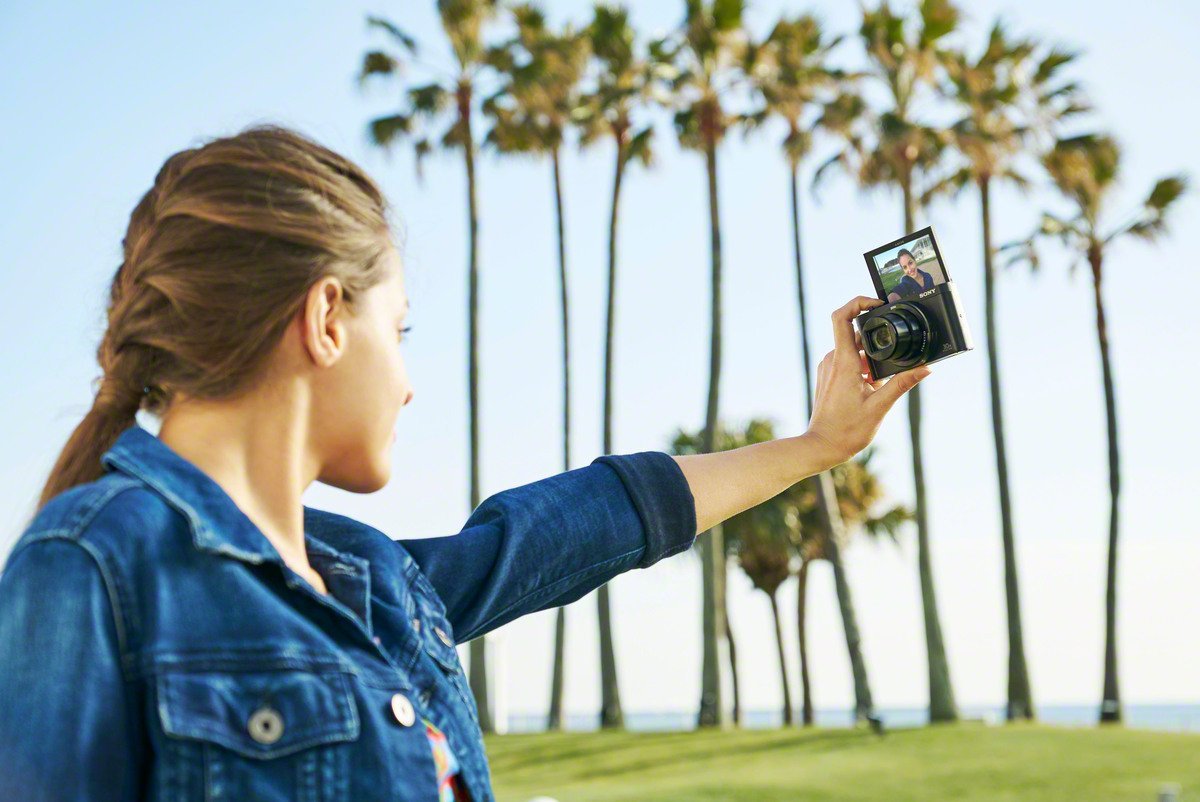
    Before I got this camera, I wasn’t particularly big on filming, I was more of a photographer than a videographer. But it’s just so easy that I had to give it a go (check out my YouTube and you’ll see my videos).  The 180 degree rotatable screen means that you can film yourself and see exactly what the camera sees. This is also great for taking selfies. Plus the ‘movie’ button means that regardless of what mode you’re in, you can start filming with just one button click.
    It’s so easy to transfer your photos

    The camera has it’s own Wi-Fi, which means that you can easily send your pictures wirelessly to your phone or tablet. For me, this is perfect, because I always edit my photos and share my photos on my phone. Plus, I can’t always be bothered to connect my cameras to my laptop and wait for everything to import. If you prefer using a wire to connect your camera to a computer though, don’t panic, you can of course do this as well! And for videos, you’ll need to do this, as you can’t send videos wirelessly.

    The battery lasts forever

    The battery life is great on this Sony Cyber-shot. I used mine constantly for about three days (taking pictures) before it died. The battery obviously doesn’t last quite as long when filming, but this is the same with all cameras.

    The zoom is incredible

    Being a fan of DSLRs, previously if I wanted to zoom, I’d lug around some super heavy zoom lens, like my Sigma 150-600mm. And no way was I expecting this tiny little Sony camera to have a zoom that was anywhere near as decent as that, but I was pleasantly surprised. In fact, I recently learned that the Sony WX500 was the world’s smallest superzoom camera when it was released. The WX500 has both digital and optical zoom, it can zoom a certain distance optically, but then switches to digital zoom. So obviously when it switches to digital zoom the quality starts to drop, but still the distance that you can zoom with this thing is amazing. If you’re hoping for top quality shots, obviously a DSLR with a zoom lens is a much better option, but if like me, you just want a decent camera that you can occasionally zoom with, you’re not going to be disappointed in the slightest.

    It’s not so good at macro

    My main issue with the Sony Cyber-shot DSC-WX500 is that it’s not great at taking close up photos. If something is too close, it simply can’t focus on it. But then again, I bought this to be a travel camera, and I don’t often need to take close up photos unless I’m getting artsy.

    It’s a little delicate

    The only thing I’d say about it is that it feels quite delicate. It’s not really the sort of camera you can throw around or drop, and expect it to be fine. But then, I suppose if you want a rugged camera, that’s when you go for a GoPro. I managed to make mine a little more durable with a screen protector and a case that meant I could wear it around my neck (as I would with a DSLR) and protect it from any bashes.

    So to sum up…

    The Sony Cyber-Shot DSC-WX500 is definitely the camera to get if you want a top quality travel camera, for a reasonable price. It does everything you could ever need it to do, and it produces top quality pictures and videos.

    [/et_pb_text][/et_pb_column][/et_pb_row][et_pb_row _builder_version=”3.0.77″][et_pb_column type=”1_2″ _builder_version=”3.0.47″ parallax=”off” parallax_method=”on”][et_pb_button button_url=”https://amzn.to/2RITvRs” url_new_window=”on” button_text=”Check Price on Amazon (US)” button_alignment=”center” _builder_version=”3.15″ custom_button=”on” button_text_size=”36px” button_text_color=”#0badbf” button_bg_color=”#dddddd” button_border_width=”3px” button_border_color=”#494949″ button_border_radius=”35px” button_letter_spacing=”0px” button_font=”Amatic SC|on|||” button_icon=”%%28%%” saved_tabs=”all”] 

    It’s a great price

    I was expecting to have to fork out loads for a decent compact camera, but I was pleasantly surprised when I found out that the Sony WX500 was relatively cheap (around $250). For a camera this decent, I was expecting it to be much more expensive. 

    It’s so compact!

    This Sony camera is smaller than my phone, which means it’s super easy to carry around. It can fit easily in a pocket, and it’s no effort to carry at all, because it’s just so light.

    This means it’s perfect for those looking for a camera that has the quality of a DSLR, but the portability of a compact camera or phone. 

    The quality is amazing

    Lately people have been saying that there’s no point paying for a camera when smartphone cameras are so good, and to a certain extent, they are right. Phone cameras are now as good, if not better, than a lot of the really cheap cameras out there. But even the late iPhone X can only shoot in 12MP, whereas this Sony can shoot 18.2MP photos. 

    This is almost as good as a lot of the super expensive DSLRs out there! And the colours is incredible too, so vivid! Take a look at the picture below, which I took using my Sony Cyber-Shot DSC-WX500. 


    You might notice it can also focus on certain things, whilst blurring out the rest, something that most DSLR users will be used to doing. 

    The video quality is also quite impressive. Whilst it’s not 4K, the 1080p video quality is more than amazing. You get a crisp and clear shot, and it’s great at automatically adjusting the exposure when you move around and the light changes.

    If you were certain that you wanted 4K video quality, you could always go for the model up from this one, the only reason I didn’t was because I wasn’t too fussed about it being of professional quality – I just wanted a good travel camera.

    But if you’re interested in compact 4K Sony cameras, you can find them here!

    The image stabilisation is great

    More and more people are wanting their cameras to have image stabilisation, so don’t worry, Sony thought about that, and you can shoot super smooth videos. 

    I must admit that until now I hadn’t used a camera with image stabilisation, I’d just been using a handheld gimbal, so I was more than impressed. 

    There are so many different modes!

    I was so impressed by how many different modes and setting options there were on the WX500. There are beauty modes which make your skin look softer, scenery modes depending on what type of setting you’re shooting in (snow, night, fireworks, restaurant etc.)

    You can even edit pictures a little on the camera in playback mode. You can add smooth skin effects, teeth whitening effects, you can even make your eyes look wider!

    The intelligent auto mode also means you don’t have to worry about knowing what settings do what. It picks the best mode and settings for you so that your pictures and footage always look top notch.

    It’s really easy to film with it

    Before I got this camera, I wasn’t particularly big on filming, I was more of a photographer than a videographer. But it’s just so easy that I had to give it a go (check out my YouTube and you’ll see my videos).  

    The 180 degree rotatable screen means that you can film yourself and see exactly what the camera sees. This is also great for taking selfies.

    Plus the ‘movie’ button means that regardless of what mode you’re in, you can start filming with just one button click.

    It’s so easy to transfer your photos

    The camera has it’s own Wi-Fi, which means that you can easily send your pictures wirelessly to your phone or tablet. For me, this is perfect, because I always edit my photos and share my photos on my phone. Plus, I can’t always be bothered to connect my cameras to my laptop and wait for everything to import.

    If you prefer using a wire to connect your camera to a computer though, don’t panic, you can of course do this as well! And for videos, you’ll need to do this, as you can’t send videos wirelessly. 

    The battery lasts forever

    The battery life is great on this Sony Cyber-shot. I used mine constantly for about three days (taking pictures) before it died. The battery obviously doesn’t last quite as long when filming, but this is the same with all cameras.

    The zoom is incredible

    Being a fan of DSLRs, previously if I wanted to zoom, I’d lug around some super heavy zoom lens, like my Sigma 150-600mm.

    And no way was I expecting this tiny little Sony camera to have a zoom that was anywhere near as decent as that, but I was pleasantly surprised.

    The WX500 has both digital and optical zoom, it can zoom a certain distance optically, but then switches to digital zoom. So obviously when it switches to digital zoom the quality starts to drop, but still the distance that you can zoom with this thing is amazing.

    If you’re hoping for top quality shots, obviously a DSLR with a zoom lens is a much better option, but if like me, you just want a decent camera that you can occasionally zoom with, you’re not going to be disappointed in the slightest.

    It’s not so good at macro

    My main issue with the Sony Cyber-shot DSC-WX500 is that it’s not great at taking close up photos. If something is too close, it simply can’t focus on it.

    But then again, I bought this to be a travel camera, and I don’t often need to take close up photos unless I’m getting artsy. 

    It’s a little delicate

    The only thing I’d say about it is that it feels quite delicate. It’s not really the sort of camera you can throw around or drop, and expect it to be fine. But then, I suppose if you want a rugged camera, that’s when you go for a GoPro.

    I managed to make mine a little more durable with a screen protector and a case that meant I could wear it around my neck (as I would with a DSLR) and protect it from any bashes.

    So to sum up…

    The Sony Cyber-Shot DSC-WX500 is definitely the camera to get if you want a top quality travel camera, for a reasonable price.

    It does everything you could ever need it to do, and it produces top quality pictures and videos.

     
    [/et_pb_button][/et_pb_column][et_pb_column type=”1_2″ _builder_version=”3.0.47″ parallax=”off” parallax_method=”on”][et_pb_button button_url=”https://amzn.to/2RJgkVb” url_new_window=”on” button_text=”Check Price on Amazon (UK)” button_alignment=”center” _builder_version=”3.15″ custom_button=”on” button_text_size=”36px” button_text_color=”#0badbf” button_bg_color=”#dddddd” button_border_width=”3px” button_border_color=”#494949″ button_border_radius=”35px” button_letter_spacing=”0px” button_font=”Amatic SC|on|||” button_icon=”%%28%%” saved_tabs=”all”][/et_pb_button][/et_pb_column][/et_pb_row][/et_pb_section]

  • Lamma Island Family Trail: What To Expect From This Hong Kong Hike

    Lamma Island Family Trail: What To Expect From This Hong Kong Hike

    A trip to Hong Kong wouldn’t be complete without visiting Lamma Island. Sure, Kowloon and Hong Kong Island have a lot to offer, but there’s something about catching a local ferry to one of the smaller surrounding islands that just completes the authentic Hong Kong experience.

    So you want to hop over to Lamma Island, but you’re not sure what to actually do there, at least that’s the position I found myself in. And the most recommended hike was the family trail.

    At first I was a little unsure about hiking the family trail, I wasn’t sure it would be adventurous enough for me. But after doing a bit of research, I concluded that it was probably the best way to see what the island had to offer, and I reckon I was right.

    If you’d rather take a look at my walk-through vlog of Lamma Island’s Family Trail, watch it below. I apologise in advance for the quality of this vlog! It was raining so I had to use my GoPro Hero 4 without a stabiliser!

    [embedyt] https://www.youtube.com/watch?v=tTiEOGBFT0c[/embedyt]


    It’s a fairly easy-going hike

    Everything I’d read online referred to the Family Trail as a hike, so I was expecting a lot of hills, uneven paths, and a bit of a challenge. But the family trail was actually quite easy-going, I suppose that’s why it’s suitable for families.

    Sure, there were a few slopes, but nothing too strenuous, and whilst some of the path was a little uneven, with slippy gravel (when I went, it was pouring with rain, bad move I know), the walk was generally fairly laid back.


    It’s not entirely clear where the trail starts

    Everything I read online said that the family trail was really clearly signposted. And it was, once you were on the family trail. But when you first dock in Yung Shue Wan, there aren’t many signs until you get past the first few shops. My advice here is follow the crowds, other people always seem to know where they’re going.


    There’s lots to see on the way

    We started off in Yung Shu Wan, so we got to explore the local shops before we started the walk. I probably wouldn’t have bothered with the shops, but I was dressed in shorts and a little top, and the rain had already soaked me through, so I had to try and find an umbrella.

    Then once you get onto the family trail, you’ll pass by local houses, massive banana trees, and you’ll also reach Hung Shing Yeh beach after about 20 minutes.

    Had it not been such awful weather when I went, we would have spent much longer at the beach and that would have broken up the walk a bit more.


    Spend some time at the beach

    If the weather is good when you go, make sure you spend some time at the beach. There are plenty of bars and cafes around it, there’s a changing room, and even a lifeguard, so it’s perfectly safe to swim, or just relax on the sand if you prefer.

    There are also rocks that are quite fun to climb, and you’ll probably find some crabs in the rock pools too.


    Look out for wildlife

    The amount of butterflies flying around the island was amazing. I’ve never seen so many different butterflies of so many different colours (if you watch the video at the top of this post you’ll see my attempt to capture them on camera).

    If you stray from the family trail, you’re also bound to see some pretty massive spiders. I’m from England, so I’m definitely not used to spiders that are any bigger than a coin, so as you can imagine, I tried to steer clear of spiders as best I could.


    Check out Lo So Shing Beach

    Lo So Shing Beach was something that I hadn’t read about anywhere online, in fact I’d never heard of it before. The only way I found this beach was by taking a detour to some public toilets a short while after Hung Shing Yeh Beach.

    Just outside of the toilets there was a sign that pointed to the beach, and we decided to stray from the path to follow it.

    The path to get to this beach was admittedly a bit more wild than the rest of the Family Trail, but it was only a five minute walk or so from the toilets, and it was definitely worth a visit.

    The beach was just as beautiful as Hung Shing Yeh beach, and I’d say I actually preferred it here. There were plenty of rocks, so we spent a while climbing the rocks and checking out the rock pools.

    For those visiting on a sunny day (which is probably most people), there’s also a viewing deck, where you can sit and enjoy a drink whilst looking out to sea.


    Don’t miss the Kamikaze Caves

    The island has a few different caves, which have been named the Kamikaze Caves, because they were built by occupying Japanese forces. We almost walked straight past one that was just before Sok Kwu Wan.

    The cave we went into stretched quite a way back, and it was definitely interesting to venture into. There weren’t as many spiders as I’d thought there’d be (in fact I didn’t see any), and there were offerings that people had left in the cave.


    Stop at Tin Hau Temple

    Before you reach Sok Kwu Wan, you’ll pass by Tin Hau temple, a temple dedicated to the Goddess of the sea, and it’s worth stopping at. You can admire the building, or light some incense.

    The design of the temple is often seen as symbolic of the east-meets-west culture of Hong Kong and Lamma Island. Whilst temples typically have an eastern design, you might notice the lions in front of the temple’s entrance have a more western design.


    There are loads of restaurants in Sok Kwu Wan…unless you’re vegan or vegetarian

    I had read a lot about how amazing the restaurants on Lamma Island were, especially in Sok Kwu Wan, so I was hoping to grab a bite to eat after we’d finished the family trail.

    But being vegan, I had no chance.

    All of the restaurants were seafood restaurants, with the fish and sea creatures swimming in tanks beside the restaurants’ tables – you can’t get fresher than that I suppose.

    So if you’re a fan of seafood, you’re in for a treat, but if, like me, you’d rather steer clear of animal products, I’d suggest bringing a picnic, or at least a few snacks.


    Ferries aren’t quite as regular from Sok Kwu Wan

    Ferries from Yung Shue Wan are fairly regular, but from Sok Kwu Wan it’s a different story. Try to time your hike so that you’re not waiting around in Sok Kwu Wan. We ended up waiting around an hour and a half.

    However, if you’re a fish eater you could always pass the time with a fresh meal. And if you have kids, there’s a play park near the ferry docks.

    Make sure you get the right ferry back!

    There are ferries to central and ferries to Aberdeen, so you want to make sure you get on the ferry, or you’ll end up spending a lot on the MTR.


  • 20 Ways Travel Will Change Your Life For The Better

    20 Ways Travel Will Change Your Life For The Better

    [et_pb_section fb_built=”1″ admin_label=”section” _builder_version=”3.0.47″][et_pb_row admin_label=”row” _builder_version=”3.0.47″ background_size=”initial” background_position=”top_left” background_repeat=”repeat” _i=”0″ _address=”0.0″][et_pb_column type=”4_4″ _builder_version=”3.0.47″ parallax=”off” parallax_method=”on”][et_pb_text admin_label=”Text” _builder_version=”3.0.47″ background_size=”initial” background_position=”top_left” background_repeat=”repeat” _i=”0″ _address=”0.0.0.0″]

    If you’ve ever been traveling before, you’ve probably noticed how each trip changes you a little. If you travel a lot, eventually you’ll be a completely different (and better) person than before you set out on your adventures. 

    Read on to find out exactly how travel will change your life and your personality! 

    1: You become more social

    Regardless of how you’re traveling, you’re always going to meet new people. So even if you’re on a solo travel trip, you can expect to come back a little more social than when you set off.

    The more you travel, the more used to socialising with new people you’ll be. You’ll be able to make friends within minutes of meeting them, and in developing your social skills, you’ll become a much more approachable person.

    2: You become more confident

    Almost every aspect of traveling is going to boost your confidence, even if before you left home you were super shy. You’ll be constantly meeting new people, learning to be independent, and problem solve, and by deciding to go traveling in the first place you’ll be pushing yourself outside of your comfort zone.

    The more you go traveling, the more confident you’ll start to feel in yourself, as you’ll have to trust your own instincts, and even if you class yourself as an introvert, you’ll have to adopt a few extroverted tendencies for your trips!

    3: You learn to problem-solve effectively

    Whilst you’re traveling, you’ll be solving problems pretty much constantly. If something goes wrong with one of your bookings, or if you get lost (it happens to all of us), or even if you just don’t know what different food items are, you’ll be constantly finding solutions to problems that arise. Think about the language barrier for example, this a problem you’ll need to overcome daily on your travels.

    Problem solving is a skill that will always be useful, even when you return from your travels. Whether you’re self employed, or returning to a job, every life path will involve solution finding and decision making.

    4: You become more willing to step outside of your comfort zone

    No one particularly enjoys stepping out of their comfort zone, not at first anyway. But traveling will force you to visit new places, try new foods, accept new cultures, meet new people etc.

    And once you step out of your comfort zone, so much more of the world opens up for you to explore.

    5: You become a much better communicator

    Communication is something a lot of people, even seasoned travellers, struggle with when traveling. Most of the time, you’ll be traveling to countries where you don’t speak the language, and so somehow you’ll need to find a way to communicate with shopkeepers, cafe and bar staff, taxi drivers, everyone you come into contact with!

    It sounds daunting, but you’ll soon master the art of simple language learning, body language, signs, and of course, Google Translate.

    And once you’ve overcome the barrier of communicating with people all over the world, communicating with people who speak your language will be a doddle.

    6: You’ll become more employable

    All of the skills you learn whilst traveling will boost your employability. Your newly developed communication skills will mean that you’ll become a desirable candidate for any role that involves communicating with people across the company, or even across the world.

    And of course every job you can imagine will involve problem-solving, and by the time you’ve finished traveling you’ll be a master at finding solutions to problems in no time at all.

    The fact that you’ve been traveling is also something that’s often admired by employers, as it shows that you’re an open minded and confident individual.

    7: You’ll broaden your horizons

    There will always be people who never bother to venture beyond their front door step. Their jobs won’t be more than a stones throw away, and their friends will all live in the same area. But once you’ve seen some more of the world, you’ll broaden your horizons and the amount of opportunities available to you.

    You’ll learn of opportunities all over the world, and you’ll meet people who could potentially be useful business contacts from a whole range of different countries.

    8: You’ll develop a hugely diverse group of friends

    Everywhere you go on your travels, you’ll meet new and interesting people from all over the world. Even after a short trip traveling, you’ll have broadened your friendship group.

    Why is this important? Because by socialising with people from different backgrounds, you’ll learn about different cultures and attitudes. Plus, it’s always nice to have people to visit in other countries!

    9: You’ll become more creative

    Traveling always involves getting at least a little bit creative. You might have to get creative about where to stay, how to travel around a country, or even what to do from day to day (because if you’re traveling full time, you can’t just be a tourist every day).

    The creativity you learn whilst traveling might be something that helps to form your ever changing personality, or something that you use in your professional or personal life.

    10: Travel lets you just be human

    So many people are falling victim to the system, and becoming more like machines than humans. Working 9-5 might put food on the table, but other than that, you’re not really exploring, or giving yourself a chance to develop as a human, rather than just as an employee.

    By traveling, even if only for a little while, you’re letting yourself just be human for a while. Let go of the stress of working life, and just enjoy the world and all of its amazing sights. Have meaningful encounters with others, and even if you’re not a particularly spiritual person, you’ll be on quite a spiritual journey.

    11: You’ll become more open minded

    In order to travel long term, and to enjoy it, you need to open your mind a little. You’ll have to accept things that might previously have seemed strange, or different, and after a while, you’ll be used to keeping an open mind.

    This can make you a much more accepting person, and it can actually make your life a whole lot easier.

    12: You learn to appreciate the little things in life

    Even those that like to indulge in luxury travel will find that every now and then, certain places won’t have all of the home comforts that we’re used to.

    Simple things like clean water, or working toilets aren’t always easy to come by, and after traveling without access to such luxuries, you’ll learn to appreciate the little things in life.

    13: You’ll make unbreakable friendships

    Traveling with someone else is stressful, probably even more stressful than traveling alone. It puts strains on friendships and relationships and these strains often cause arguments and falling outs. So if you travel with someone, and your friendship survives the challenge, you know you’ve made an unbreakable friendship.

    Strong friendships can be hard to come by, but when you make friends whilst traveling, you’ll soon be able to tell which friendships won’t pass the test, and which friendships are truly authentic.

    14: You’ll face your fears

    One of the biggest challenges a lot of people face whilst traveling is facing their fears, whatever they may be.

    Traveling will present you with a whole range of challenges, so you’re bound to encounter something that has previously terrified you.

    Whether you’re scared of bugs, adventurous foods, modes of travel, anything, you’re bound to encounter it on your travels, and it gives you the perfect opportunity to face your fears.

    15: You learn to appreciate home, and what you have

    If you’re desperate to go traveling, the chances are you’re probably also desperate to get away from the boredom of home for a while. But once you’re out and about in other countries, you’ll start to appreciate and miss home a little.

    You’ll look forward to returning home after your travels, and you’ll start to appreciate perhaps more than ever what you have, whether that’s a warm home to return to, or a loving family.

    16: You’ll realise that you’re actually quite a tough cookie

    I’ve mentioned the challenges you’ll face whilst traveling a lot, so it makes sense that in facing these challenges, you’ll actually become a lot stronger in yourself.

    Once you’ve been traveling, you’ll realise that actually, you’re one tough cookie, and if you put your mind to it, you can deal with anything the world throws at you!

    17: You’ll grow wiser

    This is a fact that often upsets people that haven’t traveled before, but it’s 100% true. The more you travel, the wiser you’ll become.

    Why? Because you’ll be constantly interacting with different people and cultures, and taking on information and wisdom that you would never have stumbled across otherwise. You’ll grow wiser in your ability to understand different cultures, and in your ability to accept people who are the complete opposite of you.

    18: You’ll develop a love of nature and the natural world

    The world has some amazing natural sights, and in seeing more of what the natural world has to offer, you’ll become much more connected with the natural world.

    In developing your love of the natural world, you’ll also become a lot more mindful, and reflective – nature just has that effect on people.

    19: You’ll learn how to be alone

    Even if you’re traveling with people, at some point you’re going to experience alone time somewhere completely new, something you might not have done before.

    It might sound obvious, but for some people, being alone is something that’s quite daunting. But by learning how to not just be alone, but how to be happy whilst alone, you’ll make yourself a stronger person, and you’ll become much better at coping with stress independently.

    20: You’ll learn how to live in the present

    Planning for the future is all well and good, the only trouble is, some people spend their whole lives planning for a tomorrow that may never come.

    Travelling teaches you to enjoy the present, and just for a moment, take a break from stressing about the future. Plus, only once you’ve actually given in to just living in the present will you be able to clearly see exactly what it is you really want from the future.

    So traveling really can transform your life….

    All you need to do is start living the travel lifestyle, and you’ll see the world whilst becoming the best possible version of yourself. 

    If you need a little help getting started though, why not check out the ultimate travel course?

    In this course you’ll be taught by none other than Nomadic Matt how you can leave your 9-5 job, and find freedom anywhere in the world!

    [/et_pb_text][/et_pb_column][/et_pb_row][et_pb_row _builder_version=”3.0.77″][et_pb_column type=”4_4″ _builder_version=”3.0.77″ parallax=”off” parallax_method=”on”][et_pb_image src=”http://travellifestylemagazine.com/wp-content/uploads/2018/06/travel_blogging_blog_img1.jpg” url=”https://superstarblogging.nomadicmatt.com/the-business-of-travel-blogging-c/ref/481/” url_new_window=”on” _builder_version=”3.0.77″][/et_pb_image][/et_pb_column][/et_pb_row][/et_pb_section]

  • A Fast Track Guide To Becoming A Travel Writer

    A Fast Track Guide To Becoming A Travel Writer

    [et_pb_section fb_built=”1″ admin_label=”section” _builder_version=”3.0.47″][et_pb_row admin_label=”row” _builder_version=”3.0.47″ background_size=”initial” background_position=”top_left” background_repeat=”repeat” _i=”0″ _address=”0.0″][et_pb_column type=”4_4″ _builder_version=”3.0.47″ parallax=”off” parallax_method=”on”][et_pb_text _builder_version=”3.0.47″ background_size=”initial” background_position=”top_left” background_repeat=”repeat” _i=”0″ _address=”0.0.0.0″]

    If you’re a travel addict who loves to write, it makes sense that you’d be interested in pursuing a career as a travel writer. It’s the uultimate dream come true, traveling the world and getting paid to write about your experiences and discoveries, am I right?

    I’m lucky enough to have made an income by travel writing for my own website (this one) and for other sites. So for anyone that’s looking to do the same, here’s a guide to how you can do the same!

    What type of travel writer do you want to become?

    First thing’s first, you need to ask yourself what kind of travel writer you want to become. There are a few different ways to make money writing travel articles, and you can do any you set your mind to.

    Conventional travel writing

    A conventional travel writer writes for another company or publication. In this role, you’ll be given a salary, and possibly even a travel budget. This is probably the most secure type of travel writing income, as you’ll have a contract and a monthly income.

    However, it might not be as flexible as travel writing for yourself. You may be required to travel to certain destinations, rather than just anywhere you fancy and deadlines are likely to be strict.

    Freelance travel writing

    Another way of making an income by travel writing is to write travel articles for different clients as a freelancer. You can sign up to become a freelancer on sites like freelancer.com and upwork.com. With freelancer jobs, you’ll be able to work from anywhere in the world, and set your own rates.

    There are a few downsides to freelancing though, one of the main ones being that work isn’t guaranteed. You’ll need to apply for travel writing jobs, so much of your time will be spent sending out applications. And if you’re to be successful, you’ll need to perfect your cover letters.

    You’re also unlikely to find jobs that give you the freedom to write about your own travel experiences. There will be some out there, but most of the time, clients will be looking for specific articles, which will require more research than just writing about your own experiences.

    Most of the time, you will also be ‘ghost writing’ so you won’t be able to claim credit for the articles you’ve written, which can be gutting, especially if you’re super proud of an article.

    Travel blogging

    This is my favourite form of travel writing, purely because you can write whatever you like, whenever you like, and when it comes down to it, how much you make is up to you.
    Okay, so you probably won’t make any money at first, but as your audience grows, more money-making doors will open.

    You could monetize your blog with ads, affiliate links, or even with digital products, like travel guides which you can sell on your site.

    The only trouble with this is that it can take a while to build your audience and start making money from your blog. The only thing I can tell you is that if you keep going with it, and keep coming up with new ideas to write about, and new ways to market your blog, it will be a success.

    How to fast track your way into travel writing

    Start a travel blog

    Whether you want to earn money writing for yourself, or you’re hoping to land a high-paying travel writing contract, starting a travel blog is something you just have to do.

    If you haven’t blogged before, it can be a little daunting, the thought of putting yourself out there for anyone and everyone to see. But you quickly get used to it, and you could always blog anonymously.

    Starting a blog, regardless of what the blog is about, is always useful if you want to go into writing, because by writing regularly, you’ll develop an authentic writing style. Once you’ve developed your style, writing will become ten times easier, and eventually you’ll be able to bang out a top-quality article in no time at all.

    If you’re hoping to get a job as a travel writer, having a travel blog up and running will show potential employers that you’re a writer capable of engaging an audience. No one wants to take a risk on a writer without a portfolio, and your blog will quickly become your portfolio.

    If you’re hoping to make money writing travel articles for yourself, having a travel blog could be the answer to your dreams. If you post regularly enough, build up a good following and draw a good amount of traffic to your site, there’s nothing stopping you from monetizing your blog.

    If you’re hoping to make money writing travel articles as a freelancer, you’ll have a portfolio in place to show potential clients that you specialise in writing about travel. This will help you stand out from other freelance writers who will write about anything and everything.

    [/et_pb_text][/et_pb_column][/et_pb_row][et_pb_row _builder_version=”3.0.77″][et_pb_column type=”4_4″ _builder_version=”3.0.77″ parallax=”off” parallax_method=”on”][et_pb_cta title=”WANT TO LEARN THE BUSINESS OF TRAVEL BLOGGING WITH NOMADIC MATT AS YOUR TEACHER?” button_url=”https://superstarblogging.nomadicmatt.com/the-business-of-travel-blogging-c/ref/481/” url_new_window=”on” button_text=”Learn more!” background_color=”rgba(0,168,170,0.67)” _builder_version=”3.0.77″ max_width=”84%” module_alignment=”center” custom_button=”on” button_text_size=”32px”]

    Nomadic Matt is possibly the King of the travel blog industry, he’s the prime example of someone living the utlimate dream. So if you want to learn how you can transform your blog into a profitable business, check out his travel course!

    [/et_pb_cta][/et_pb_column][/et_pb_row][et_pb_row _builder_version=”3.0.77″][et_pb_column type=”4_4″ _builder_version=”3.0.77″ parallax=”off” parallax_method=”on”][et_pb_text _builder_version=”3.0.77″]

    TRY TO NARROW IT DOWN TO A NICHE

    Travel writing is super competitive, so if you want to improve your chances of standing out from the crowd, try narrowing it down from just ‘travel’ to a more specific niche.

    There are so many different niches you could explore, here are a few different niche ideas you could try out:

    -Travel writing for minority groups
    -Travel writing for a specific area (you could literally just write tons of articles about the same city or country)
    -Budget traveling
    -Luxury traveling
    -Specific activities and where to do them (kayaking, cycling, hiking, driving, bungee jumping, paragliding)
    -Food travel (you could review food in different countries)
    -A type of travel (flying, cruises, driving etc.)

    These are just a few travel niche ideas you could try, but there are so many different niches you could try. And the great thing about going for a niche is that many niches are pretty much untouched, so it wouldn’t be too hard for you to establish yourself as an authority.

    BUILD YOUR SOCIAL MEDIA FOLLOWING (ESPECIALLY ON INSTAGRAM)

    Building your social media following will give you an audience that’s already interested in you and your travels. Whether you plan on monetizing a travel blog, or writing for another publication, you’ll have an audience to share your articles with.

    If you’re strapped for time, just focus on Instagram. Travel is a particularly visual industry; people want to see as well as read about adventures. If you post pictures of your adventures on Instagram, you’ll draw people in, and it’s more likely that they’ll be intrigued by your content. They’ll want to know the story behind the pictures.

    You’ll also improve your chances of being head-hunted for travel writing roles. If potential employers, or even other blog owners see that you’re already a travel writer with quite the following, they’re more likely to consider asking you to write for them.

    CONSIDER STARTING A YOUTUBE CHANNEL

    The key to good travel writing is personality. Everyone can write flowery language about a destination if they put their mind to it, but if you really want to keep people interested, you need to weave a little of yourself into each article you write.

    People want to get to know the traveller, as well as the destinations they visit. It makes travel stories relatable, and you’ll interest people on a personal level.

    One of the best ways to show people your personality is to put yourself out there on YouTube. You could start a travel vlog, and give your audience the opportunity to see your adventures, rather than just read about them.

    People will get to know you as a person, and in doing so, they’ll become interested in your articles. So by starting a YouTube channel, you’ll boost audience engagement with your articles, and you could even monetize your channel. You just need to find the confidence to put yourself out there.

    (I haven’t yet started a personal YouTube channel, but it’s coming, I promise. For now though, you can check out the Travel Lifestyle YouTube channel.)

    TRAVEL!

    However you plan on travel writing, if you don’t travel very often, you’re not going to have a lot to write about.

    You don’t have to travel full time to be a travel writer, you just need to visit enough places to fuel a few articles.

    For example, if for whatever reason you’d rather do weekend city trips every now and then, rather than longer multi-country trips, that’s absolutely fine! As long as you travel at least more than the average joe, you’ll have more than enough to write about.

    Plus, if you’re hoping to land a job as a travel writer, the first thing employers will look for is an interest in travel, and what better way to show your interest than to have several trips already under your belt?

    FIND TRAVEL WRITING JOBS

    If you’re planning on simply travel blogging, this step won’t apply to you. But if you’re hoping to be a freelance travel writer, or a full time travel writer for another publication, this is the final, and possibly the hardest step to achieving your dream job.

    Luckily though, if you’ve taken all of the previous steps, you’ll already be the perfect candidate for any travel writing job you go for.

    So where can you find these dream jobs? For freelancers you can simply sign up to sites like Upwork or Freelancer, and search for travel writing jobs on those freelancer platforms. Or if you want to extend your reach, you could always try Reddit. There are so many subreddits where you could advertise your travel writing services, or find clients looking for travel writers.

    If you want a more permanent travel writing job though, with an established company, take to every job site you know, and apply to as many travel writing jobs as you can. The more you apply for, the more likely it is you’ll land your dream role.

    If there’s a specific publication you know you’d like to write for, you can search their website for opportunities, or even send them an email applying for a speculative position. A large percentage of opportunities aren’t actually advertised, so you definitely won’t be wasting your time. And even if they don’t have anything going at the moment, you can ask them to keep your CV on file.

    OR…


    START MARKETING YOUR BLOG

    If you’re hoping to make money as a travel blogger, you’ll need to have a marketing plan in place. It sounds scary, but it can be really simple.

    You just need to have a plan for how you’re going to attract more people to your website. You’ll need a little bit of SEO, write a few guest posts for other travel sites to get backlinks, and boost your social media following.

    The more people you can attract to your website, the more successful your travel blog will be!

    [/et_pb_text][/et_pb_column][/et_pb_row][/et_pb_section]

  • TUI Fuerteventura Uncovered Tour Review: What To Expect

    TUI Fuerteventura Uncovered Tour Review: What To Expect

    [et_pb_section bb_built=”1″ _builder_version=”3.0.47″][et_pb_row _builder_version=”3.0.47″ background_size=”initial” background_position=”top_left” background_repeat=”repeat” _i=”0″ _address=”0.0″][et_pb_column type=”4_4″][et_pb_text _builder_version=”3.0.77″]

    The Canary Islands are well known for their hundreds of all inclusive resorts, but if you fancy something a little more adventurous, you might want to consider taking a tour or booking a few excursions.

    If you’ve travelled with TUI to Fuerteventura, the Fuerteventura Uncovered tour is one day out that the reps insist is worthwhile, or at least they did for us.

    But if you’re wondering whether or not to go for it (because it is pretty costly at around £50), here’s a recap of what the tour entailed, followed by the pros and cons (feel free to skip to the pros and cons if you don’t want any spoilers, I won’t be offended!).

    What to expect: a step by step account of the tour

    The pick up

    We were picked up at just after 8am in a bright blue TUI bus that you could see coming from a mile away (one of the benefits of this tour being TUI exclusive I guess). The coach was comfy with leather seats, super effective air con, and nice little foot rests, which was lovely after traveling to the Island on a budget airline.

    [/et_pb_text][/et_pb_column][/et_pb_row][et_pb_row _builder_version=”3.0.77″][et_pb_column type=”4_4″][et_pb_text _builder_version=”3.0.77″ background_color=”rgba(237,240,0,0.62)”]

    TIP

    If like me, you don’t book the tour in advance, and just book it at your hotel, you’ll just be given a paper receipt that looks like any other receipt that you’d normally bin – but keep hold of it! They scan this as you get on the bus.

    [/et_pb_text][/et_pb_column][/et_pb_row][et_pb_row _builder_version=”3.0.77″][et_pb_column type=”4_4″][et_pb_text _builder_version=”3.0.77″]

    The coach then drove to a few other hotels, and by the time it hit 9am, we had picked everyone up.

    Our guide then introduced herself, cracked a few jokes, outlined the plan for the day and gave us some great facts about Fuerteventura’s history and culture.

    First Stop: Ajuy

    The first stop of the day was Ajuy, which was a beautiful black sand beach. Our guide walked us down to the beach and explained that we could either relax on the beach, and enjoy the bars and restaurants, or we could walk up a rocky path that winds up and around the cliff face, until eventually reaching some caves. But whatever we decided to do, we only had an hour to do it!

    I was looking for a bit of adventure, so we opted for the rocky road to the caves. And boy were we glad we did.

    The caves were huge and apart from the steps down to them, they seemed basically untouched. The steps ended just inside the mouth of the cave, and from there onwards, if you wanted to go further, you had to climb over rocks. Obviously for me, this was great fun, but there were a few older folks who had to turn back at that point.

    But, if you are fit and well enough to venture further into the cave, it’s definitely good fun climbing the rocks, and you’ll get some great ocean views. The rocks aren’t actually that tricky to climb over either, you just have to watch your footing a bit, so don’t be put off by that!

    The walk back felt like a bit of a trek. The exciting part was over, so we didn’t tackle the stairs with as much enthusiasm on the way back. Plus, a lot of the walk back was uphill.

    Second Stop: Buenaventura Church

    So the day had gotten off to an exciting start, and we were eager to see what the tour held in store for us next.

    The next stop was only a short stop of 15 minutes, to see Buenaventura Church. Our guide explained the significance of the Church’s design, saying that the designer had wanted the Church to look Mayan, after being inspired by Mayan culture.

    The town around the Church also looked quite quaint and it was bustling with people, unfortunately though our 15 minutes wasn’t enough time to explore any of the traditional looking restaurants or shops.

    Third Stop: Aloe Vera Farm

    Next we visited an Aloe Vera Farm, which I’d say was one of the trip’s best bits. We all piled out of the coach and found ourselves faced with rows and rows of hundreds of Aloe Vera plants. Considering the ground was pure volcanic rock, it was an odd sight to see so many plants thriving in such a dry environment.

    Our visit to the farm began with a presentation about the natural powers of Aloe Vera, and the different types of Aloe plants. We were then guided over to a table already set up with a few Aloe Vera leaves and equipment. We were shown how to cut Aloe Vera leaves, and how to get rid of the orange sap.

    Why get rid of the sap, you ask? Well, apparently, the slightest taste of the orange goo will send you running for the toilet! Yep, it’s a natural laxative.

    Once the leaves had been cut, we were each offered a piece of the Aloe Vera from inside the leaves. This was a gel, putty like substance that we were encouraged to rub over our skin to feel the moisturising effect.

    [/et_pb_text][/et_pb_column][/et_pb_row][et_pb_row _builder_version=”3.0.77″][et_pb_column type=”4_4″][et_pb_text _builder_version=”3.0.77″ background_color=”rgba(237,240,0,0.67)”]

    TIP

    Don’t eat the Aloe Vera that they give you to rub on your skin! It’s a natural laxative, and there are only two toilets on site!

    [/et_pb_text][/et_pb_column][/et_pb_row][et_pb_row _builder_version=”3.0.77″][et_pb_column type=”4_4″][et_pb_text _builder_version=”3.0.77″]

    We also got to try each of the products on offer in the farm’s store. We tried hand cream, moisturiser that had been mixed with avocado oil, and we even got to try Aloe Vera juice (the laxative substance had been removed, don’t worry!). Be warned though, even a tiny sip of the juice tastes like you’ve just bitten into a raw onion.

    After our testers and tasters, we were able to buy the products if we wanted to. I didn’t, quite simply because I’m a budget traveller who can’t afford to spend €30 on moisturiser.

    Lunch

    Lunch was included in the tour, and by the time we got to the restaurant, we were all looking forward to a hearty meal.

    The restaurant was full of other tour groups, and we were all sat on tables of eight. This meant that we got to know a few other people on the tour, and get tips from everyone else on what was worth visiting on the island.

    I’m a vegetarian, so my meal was a little different to most people’s, but still, it was delicious. The starter for vegetarians was pumpkin soup, but everyone else had what they called a classic Canary Island dish: a soup consisting of noodles, chickpeas and bacon.

    The main course was fairly simple, but still tasty. For the meat eaters, it was crispy chicken leg with potatoes and salad, and for us vegetarians, it was a Spanish omelette with salad.

    Dessert wasn’t quite as nice as the first two courses. We were each given a choice of strawberry or chocolate ice cream, which came in yoghurt pots that reminded me a lot of school dinners. But still, ice cream is ice cream, no matter how it’s served!

    The lunch also included free red wine, which certainly helped everyone get to know each other, as we gradually got slightly tipsy.

    Fourth Stop: Bar, museum and viewing point

    I’m not sure exactly what this stop was called, but it was located at the top of the tallest mountain. Our tour guide gave us around 20 minutes to enjoy this stop, and recommended we get a cocktail and take in the views.

    Having just had lunch and free red wine, the thought of paying for a cocktail didn’t much appeal to me, so I spent some time looking around and taking photos of the view, before venturing inside to explore.

    As well as the bar, there was also a museum inside, with beautiful displays, models of the island, and lots of information.

    [/et_pb_text][/et_pb_column][/et_pb_row][et_pb_row _builder_version=”3.0.77″][et_pb_column type=”4_4″][et_pb_text _builder_version=”3.0.77″ background_color=”rgba(237,240,0,0.67)”]

    TIP

    If you want to look around the museum, I’d recommend skipping the bar completely. There’s so much information to read that you won’t have time for both!

    [/et_pb_text][/et_pb_column][/et_pb_row][et_pb_row custom_padding=”15.9531px|0px|0px|0px” _builder_version=”3.0.77″][et_pb_column type=”4_4″][et_pb_text _builder_version=”3.0.77″]

    Fifth Stop: Betancuria

    Next we stopped at the historic town of Betancuria, which looked quite similar to the Mamma Mia! setting.

    We visited the 17th century church there, the admission already paid for and included in our tour price. This church was definitely more impressive than the first one we visited, with beautiful gold alters and cardinal robes on display.

    We were taken through to the back of the church, to what we were told was the Cardinal’s dressing room. This room was full of amazing paitings, and a hand crafted, red and gold ceiling.

    Aside from the church there wasn’t really much to do in Betancuria. We were given an hour here, but aside from restaurants there wasn’t anything else to see or do. The town only consists of two small streets, and so most people passed the time with an icecream.

    Sixth Stop: Goat Farm

    Our visit to the goat farm was definitely interesting. We got to see the goats being milked, the goat pens outside (where there was also camels, tortoises, and geese), and we had a few indoor demonstrations and tasters as well.


    We watched the demonstration alongisde a French TUI tour, and half of the entertainment was the banter between the two tour guides.

    We watched a farmer demonstrate how to make Gofio, a traditional Fuerteventura delicacy. Gofio they told us was like flour but with a more nutty taste, and to make the soft dough that was the finished product, the Gofio was mixed with water, sugar and a little salt in a goat skin!

    I warn you, the first taste is a bit weird, and the texture is unexpected, but even if you don’t like at first, go for a second bite! Once you get used to the texture, you start to appreciate the nutty taste.

    As well as the Gofio, we also got to taste honey rum (which honestly, is so tasty you could drink it like juice), and a few different types of goats cheese. We could also try cactus jam if we wanted to.

    Of course, once we’d tasted everything, we were given the opportunity to buy everything we’d tasted and more.

    Seventh Stop: Mountain Road and Viewpoint 

    This stop apparently wasn’t an official one (although there was another TUI bus there when we arrived, which makes me think it was). Our tour guide got the coach excited by telling us we were taking a detour down Fuerteventura’s most dangerous road.

    The road was without a doubt a scary one, with sheer drops either side as it wound up the mountain.

    The coach stopped at a viewing bay, where we all piled out of the coach to see the views and take pictures.

    One word of warning, there aren’t really any barriers, so you could walk right to the edge if you wanted to. One member of our tour had a slight stumble, and it is easily done if you don’t have your wits about you.

    You’ll also see some squirrels that look a bit like chipmunks, and these guys are super curious, and some of them quite tame. We managed to get a few good close-up shots of the little critters.

    End of the day

    That was the end of our tour, and we were each then dropped back to our hotels. It took around an hour/hour and a half to get back. The day finished at around 5:45pm.


    Pros and Cons of the Tour

    [/et_pb_text][et_pb_image _builder_version=”3.0.77″ /][/et_pb_column][/et_pb_row][et_pb_row custom_padding=”0px|0px|15.9531px|0px” _builder_version=”3.0.77″][et_pb_column type=”1_2″][et_pb_text _builder_version=”3.0.77″ background_color=”rgba(42,198,33,0.61)”]

    Pros

    • We covered a lot of ground in one day, and got to see lots of Fuerteventura in a short space of time.
    • Having a tour guide meant we weren’t just seeing Fuerteventura, but we were also learning about it.
    • You get to meet like-minded people
    • Lunch is included, so you don’t have to spend anything if you don’t want to.
    • With so many different opportunities to taste and try local products, we fully immersed ourselves in Fuerteventura customs, and got an idea of great souvenirs to take home.
    • Going with a tour meant that traveling around Fuerteventura was stress free.

    [/et_pb_text][/et_pb_column][et_pb_column type=”1_2″][et_pb_text _builder_version=”3.0.77″ background_color=”rgba(224,43,32,0.56)” background_layout=”light” border_style=”solid”]

    Cons

    • Much of the tour felt like we were being sold to.
    • Apart from the caves, it wasn’t particularly adventurous. It was perhaps more suited to an older crowd.
    • The time spent at each stop could be reorganised. For example longer time was needed at the caves and perhaps at the museum, and less time was needed in Betancuria.
    • It was sometimes not clear what would cost extra – for example we were told we could have orange juice instead of wine (which was included), but were then brought a bill for it. And we were told at the mountain stop that the next part of the tour was a cocktail stop – but the cocktails were not included.

    [/et_pb_text][/et_pb_column][/et_pb_row][et_pb_row _builder_version=”3.0.77″][et_pb_column type=”4_4″][et_pb_text _builder_version=”3.0.77″]

    Was it worth the money?

    This is a question I always get asked after going on tours, and the answer for this one is yes.

    The tour was something like 50 euros each, but that included travel all around the island, lunch, a tour guide, and several private demonstrations.

    We saw more than we would have had we just hired a car and hit the open road, and we visited places we wouldn’t even have known about.

    [/et_pb_text][/et_pb_column][/et_pb_row][/et_pb_section]

  • How To Keep Expensive Camera Gear Safe Whilst Traveling

    How To Keep Expensive Camera Gear Safe Whilst Traveling

    You’ve probably heard a fair few horror stories about traveling with camera gear. Lenses getting broken, kit being stolen, hold luggage containing cameras going missing, so it’s no wonder people often leave the bulk of their camera gear at home.

    But if you’re traveling to some amazing places (which no doubt you are), you want to be able to capture the moment and scenery as best you can. And that means taking all your best camera gear with you!

    Don’t panic though, it doesn’t have to end in disaster. It doesn’t even have to be difficult. You just need to know how to keep your gear safe from breakage, loss and theft. Once you’re used to traveling with your photography gear, you won’t even consider traveling without it again.

    So here’s how you can make sure your camera gear stays safe and by your side on your adventures.

    Pack your cameras in your carry-on luggage

    There are so many different horror stories about airlines losing people’s luggage, and whilst it’s never happened to me, I always make sure to pack my most precious possessions (which always includes my camera gear) in my carry on bag.

    If something ever were to happen with my hold luggage, it would be stressful enough losing clothes and toiletries, and I dread to even think about losing my photography equipment too.

    Hold luggage also gets thrown around quite a bit, you just need to watch them loading the plane to see that. So if you pack your cameras and lenses in your hold luggage, it’s much more likely that you’re going to have a few breakages.

    It’s okay to put non-delicate camera accessories in your hold luggage, like memory cards, battery chargers or even some tripods. Anything that can take a bit of a beating.

    Pack spare lithium batteries in your carry on luggage

    If any of your photography gear has spare lithium batteries (that aren’t installed in the device), pack them in your cabin bag. This is less about keeping your batteries safe, and more about making sure you adhere to the TSA guidelines.

    Plus, lithium batteries can cause hazards if they short circuit, and the last thing you want is to put yourself and the entire plane at risk.

    Get a protective camera bag

    There are so many different camera bags out there that there’s no excuse for transporting your camera kit in a flimsy bag. Camera bags are made to protect and cushion cameras, and whatever your budget, you’ll be able to find one to suit you.

    Whether you want a camera rucksack with padding, or a hard shell, cushioned case, most camera bags will be cabin approved, and will make sure your cameras aren’t bashed around at all during transportation.

    Tone down your bag

    Some camera bags obviously look like they contain cameras, which is great if you want to feel like a real pro, but thieves will also be able to tell that you’re traveling with expensive gear.

    If you can, go for a camera bag that’s a bit more generic. One that looks like a regular bag. This way, you won’t attract as much attention, and your cameras are much less likely to be stolen.

    Another good way to deter thieves is to beat up your bag a little bit. This might sound like a horrific thing to do, especially if your camera bag is a recent purchase, but if your bag is a bit dirty, or a bit old looking, you won’t be such an obvious target.

    An old bag implies old gear, gear not worth stealing. And you’ll also give the impression that you’re very well traveled, and no one’s going to mess with a sassy and street wise traveler – thieves tend to go for the rich but inexperienced travellers.

    Keep an eye out

    When you’re using your photography gear to capture amazing shots of your travels, just have your wits about you and make sure you keep an eye out for anyone lurking too close.

    It doesn’t happen very often, but sometimes tourists will have cameras stolen from their hands before they’ve even had time to click the shutter button. So if you catch a glimpse of anyone suspicious, or anyone hovering suspiciously close to you, secure your camera gear and move on. Find a crowd if you can.

    Find a fellow photography enthusiast

    You’ve probably been told time and time again not to travel anywhere dangerous, or walk home at night on your own, and this is a rule that you should definitely stick to when out and about with your camera gear.

    Thieves will go for those who are easiest to rob, and if you’re traveling with someone else, or even a group of people, you’re instantly not as vulnerable as a solo photographer. You’ll also have a buddy to keep an eye out for you whilst you shoot.

    Keep your bag in sight

    The easiest way to carry a camera bag is often wearing it on your back, or slinging it over your shoulder, but if you’re traveling through crowds, this is going to make you an easy target for thieves.

    If you can, wear your bag on the front of your body, even if you have to wear your camera rucksack like a baby carrier. You might look a bit strange, but you’ll have your camera gear right where you want it: right in front of your eyes.

    Use several different memory cards

    Memory cards are the easiest thing to lose, and if you’re taking some incredible photos, you don’t want to risk losing them all.

    So rather than opting for one 256gb memory card for example, go for a few smaller, 32gb ones. This way, if you lose your memory card on one day, you’ll still have the footage from the other days, and another memory card to see you through to the end of your trip.

    Ask for a safe at your hotel or hostel

    Most hotels and hostels will have safes available, even if there isn’t one already in your room. Just pop down to reception and ask if it’s possible to hire one.

    If you’ve got a safe at your accommodation you won’t feel the need to carry your camera gear everywhere with you. You’ll be able to leave it in the room, reassured that it’s safe.

    Make a note of all your gear

    Before you set out for your travels, make a note of all your gear, and if you want to be super safe, write down the serial numbers of your devices too.

    This way, you can do a stock check every now and then, especially if you’re traveling with a lot of gear. And with the serial number you’re more likely to track down a lost item.

    Take out photography insurance

    You’ve heard of travel insurance, and probably content insurance, but there are companies that deal specifically with insuring photography gear for those that travel a lot.

  • Alaska Inside Passage Cruise Adventure

    Alaska Inside Passage Cruise Adventure

    Anyone looking to explore Alaska should seriously consider doing so on a cruise. This way you’ll get to see a whole load of Alaskan destinations, and take part in local activities that you might not otherwise have the chance to.

    I visited Alaska on a Princess Cruises Alaskan Cruise, and it was incredible. To be perfectly honest, the idea of a cruise never appealed to me. It was something I thought only retired people did, and it sounded like a particularly slow way to travel. I’m so used to packing my travels with daily adventures that when I heard it would be a few days at sea between each port, I thought I’d probably die of boredom.

    But, I’m pleased to say I was pleasantly surprised. Here’s how my trip turned out.

    10 Day Alaska Inside Passage Cruise (from San Francisco)

    Starting off in San Francisco

    The cruise started from San Francisco, Pier 27 to be precise. I’m from the UK so I seized the opportunity to spend some time in San Francisco before the cruise departed, seeing the sights and visiting family members.

    Pier 27 was reasonably close to Pier 39 (a buzzing tourist pier, full of restaurants, arcades and shops), so we stopped there for a while for some lunch at Bubba Gump Shrimp (oh yes), before walking a little further to pier 45, otherwise known as the Musée Mécanique. This was the perfect way to spend the time we had to wait before we could board. The museum is full of arcade machines and penny games that will throw you back in time, and there’s something for everyone there too.

    Boarding

    Once the time came for us to board, I was impressed by how speedy the process was. If, like me, you’re used to waiting in security queues at airports for absolutely ages, you’re in for a treat, because as it turns out, cruise terminals are a lot quicker and more organised when it comes to getting people through security and safely on board.

    Once we got through security we were handed our very own Princess Cruises cards to use on board for drinks, snacks, everything!

    My first experience of a cruise ship

    Once the commotion of boarding had died down it was time to set sail, and three days of non-stop cruising awaited us.

    Having never been on a cruise ship before, I didn’t really think that there could be all that much to do. I’d packed books, work to do, my laptop, anything that I thought might keep me from going slowly insane. And do you know what? I didn’t touch any of it.

    WiFi on board was ridiculously expensive, and priding myself on being a budget traveler, there was no way I could justify it. So I seized the opportunity to cut myself off from the outside world for a few days, and explore what the ship had to offer.

    There was so much it was almost overwhelming. No matter how many times I walked around the ship, I kept discovering new things, and getting lost repeatedly (in a good way).

    The first thing I found on my around-the-ship adventures was endless amounts of food. Seriously, there was food everywhere. From the buffet, to the coffee shop, to the pizzeria, to the ice-cream stand, to several formal restaurants, wherever I went on the ship, I was never more than a couple of minutes away from food, and good food at that! And the best part was that most of it was free (well, included in the overall price I’d paid for the cruise).

    So once I’d finished trying every sweet and savoury snack I could manage, I went on to find out where and what the onboard entertainment was, because as much as I love food, I couldn’t manage a ten day cruise doing nothing but eating.

    There was a whole entertainment program, including things like games, competitions, workshops, evening shows, Bingo, there was even a Casino! As well as organised entertainment, there was also plenty to do spontaneously. There was a shuffle board, a basketball court, a pool, gym and a running track. So as you can imagine, I was instantly drawn into onboard activities and my books and work were long forgotten.

    Sight seeing and whale watching

    Lots of people travel to Alaska in the hope of seeing whales, whale watching was even an optional excursion at a lot of the ports, but we were able to watch over the side of the ship and catch a few unplanned glimpses of fish, dolphins and even one or two whales.

    Once we got a little closer to land, the scenery was also incredible. We sailed through glacier carved fjords, and admired waterfalls – there were endless photo opportunities.

    One member of our party had booked a cabin with a balcony, and so even when the weather got a bit too chilly to be standing up on deck, we were able to sight see and take pictures without getting too windswept. We all snuggled under blankets, with wooly hats and a glass of champagne, enjoying the mountain scenery.

    Juneau – the first port

    Juneau was the first port of call for our ship, and it was the one I was most excited about. Why? Because I’d booked a kayaking excursion to explore Mendenhall Lake, and hopefully see some more Alaskan wildlife.

    Here’s a video showing a few different clips of my excursion. We may not have seen any whales, but I stand by that it was the best possible way to explore the untouched areas of Juneau.

    [embedyt] https://www.youtube.com/watch?v=P08J2rnzAss[/embedyt]


    I don’t have much to report on Juneau itself, as 6 hours of my day there was spent paddling through blissfully calm waters, but I was able to fit in a ride up the mountain, on Goldbelt Mount Roberts Tramway. And if you happen to be in Juneau ever, I’d recommend it.

    The tram took us to the top of the mountain, where we could see out over the capital. By the time I rode the tram, it was 9pm, and way past sunset, but even so, the view was incredible. Our cruise ship was lit up in the waters below, and Juneau looked warmer than ever.

    At the top of the Goldbelt Mount Roberts Tramway there’s also a little shop that’s got some great souvenirs.

    Skagway

    Skagway was the second stop on our Alaska cruise, and this stop had a slightly different feel to Juneau, perhaps because this time I explored the port, rather than just setting off for an excursion.

    The town was like stepping back in time to the old west, with saloons and diamond shops everywhere. It looked exactly like I’d imagine a gold rush town to look.

    Whilst in Skagway, we did take part in another excursion, this time a slightly less active one. We boarded the Whitepass and Yukon Route Railroad train, and for three hours, we took in the views, took some great pictures, and even made some new friends.

    Ketchikan

    Ketchikan was an interesting stop, mainly because it was so varied. The main town was full of gift shops, diamond and jewellery shops, and of course cafes. To be honest, I didn’t spend too much time looking around the shops, as the general impression I’d formed was that most cruise town ports consisted of the same shops, selling similar souvenirs. I wanted to explore off the beaten path.

    So we took a local bus to the Totem Heritage Centre. The centre was full of information and stories about the origins and designs of the 19th century Totem poles.

    From the Totem Heritage Centre, we followed a trail that took us through the woods and to a river where there was literally thousands of salmon. With Ketchikan being the salmon capital of the world, we couldn’t resist climbing down to the river to get a closer look at the salmon.

    We decided to walk back, through the local streets, rather than getting the bus, so that we could get a feel for local life. The place was pretty much deserted, but still it made an interesting walk.

    When we got back to the main town, we explored the famous Creek Street, which used to be an Alaskan red light district in the 20th century. This was quite something to see, with the wooden buildings all raised above the creek, and sea lions swimming underneath.

    The buildings were all brightly coloured, and the street was packed. There were tourists everywhere, and actors dressed as brothel madams enticing you to enter the old brothels that are now museums.

    Glacier Bay National Park

    Glacier Bay was the highlight of the whole cruise, it was the reason most of us were on the cruise in the first place.

    We weren’t able to get off the cruise ship, as Glacier Bay is a protected area, but the ship stopped for a whole day in the National Park, giving us plenty of time to take pictures and enjoy the scenery. We even managed to see one of the glaciers calving. This is basically where chunks of ice break off of the glacier and fall into the water, with the sound of thunder. This is apparently a rare sight to see, and it was definitely quite incredible to watch. The sound of thunder was unmistakable.

    A Glacier Bay National Park Ranger also came on board to tell us more about the glaciers’ history, how they moved and why they calve (apparently global warming has nothing to do with it).

    Victoria, British Columbia

    Victoria was our last stop, and it was pretty different from our previous Alaska stops. For one, it wasn’t freezing cold, and it was much more city-like even than Juneau, Alaska’s capital.

    There wasn’t quite as much to do in Victoria when it came to excursions, but there was definitely to keep us occupied for the afternoon we were there.

    We started off by getting a water taxi to take us further into the city, which was an experience in itself. Then we explored the British Columbia Parliament Buildings, before going for afternoon tea at a hotel overlooking the harbour.

    It was the first stop where the shops were a bit more varied than just gift stores and diamond stores, so naturally, we spent some time browsing and inevitably, buying souvenirs. It was my first time in Canada, so of course I couldn’t leave without buying some Rocky Mountain chocolate.

    Back to San Francisco

    Sadly, our ten day Alaskan cruise adventure started to come to a close after we visited Victoria, British Columbia. After two more sea days, we were back in San Francisco, saying goodbye to all the new friends we’d met, and exchanging photos of all the amazing sights we’d seen.

    So the Alaska Inside Passage Cruise was one that I would highly recommend, and if the chance ever presents itself, I’ll definitely return to Alaska to explore further. The sights were incredible, and unlike anything I’d ever seen before, and even the experience of being on a Princess Cruise was something I won’t ever forget. The extravagant displays of food, faultless entertainment, and friendliness of the staff made the whole trip even more memorable.

  • 20 Tips For Easy Vegan Travel

    20 Tips For Easy Vegan Travel

    For some people, travel is super easy. They can be spontaneous and just get up and go. For us vegans though, it can be a little more difficult.

    Or at least, we think it’s difficult. But there are hundreds of vegan travellers out there (myself included), who have managed to travel without their veganism being too much of a problem.

    So how do they do it? How do they breeze from destination to destination, finding nutritious vegan meals in places where the term ‘vegan’ might not even be understood?

    At first, it was a mystery to me too. Newly vegan and struggling not to give in to any non-vegan temptation, I made my way to different destinations around the world. And somehow, I managed to 1) survive, and 2) figure out exactly what it is that makes vegan travel that bit easier.

    Here are 20 tips to help you travel the world easily, as a vegan, so that hopefully, your plant based travels will run a lot more smoothly.

    1: Travel with other vegans

    The more vegan company you have whilst traveling, the more likely you are to stay true to veganism.

    Finding vegan options can be difficult, but when there’s a whole group of you, you’ll encourage each other to keep going until you find the perfect place. Plus, you’re much less likely to give in to temptation when you’re surrounded by other strong willed vegans or vegetarians.

    Traveling with other vegans can also be a lot less stressful. When you travel with a meat eater, they might not have the patience to help you find a restaurant or cafe with vegan options. You might feel pressured to just give in and eat somewhere without a single vegan option. That’s when you feel tempted to break your commitment to veganism, and that’s the last thing you want!

    2: Don’t expect a ton of vegan options

    Some places will have so many plant based meal choices, that it’ll be like a vegan heaven. But in other places, in fact, probably in most places, plant based living might be a preposterous idea to locals.

    In these places, vegan options might be quite hard to come by, and might appear on menus by chance, rather than as strategically planned options for vegans. Every now and then, you’ll probably end up with some makeshift vegan meal that the restaurant or cafe has thrown together. And more often than not, these makeshift meals won’t be all that great, so do what you can to find somewhere that caters for vegans!

    It might take a little searching, but even in places where meals are very meat orientated, you’ll find something. Just don’t expect a ton of options. If you’re expecting a whole range of menu options, you’re more likely to be disappointed. So tone down your expectations, that way if you do manage to come across somewhere that seems to be a plant based heaven, it’ll be a pleasant surprise.

    3: Pack your favourite vegan sauce or salad dressing

    Some people might think you mad for packing your own condiments, but any vegan traveler will understand completely. They’ll probably have done the same, or if they haven’t, they’ll soon be wishing they had!

    Often, sauces and dressings that you wouldn’t even think to contain animal products, aren’t vegan. And even us plant based folk don’t want to be eating plain old leaves when we order a salad.

    So sneak a few bottles or packets of your favourite sauces and salad dressings, and you’ll have your own flavour sachets to garnish any salads or sandwiches.

    Also, no matter where you go, you’ll be able to find a supermarket. And if you can find a supermarket, you can always find at least some lettuce, and with your own sauces already packed, you’ve got yourself a flavoursome lunch.

    4: Pack a bunch of vegan snacks

    Packing vegan snacks is key to making vegan travel easy. The worst part about traveling as a vegan is that even when you’re super hungry, you’ve probably got a little wait until you can find somewhere with vegan options.

    Having vegan snacks with you makes searching for vegan food in a new place a little more bearable. You can have a munch on some of your favourite treats to keep you going.

    They also make day trips a whole lot easier. If you’re heading out on a hike, or even to a tourist attraction like a national park, you’re not likely to stumble across any vegan-friendly food options. With your own snacks already packed, you’ll be fully prepared for a long day trip, with your picnic all ready. As long as you’ve come prepared with snacks, you’ll have energy to keep you going all day, and you shouldn’t need to turn back in search of food.

    5: Learn how to ask if something is vegan

    One of the biggest struggles vegan travellers come across is communication. Those without any dietary requirements will often wing it, and order anything. It’s easy to work out the basics, but when you need to know if there’s egg or milk in something, that requires a little more knowledge of the local language.

    Before you rock up in a new destination, do a little googling, and find out how to ask if something is vegan. This might go without saying, but you should also learn the language for ‘yes’ and ‘no’, just so you know what their response is when you ask.

    You might already have an inkling about what menu options contain animal products, but some menu items might surprise you. And at least if you learn how to ask what’s vegan, you might end up finding a delicious meal that you previously thought was off limits.

    6: Take to Instagram for inspiration

    When you set out, you might feel like you’re the only vegan traveler on earth, but don’t worry, you’re not. There are thousands of us out here, and most of us love to share our vegan experiences on Instagram.

    Search your destination on Insta, and have a scroll through, and you might find some vegan food pictures. You can also try searching for #vegan followed by you destination. For example, I’m writing this eBook in the French town of Chamonix, so I searched for #veganchamonix. Now, this is a fairly small town, and one that not too many people have heard of, so my search might not have returned too many results, but the point is, I still got at least some results. Type in somewhere bigger, #vegansanfrancisco for example, and you’ll find thousands of posts. Most of them will be geotagged, or will mention the venue in the caption, so you can easily track down those vegan dishes that look delicious.

    7: Learn the language for certain ingredients

    As well as learning how to ask if something is vegan, if you want to go the extra mile, and make double sure you’re not going to slip up with any non-vegan foods, you might want to learn the local language for ingredients like milk and eggs.

    This is going to make supermarket shops a lot easier. If you’re not sure if something is okay for you to eat, you can then simply scan the back for animal product ingredients.

    Also, believe it or not, there will be places where the term ‘vegan’ is unheard of. You might ask what vegan options they have and be met with a blank stare. So if you can ask if something contains the things you’re refraining from eating, without using the term ‘vegan’, you’ll have found a way around that obstacle.

    8: If you can, book self catering accommodation

    Most people like eating out because it’s easier, and nicer, but for us vegans, it’s a heck of a lot more difficult than eating at home, and often there isn’t too much to choose from (which makes it even worse for fussy vegans!).

    So to avoid the awkward eating out and searching for something you can eat, try and book self catered accommodation. This way, you’ll have the freedom to cook delicious vegan meals in your accommodation, with no questions asked, and no hours of searching.

    Plus, booking self catered can make your travels a lot less expensive. Book through booking.com or Airbnb and often it’ll be much cheaper than a hotel, and sometimes as affordable as a hostel. Even if you do go the hostel route though, you can usually find hostels with kitchens, where you can do your own food prep. You also won’t then have to spend money on eating out, which let’s face it, can be pretty pricey.

    9: Ring ahead and ask your hotel/hostel about the local vegan options

    If you can’t book self catering, or if you’re just interested in going out to eat, ring ahead and ask about what vegan options there are locally.

    This way, you’ll have a good idea of what’s on offer. If it turns out there’s not much around for vegans, you won’t be disappointed when you arrive. And if there’s loads of plant based options, you can plan all your meals (and your budget) in advance.

    And if you haven’t yet fully decided on where you’re staying, ringing round a few different places can help you choose the best hotel or hostel. You might even find somewhere with a whole load of other vegans, and where there’s vegans, there’s like minded friends. Then hopefully, if you’re not sure where to find a suitable and delicious snack, someone else will be able to direct you to the perfect place.

    10: Take to Pinterest for inspiration

    Pinterest can be just as useful for finding vegan inspiration as Instagram. Search on Pinterest for vegan options in your destination, and you’ll find restaurants and cafes that you’d never have found otherwise.

    Much like you would on Instagram, just search ‘(your destination) vegan’ or ‘(your destination) vegan restaurants’ and you should be met with some scrumptious looking search results.

    11: Find other local vegans and vegan travellers online

    It’s always great to make a like minded friend who lives a similar lifestyle to you, and finding other vegan travellers can really make your trip.

    You can exchange stories, discuss veganism in depth, and you might even learn something from each other. Often, the best cafes are the ones you hear about from someone else.

    Plus, if you’re traveling alone, or as the only vegan in your group, finding other vegans can be a fun reminder of why you chose to become vegan in the first place.

    There are plenty of places you can find other vegans online. Try social media groups and communities, and you’re bound to find someone traveling to the same place as you.

    Traveling Friends

    12: Look for health food shops

    The first mistake people often make is searching for ‘vegan’ cafes and restaurants. Sure, that’s essentially what you’re looking for, but there aren’t too many cafes that label themselves as such.

    Instead, you want to look for health food shops. These often specialise in organic and healthy products, but as you probably know, veganism is pretty damn healthy, so naturally they’ll have plenty of vegan options.

    Most health food cafes will also sell products for you to take away, so you can stop off for their to refuel, and also top up on some handy snacks for later.

    13: Do some research before you set off

    The last thing you want to do when heading somewhere new is to go in blind. You want to have at least some idea of what to expect when it comes to vegan food options.

    Look up your destination on vegan blogs, and search for vegan and health food shops and cafes. Look at vegan travel blogs, because you never know, someone else might already have experienced your destination as a vegan, and if you’re lucky, they’ll have written an article with everything you need to know.

    14: Pack enough eco cosmetics to last you a while

    Finding eco cosmetics in a foreign place is even trickier than finding vegan food options. So if you want to have enough to last you, pack all you need. That is, if you don’t want the stress of having to find and ask for eco products in another language.

    If you’re traveling for a while, of course you’ll need to stock up at some point, but you don’t want to be going on a wild goose chase the second you touch down in your destination.

    15: Accept that you might have to eat a lot of raw foods

    If you don’t have a kitchen at your accommodation, and there aren’t too many vegan options around, you might have to accept that most of your meals will be made up of salad and fruits.

    You’ll always be able to find fruits and salad items in supermarkets, so if the restaurants aren’t too accommodating, you won’t be completely without meal options.So just don’t be surprised if there aren’t too many warm food items that you can eat. Everyone loves a good vegan burger, but realistically, you won’t find one in every destination.

    16: Book your airplane meals in advance

    As well as finding suitable food at your destination, you also need to think about what you’re going to eat on the plane, especially if you’re in for a long haul flight.

    Airplanes can cater for vegans, but they sometimes need to know in advance if you require a special meal. If you want to play it safe, book your airplane meal before you fly, and you’ll avoid the risk of them selling out of vegan options.

    On a slightly unrelated side note though, if you’re hoping to be upgraded, you might want to wave goodbye to this possibility if you order a vegan meal. Airlines often won’t upgrade those that have special diet requirements, purely because they’re not sure they’d be able to cater for them.

    17: Double check ‘vegan’ options

    Veganism might be an increasing lifestyle choice, but that doesn’t mean that the term is universally understood.So when ordering a vegan option, just double check that it doesn’t contain meat or animal products. Better to be safe than sorry, right?

    Even if you’ve asked if something is vegan, and been given a confident yes, maybe just double check by asking about the ingredients. Sometimes, people will assume you just mean vegetarian, or they might just be keen to please you, as their customer.

    18: Be 100% sure about your veganism

    If you set off on your travels with doubts in your mind about your commitment to veganism, the chances are you’re going to be very easily swayed to eat something that’s not vegan.

    Before you start your travels, remind yourself of why you became vegan, and if you’re serious about this lifestyle choice, be firm with yourself in the face of temptation!

    19: Be prepared for mishaps

    Sometimes, miscommunications happen. Even if you triple check every thing you eat. So you might end up with a vegan burger that’s not actually entirely vegan, but it’s not the end of the world.

    As long as you’re not having full on hot dogs, or cheese fondues, you can still class yourself a dedicated vegan, even if you slip up occasionally.

    What matters is that you’re doing your bit, whether for the animals, the planet or yourself (we all have different reasons for turning vegan) and that you’re actively doing your best to make a change.

    20: Don’t be afraid to travel!

    The thought of traveling as a vegan can sometimes be a little scary. It can be difficult enough to find vegan options in your home town, so it makes sense that you might be a bit nervous about traveling to somewhere where the term ‘vegan’ isn’t even understood.

    But the main thing to remember is not to be afraid of going for it and starting your travels!

    Once you’ve set off, and hit a few different destinations, you’ll realise it’s not actually that difficult, or different to normal travel. All you need is a bit of research under your belt before you go, and some self restraint when it comes to non-vegan temptations!

    You’ll also see that no matter where you are, meat and animal products don’t have to be part of your diet. You’ll probably meet more vegans than ever before, and maybe even stumble across places where veganism is becoming the norm. You’ll see more of the world you’re changing, and remind yourself of why you became vegan in the first place. Trust me, travel can be an important part of the vegan lifestyle, and you definitely won’t regret taking a leap and going for it.

  • How To Avoid Getting Sick On A Plane: 10 Tips To Flu-Proof Your Flight

    How To Avoid Getting Sick On A Plane: 10 Tips To Flu-Proof Your Flight

    Have you ever boarded a flight only to feel a cold brewing a few hours later? You’re not the only one. Planes are breeding grounds for colds, flus and other illnesses, there are just so many germs going around! Luckily though, there are a few things you can do to avoid catching colds and illnesses when flying.

    1: Wash Your Hands

    Everyone knows to wash their hands, but the reality is that most of us don’t do it as much as we should.

    On a plane, anytime you come into contact with other people or surfaces that lots of others have used, wash your hands! It sounds a bit extreme, but this is how germs and bacteria spread.

    Wash your hands regularly during the flight, and make sure you use soap! The last thing you want is for any bacteria to be lurking on your hands.

    2: Irrigate

    If you want to avoid getting sick on your flight, you need your nasal passages free and clear. Irrigating your sinuses, either with a nasal passage clearing spray or a NetiPot, before and especially after your flight, will help flush away germs that you come in contact with.

    3: Avoid touching your face

    When you think about, you probably touch your face quite a lot throughout the day. Whether you’re scratching an itch or moving hair out of your eyes, it’s something you do fairly often. But if you want to avoid getting sick after a flight, it’s a habit you’ll want to break.

    Even if you wash your hands regularly throughout the flight, keep them away from your face! You don’t want to spread any germs to your nose mouth or eyes.

    4: Protect Your Hands

    This tip might make you look a little weird, but you’ve probably gathered by bow that your hands play a huge role in spreading germs.

    To avoid incidentally picking up any bacteria that could cause an illness, use gloves or a napkin, or even your shirtsleeves to open things like toilet doors on planes.

    5: Hydrate

    Hydration is key to staying healthy whether you’re on a plane or not. If you’re dehydrated this can cause symptoms of its own, and lower your immune system. Staying hydrated can keep you feeling good and healthy, and it can even help you conquer jet lag.

    Plus, if you travel regularly, you might have noticed that the atmosphere on planes is pretty drying. The air con always leaves you with a dry mouth and even dry skin, so the chances are you’ll be craving water fairly regularly anyway.

    6: Get Some Beauty Sleep

    If you’re tired, your body is going to cope too well with fighting off any potential illnesses. Keep your immune system strong by getting plenty of sleep.

    This applies to both on the flight, and before and after. You want your body to be at its strongest over your period of travel.

    It can be hard to sleep on the plane, but try and get in as much sleep as you can.

    7: Wipe Down Your Area

    Your seat and your tray table is where you’re going to be sat for at least a few hours, so you want to make sure that your little space is clean.

    Think of how many people have used the tray table before you. Sure, the cabin crew probably gave it a wipe down, but it’s better to be safe than sorry. So bring some antibacterial wipes with you anyway.

    8: Come Prepared

    To avoid sharing germs with the people that flew before you, it doesn’t hurt to bring things like your own pillow. Some airlines also recycle their headphones, so bring your own pair if you can.

    9: Keep Your Distance

    I know, I know, easier said than done, right? Most of the time, on a flight, you’re squashed right up to person next to you. But try not to get too cosy with the people around you if you can help it.

    10: Stay healthy!

    Whether you travel a lot or not, staying healthy is always a good thing to do. But if you’re trying to avoid picking up colds and flus on your flights, being healthy is a pretty good way to naturally fight off any potential illnesses.

    If you eat a healthy diet, stay hydrated, exercise regularly and just generally make sure your body is always in fighting condition, you’re a lot less likely to pick up illnesses, regardless of whether you’re traveling or not.

  • How To Capture Perfect Travel Photos And Videos With Your Drone

    How To Capture Perfect Travel Photos And Videos With Your Drone

    Drones are fast becoming one of the most popular travel accessories. You can capture some truly incredible photos and videos with a drone, especially if you’ve got one of the high end 4K quadcopters.

    But it can be hard to know where to start, especially if you’ve never even flown a drone before. So here are some top tips for taking great photos and videos.

    Top Tips For Taking Stunning Drone Photos

    Learn Basic Photography

    Drone photography isn’t all that different from normal photography, so it can help to learn the general basics before taking to the skies with your flying camera.

    Photography is all about light. If you think about it, light has much greater impact in aerial photography, as your camera is now closer to the most powerful source of natural light – the sun.

    The effect of glare, reflections and shadows are therefore magnified. Learning how to manipulate light to your advantage will better equip you to overcome these challenges.

    In addition to light, understanding composition techniques such as leading lines, framing and the rule of thirds will also be invaluable in creating balanced, aesthetically pleasing images.

    Capitalize on the Golden Hour

    You get two chances every day. The Golden Hour refers to the times of day when the natural light is perfect – in the morning it’s the hour after sunrise and again in the evening the hour before sunset. How long these periods actually last, will vary based on time of year and location.

    During these times the sun is lowest in the sky, creating soft, diffused light instead of the harsher midday sun. This type of light reduces shadows and highlights, giving the overall image a warm and pleasing glow. There are also usually a lot less people around at these times so that’s definitely a plus.

    Location, Location, Location

    Do your research and scope out your location beforehand. See what the crowds are like, find a spot for take-off and landing, make note of interesting landmarks and talk to the locals about any hidden gems.

    You’ll also want to stay clear of people and private property, so make sure the location is safe and legal to fly over.

    Create a Flight Plan

    Plot your flight course for safety and efficiency. You don’t want to waste precious battery power figuring out where to go and what to shoot. This is where your photography knowledge, time of day and location considerations come together.

    By planning a route to fly, you’ll also be able to think about what you want to capture in advance.

    Take Control

    While automatic flight modes are great when you’re getting started, you’ll want to take the reins and fly manually as soon as you’re able.

    The finer more precise control and handling of your craft, will allow you to create images exactly as you envisioned. With automatic modes you’re trading control for ease – don’t be lazy, master your machine.

    This goes for camera settings too, especially shutter speed. Keep in mind that with drone photography your camera is not stationary and where there’s movement there’s the risk of introducing blur. Blur can be a creative tool, but it should be controlled. In most cases, you’ll want to use faster shutter speeds to avoid blur and get sharp images. So shoot manually if your camera allows. I know it sounds like a lot to do at once, but practice is the key.

    Remember You Are Creating Art

    The purpose of art is to evoke emotion. You want your images to make people pause and really take it in. You want them to feel something. Make your captures tell a story – about your journey, the culture of your destination or even just a moment. You are an artist and your drone is your paintbrush.

    Use the Tools Available

    The tools we’re talking about here, are your accessories. As with standard photography, basic accessories like lens filters and hoods can really enhance your images. Neutral density and polarizing filters will play a crucial role in controlling exposure and tonal quality, while hoods can prevent glare and propeller shadows.

    Top Tips For Capturing Impressive Drone Videos

    Make sure the drone is stable before filming

    If there are strong winds, your drone might be wobbling in the sky a bit. Before hitting the record button, make sure the drone is stable and hovering. This should mean less editing later on.

    Master Flight Manoeuvres

    Flight patterns can make for some unique footage. So before you head out on your first trip, practice flight patterns, such as figure eights and circles to elevate your captures in the field.

    Take it a step further and learn how to control your gimbal to pivot your camera midair for those panning and tilting shots.

    A classic drone shot to try is focusing on something, and drifting up and back. This creates a cinematic video piece that will impress anyone. And it’s super easy to do.

    Top Shots To Try With Your Drone

    Still Shots

    1: Symmetry & Repetition

    Order and structure can be spellbinding in their simplicity and often invokes a sense of calm.

    2: Unique Patterns & Abstracts

    Things that look humdrum and ordinary from the ground, can turn out to be intriguing from above. You will be amazed by how random shapes and patterns come together.


    3: Flipped Perspective

    Take advantage of your bird’s-eye view to create optical illusions.


    4.         Miniature Effect (Tilt-Shift)

    Create the illusion of a tiny toy-like world. You may need a bit of a post-production touch to get it just right, but it will be well worth it. These shots never fail to impress and take the viewer back to a childlike, wide-eyed state of amazement.

    5.         Play with Shadows & Lines

    Distinct lines guide the composition of an image, while shadows can provide a point of interest with giant silhouettes that tickle the imagination. In either case, you are making use of these elements to direct your viewer’s eyes to tell a story.

    Video Shots

    1.         The Fly-By

    Good for story transitions. As the name suggests, it is achieved by simply flying by or over your subject, often with a pan or tilt of the camera. It helps to give your point of interest some geographical perspective and scale.


    2.         The High Pan

    Ideal for showcasing landscapes and showing the distance between two points. Usually achieved with the drone in a stationary hover, then capturing a sweeping shot by panning the camera in either direction. You can make it a bit more complex by moving the drone forward or backward during the pan for added visual impact.


    3.         The Reveal

    Provides a grand entrance for your subject or point of interest. Starting from an area with your subject out of frame, pan or tilt your camera towards your subject bringing it in the frame. It’s as simple as that. The reveal can be further enhanced by gradually zooming in on the subject.


    4.         The Chase

    Great closing and action shot. This involves following a moving subject at equal or greater speed. We see this used often in movie chase scenes (I guess that’s where the name comes from), as it creates an intense, action packed atmosphere.


    5.         The Pedestal

    Often used when filming tall objects like monuments or skyscrapers. The shot involves filming with the drone moving up and down – not tilting the camera with the gimbal.


    These are just a few of the most common drone cinematography techniques. They vary in complexity, so there is something for you to try at any skill level. Just keep practicing and before you know it, you will take your videos to a whole new level.