Category: Travel Photography

  • The Best External Hard Drives for Photographers 

    The Best External Hard Drives for Photographers 

    Whether you’re a professional or amateur, if you’re into photography you’ll know the struggle of constantly backing up images. Gone are the days when you could only take a certain amount of pictures on one film. Memory cards nowadays can store thousands of images, so there’s nothing to stop you from snapping photos left, right and centre. 

    And if like me, you have an incredible ability to take hundreds of photos in just a few moments, you’ll need a top-quality external hard drive to store all of your many, many snaps.

    Here’s everything you need to know about external hard drives, and where you can find the best external hard drives for photographers. 

    What is an External Hard Drive?

    An external hard drive is a portable device that can store thousands of digital files. Usually, external hard drives have 1tb or more of storage space, so they can hold much more than most laptops or computers. 

    You can use portable hard drives to store documents, images and even videos, freeing up space on your laptop and camera. 

    Why Photographers Should Use External Hard Drives?

    Most photographers nowadays use DSLRs, rather than film cameras, which means they can take as many pictures as their heart desires. A single day out can result in hundreds, if not thousands of pictures. 

    And storing thousands of images on your computer isn’t the best idea. Filling up your computer’s storage is going to slow it down majorly. So rather than overloading your laptop or computer, external hard drives can store all the photos you need. 

    Using an external hard drive also means that if your laptop fails you and dies unexpectedly, you don’t have to worry about your photos — they’ll be safe and sound on your hard drive. 

    What To Look For In An External Hard Drive

    If you’ve never bought an external hard drive before, there are a few things you need to look for in your search for the right one:

    • Storage capacity — your hard drive needs to be large enough to store all of your photos.

    • Price — some hard drives can be pretty pricey, and you don’t want to break the bank by investing in an overly
      expensive one. At the same time though, if a hard drive has a price tag that seems too good to be true, it probably is too good to be true.

    • Device Compatability — your hard drive needs to be compatible with your devices (mainly your camera and your laptop).

    • Portability — if you’re the type of photographer who likes to go for adventures in the wilderness, just you and your gear, you’ll need a hard drive that’s portable enough for you to tuck into a rucksack.

    The 10 Best External Hard Drives For Photographers

    1: Porsche Design 1TB External Hard Drive

    I thought I’d start with the hard drive that I use for most of my photos: the Porsche Design 1TB external hard drive. For me, 1TB is plenty of storage, and the sleek, lightweight and portable design makes it the perfect shape and size to take everywhere with me.

    If you need more storage than 1TB though, you can also purchase this hard drive with a storage capacity of up to 8TB, so it’s a great hard drive for professionals and amateurs alike.

    Pros

    • Large storage capacity (up to 8TB)
    • Sleek and portable design
    • Compatible with both PC and Mac
    • Automatic back-up software

    Cons

    • It’s a little pricey


    2: Seagate 1TB Backup Plus Slim USB 3.0 Portable 2.5 Inch External Hard Drive

    The Seagate 1TB Backup Hard Drive provides 1TB storage capacity and an NTFS driver for Mac. So you can easily use the Seagate 1TB Backup interchangeably between Mac and Windows computers. This Seagate device also provides the Seagate software with features that make it easier to backup data — your photos will be protected from accidental deletion. 

    Pros

    • Supports Android, iOS, and Windows
    • Available in 10 colors
    • Lightweight
    • User-friendly
    • Photos are protected from accidental deletion

    Cons

    • Slightly expensive
    • Can wear over time

    3: Kesu 2.5″ 120GB Ultra Slim Portable External Hard Drive 

    The Kesu Ultra Slim Hard Drive provides a total of 120 GB storage space.  It combines both USB 3.0 and 2.0 speeds to give you faster results. So if you want quick photo transfers, this is the device for you.

    Additionally, it just needs a simple, plug-and-play installation that makes it is easy to work. And as it’s formatted in ExFat, it can be used for most Windows, Linux, Mac, and Android OS computers. However, older devices may require reformatting, so if you have an older model camera or computer you can consult their customer services for more details.

    Pros

    • Affordable
    • Easy to install
    • It’s compatible with most devices
    • Three years warranty
    • Helpful customer service

    Cons

    • Eject drive does not work with Macbook air
    • Doesn’t work with smartphones or tablets

    4: Maxone 2.5″ Aluminum Portable External Hard Drive

    Maxone Aluminum Portable External Hard Drive does not need any software or additional power supply. It comes ready to use with any Windows and Mac OS device. You can connect your laptop and perform fast transfers of all your photos, videos, and other files. 

    However, it’s preferable that you connect with a USB 3.0 port for maximum speed as USB 3.0 transfers a file ten times faster than USB 2.0 with a speed of 5 GB/second. 

    The Maxone External Hard Drive also comes with a LED indicator, so you know when your device is connected and when the transfer is finished. 

    Pros

    • Relatively affordable
    • Three years warranty
    • Available in different colors, including a great rose gold colour
    • Fast transfer
    • Compatible with a range of devices

    Cons

    • Instructions are a bit hard to read

    5: Toshiba HDTB410EK3AA Portable External Hard Drive

    The Toshiba HDTB4 is a hard drive from a well-known brand, and you can buy this hard drive with a storage capacity of up to 3TB. It has a super high transfer speed with USB 3.0 and will transfer data on all Windows devices. 

    The package comes with a USB cable, a user manual, and a two-year warranty if you register your purchase at their website.

    Pros

    • Very lightweight
    • Recommended by users
    • Safe and reliable
    • Lots of storage (3TB)
    • Well-known brand

    Cons

    • Slightly expensive
    • Only compatible with Windows

    6: Seagate Expansion USB 3.0 Portable 2.5 Inch External Hard Drive

    Another hard drive from Seagate, this external storage device comes with 1TB, 2TB, or 4TB of storage capacity. Simply drag and drop your photos and videos onto the Seagate Expansion Hard Drive to save all your important data. As you can view, save, and share multimedia files, this device can be used for multiple purposes. 

    The device uses a simple USB connection, so there is no need for main plugs. Also, the device is compliant with Windows 7, 8, and 10 but can be used for Mac computers with an adapter or by reformatting. 

    Pros

    • Two-year warranty
    • Can also use for Xbox or PS4 video games
    • Large memory (up to 4TB)
    • Easy to install

    Cons

    • Slightly expensive
    • Only for Windows computers

    7: Sonnics 320GB Blue External Portable Hard Drive

    The Sonnics Blue Hard Drive has a 320GB storage with a USB transfer speed of 5GBs/second. It does not need any external power source as it works with a USB 3.0 or 2.0 port. Furthermore, it is formatted to FAT32, which is compatible with Windows and Mac OS systems. You can also use the Sonnics Hard Drive to view your photos and videos on larger television screens as it is compatible with most smart TVs. 

    Pros

    • One year warranty
    • Relatively affordable
    • Lightweight
    • High user rating

    Cons

    • Doesn’t include a user manual
    • Only 320GB of storage

    8: Bipra S2 2.5 inch USB 2.0 NTFS Portable External Hard Drive

    The Bipra S2 NTFS Portable Hard Drive is available in multiple storage capacities with the highest being 750GB. It’s a reasonably priced answer to your storage problems. It’s formatted to NTFS so it can support multiple Windows and Mac devices. The Bipra device is USB powered and can be connected to your device with a simple plug-and-play. 

    Pros

    • Affordable
    • No power source needed
    • Easy to use
    • Available with multiple storage capacities

    Cons

    • No warranty specified
    • Slightly heavy for a hard drive

    9: WD Elements Portable External Hard Drive

    The good thing about the WD Elements External Hard Drive is that it has two layers of protection for your data. Transfer all your images to this device by installing the WD SmartWare Pro software. The software will automatically save your photos and backup your cloud data online. 

    The device requires USB compatibility, so it is supported by all Windows 10 and 8.1 computers. For other versions, it needs to be reformatted. 

    Pros:

    • High user rating
    • Free trial available for software
    • Good customer service
    • Fast transfer
    • Large storage capacity (2TB)

    Cons:

    • Requires reformatting for Mac OS
    • No warranty specified

    1o: Seagate 8TB Backup Plus Hub USB 3.0 Desktop 3.5 Inch External Hard Drive

    The Seagate 8TB backup is the perfect external hard drive for serious photographers. It provides 8000 GBs of storage space. Like the Seagate 1TB, the Seagate 8TB Backup comes with the Seagate Dashboard software or mobile app allowing you to use different tools. For example, you can schedule syncing to backup data automatically at a specific time. You can also make use of a two-month free subscription to Adobe Creative Cloud when you sign up for the Seagate software.  

    Pros:

    • One year warranty
    • Great customer support
    • User-friendly
    • Also, available in different colours
    • Two-month free subscription to Adobe Creative Cloud when you sign up for Seagate software
    • It has all the storage capacity you could ever need

    Cons:

    • Expensive
    • Heavyweight

    11: SanDisk Extreme Portable SSD

    You’ve probably used SanDisk memory cards before, but now you can use a SanDisk external hard drive too. With a transfer speed of about 550 GB/ second, the SanDisk Extreme Portable SSD provides fast transfer of all high-resolution pictures and videos. You can use this device on all Windows 10, 8, and 7 computers as well as Mac OS 10.4 and above. 

    The SanDisk hard drive is extremely durable with special impact-resistant and waterproof technology, so it can withstand whatever adventure you throw at it and you can rest assured that it won’t lose quality over time. It comes with an OTG cable, USB hub, memory card reader, and more. You can buy this hard drive with a storage capacity of 250GB, 500GB, 1TB, or 2TB. 

    Pros:

    • Waterproof
    • Dust resistant
    • High user rating
    • Large storage capacity (up to 2TB)
    • Compatible with most devices
    • Fast transfer speed

    Cons:

    • No warranty specified
    • Expensive


  • An Honest Sony RX100 VA Review: Everything You Need To Know

    An Honest Sony RX100 VA Review: Everything You Need To Know

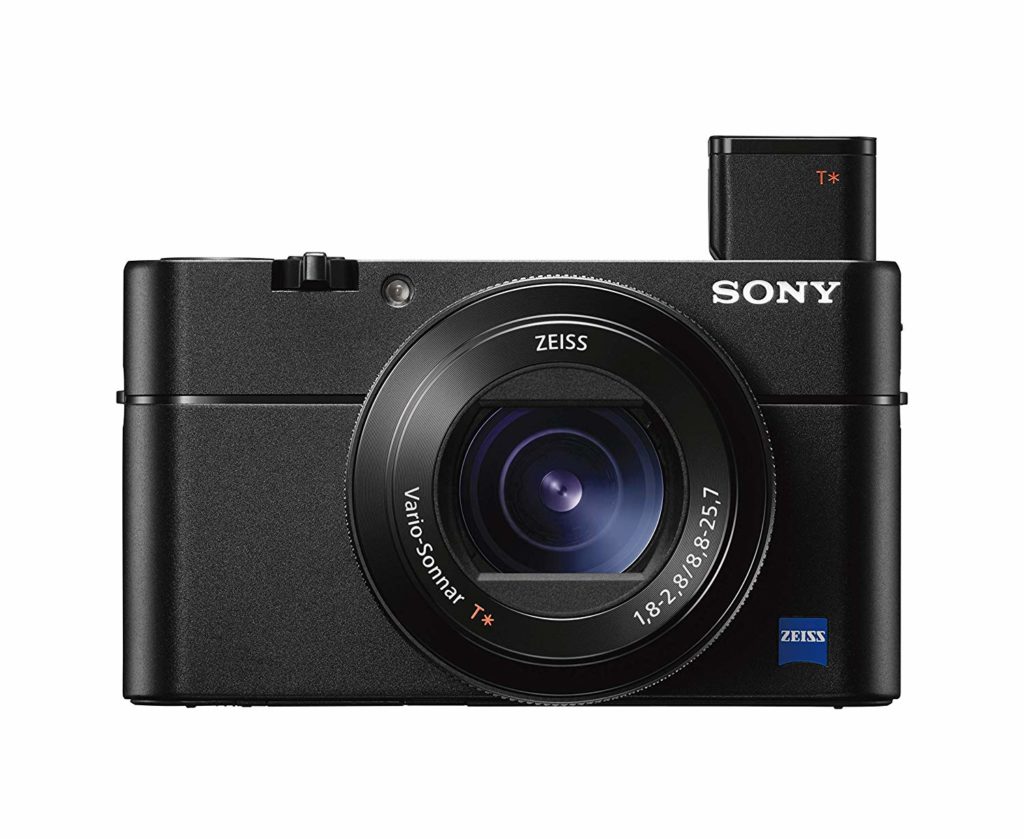
    There’s hardly any info online about the Sony Cyber-shot RX100 VA. Sony released this camera as an upgrade to the RX100 V, but they didn’t market it or make any public announcements at all.

    I’m a huge fan of Sony’s compact cameras, and whilst I actually bought the RX100 VA by accident (scroll down for the full story), I’ve grown to love it even more than my other Sony models.

    Here’s everything you need to know about the Sony Cyber-shot RX100 VA, so you can decide whether or not it’s the camera for you.

    What is the Sony Cyber-Shot DSC-RX100 VA?

    The Sony RX100 VA is an update to the Sony RX100 V compact camera.

    It can do everything the RX100 V can do, but it’s got some more advanced features thrown in too.

    For example, it’s got the Sony RX100 VI’s processor and firmware, and a slightly better lens than the RX100 V.

    Who is the Sony RX100 VA for?

    Part of the beauty of the RX100 VA is the fact that it’s suited to so many different people. Whether you just like to point and shoot on your travels, or you like to play around with more advanced photography settings, the VA has you covered.

    It’s so lightweight and easy to use, which means you can take it just about anywhere with you (one advantage compact cameras have over DSLRs). I personally use mine as a travel camera when I need to travel light.

    It also has 4K video mode and image stabilisation, so it’s great for anyone who loves to vlog with a compact camera. In fact, in terms of vlogging, I’d say this is one of the best compact vlogging cameras out there.

    How I bought the Sony RX100 VA by accident

    The RX100 mark 5 was a popular camera, with some great reviews, so I was surprised when the model upgrade (the RX100 VA or mark 5 A) was introduced so quietly. In fact, I didn’t even realise there WAS an RX100 VA, until I tried to buy the standard mark 5.

    There I was, in the middle of a mall in Chiang Mai, ready to play at libertyslotscasino.co, when the manager came running out waving his hands.

    ‘Don’t pay yet!’ he shouted, running towards me. I can’t say I’ve ever had that in a store before.

    But he quickly explained that they no longer had any of the mark 5 models in stock, because they’d replaced them with the mark 5 A – the RX100 VA.

    I was a little wary at first. Was it a scam? Was I about to buy a non-existent camera? I couldn’t find any information about the camera online, not even from Sony. But the store seemed legit, and the promise of an even newer model for not much more money persuaded me to go for it. It was time to upgrade my Sony WX500 anyway.

    (If you want to know about my previous camera, here’s my review of the Sony WX500)

    Sony RX100 VA Review

    So I’ve now had the Sony RX100 VA for several months. I’ve taken it to 5 different countries so far, and I’m loving it. But that’s not to say that it’s perfect. So here’s everything I wish I’d known before buying the RX100 VA (because when I bought it, there was literally no information online).

    So without further ado (that’s right, I’ll stop waffling now), here’s a review of the Sony RX100 mark VA.

    The good stuff

    This camera is definitely a step up from a lot of Sony’s other compact camera options. There are so many great features that make it perfect for point and shoot, as well as more advanced photography.

    It has super fast AF

    The autofocus is impressively speedy in both photo and video mode. When you compare it to other similar models like the Panasonic Lumix LX10 or LX15, it really is quite something.

    There’s no lag, and it’s super smooth, so you can get some artistic and professional looking shots on the go without worrying about your photos/videos being out of focus.

    It’s got a great f-stop range

    So I’ve had the Sony WX500 for a year or so now, but one of my main issues with it was that it just couldn’t blur out the background to get that professional look.

    So when I realised the RX100 VA can blur out the background almost as well as any high end DSLR, I was sold. The f-stop ranges from 1.8 to 2.8, which is enough to give you that out-of-focus background.

    The manual control ring is great

    I love compact cameras, but I’ve got to say, my heart lies with DSLRs. So for me, the manual control ring was perfect, because it made the camera feel more similar to a DSLR.

    Being able to change the depth of field manually gives so much more control over composition. It meant I was able to capture shots like this (because believe me, this spider was too camouflaged for most compact cameras to focus on).

    It has 4K!

    Anyone interested in vlogging will be desperate for a 4K vlogging camera. So you’ll be pleased to hear this camera can film in 4K at 30fps.

    The quality is quite something, and when paired with a lower f-stop, you’ll have people thinking you’re working with a really professional bit of kit.

    It’s got a great processor

    One of the major upgrades the VA has, compared to the standard mark 5, is the processor. Sony took the RX100 VI processor (I know, all the names are too similar, but bear with me), the BIONX processor, and put it into the mark 5 to make the VA. This means it’s faster and better able to cope with extensive use.

    It has a viewfinder

    The viewfinder in the RX100 VA is a welcome feature. It makes it a much friendlier camera for those used to bridge cameras or DSLRs.

    Even if you don’t often use viewfinders, it can be handy to have one, especially if you’re shooting in broad daylight, when the sunlight might block your view of the screen.

    And don’t worry, the viewfinder isn’t delicate or an eye sore, because you can tuck it neatly into the camera, out of sight, and out of the way of any bashes.

    The image stabilisation is incredible

    With this camera, you can walk or run whilst filming without fear of shaky footage. The advanced image stabilisation even gives the GoPro Hero 7 hyper smooth a run for its money.

    It’s got Wi-Fi

    I love having the option to transfer my photos to my phone by Wi-Fi. It just makes social media easier, and it saves me from having to faff around finding a wire to transfer my files.

    It also gives you the option of sending photos to yourself whilst you’re out and about. This can help you save space on your camera’s memory card.

    One thing to note though is that you can’t transfer videos by Wi-Fi, only photos.

    You can charge with a USB

    One thing that bugs me about a lot of cameras is when you have to take the battery out of the camera to charge it. It’s just a hassle. But the Sony RX100 VA can be charged with a micro USB, so you can charge up whilst importing your files.

    It feels great to hold

    The way a camera feels to hold can really make or break your experience with. The RX100 VA feels like it’s made with quality materials. It’s lightweight but it still feels substantial, and it doesn’t look nearly as plasticy as a lot of other similar models.

    The tilting screen gives you more angle options

    I don’t know about you, but I always try and take pictures from different angles. Sometimes I’ll take pictures right from the floor, and other times I’ll stand on tiptoes and hold the camera as high above my head as possible. But often you have to snap creative angles blind – you can’t see what your camera sees.

    The tilting screen tilts 180 degrees, upwards and downwards, so you can always get a good view of the picture or video you’re trying to take.

    The not-so-good stuff

    I love the Sony RX100 VA, but it’s not perfect. Nothing ever is. And this wouldn’t be an honest review without disclosing the negatives, so here goes.

    It’s a little pricey

    Most people expect compact cameras to be much more affordable than bridge cameras and DSLRs. But the RX100 VA is a little more pricey than your average point and shoot compact camera.

    However, it’s one of the more advanced compacts out there, so you really do get what you pay for.

    The zoom isn’t great

    Some of the cheaper Sony compact models, like the Sony WX500, have an incredible zoom that put massive zoom lenses to shame. But unfortunately, on the RX100 VA, Sony decided zoom wasn’t a priority.

    Image stabilisation isn’t so great in 4K

    For some people, 4K footage is a must-have, and of course you’ll have 4K video at your disposal. But if you want to film a professional looking video, it can be worth actually taking it down a notch.

    The image stabilisation works best when filming in 1080p, so if you want super smooth video, 4K isn’t the way to go.

    There’s no touchscreen

    Touch screen compact cameras are like marmite – you either love them or hate them. But if you love them, you’ll be sad to hear the RX100 VA doesn’t have a touch screen. However, you can easily navigate between settings with the buttons.

  • The Ultimate Guide To Road Trippin’ With A GoPro: GoPro Tips & Tricks

    The Ultimate Guide To Road Trippin’ With A GoPro: GoPro Tips & Tricks

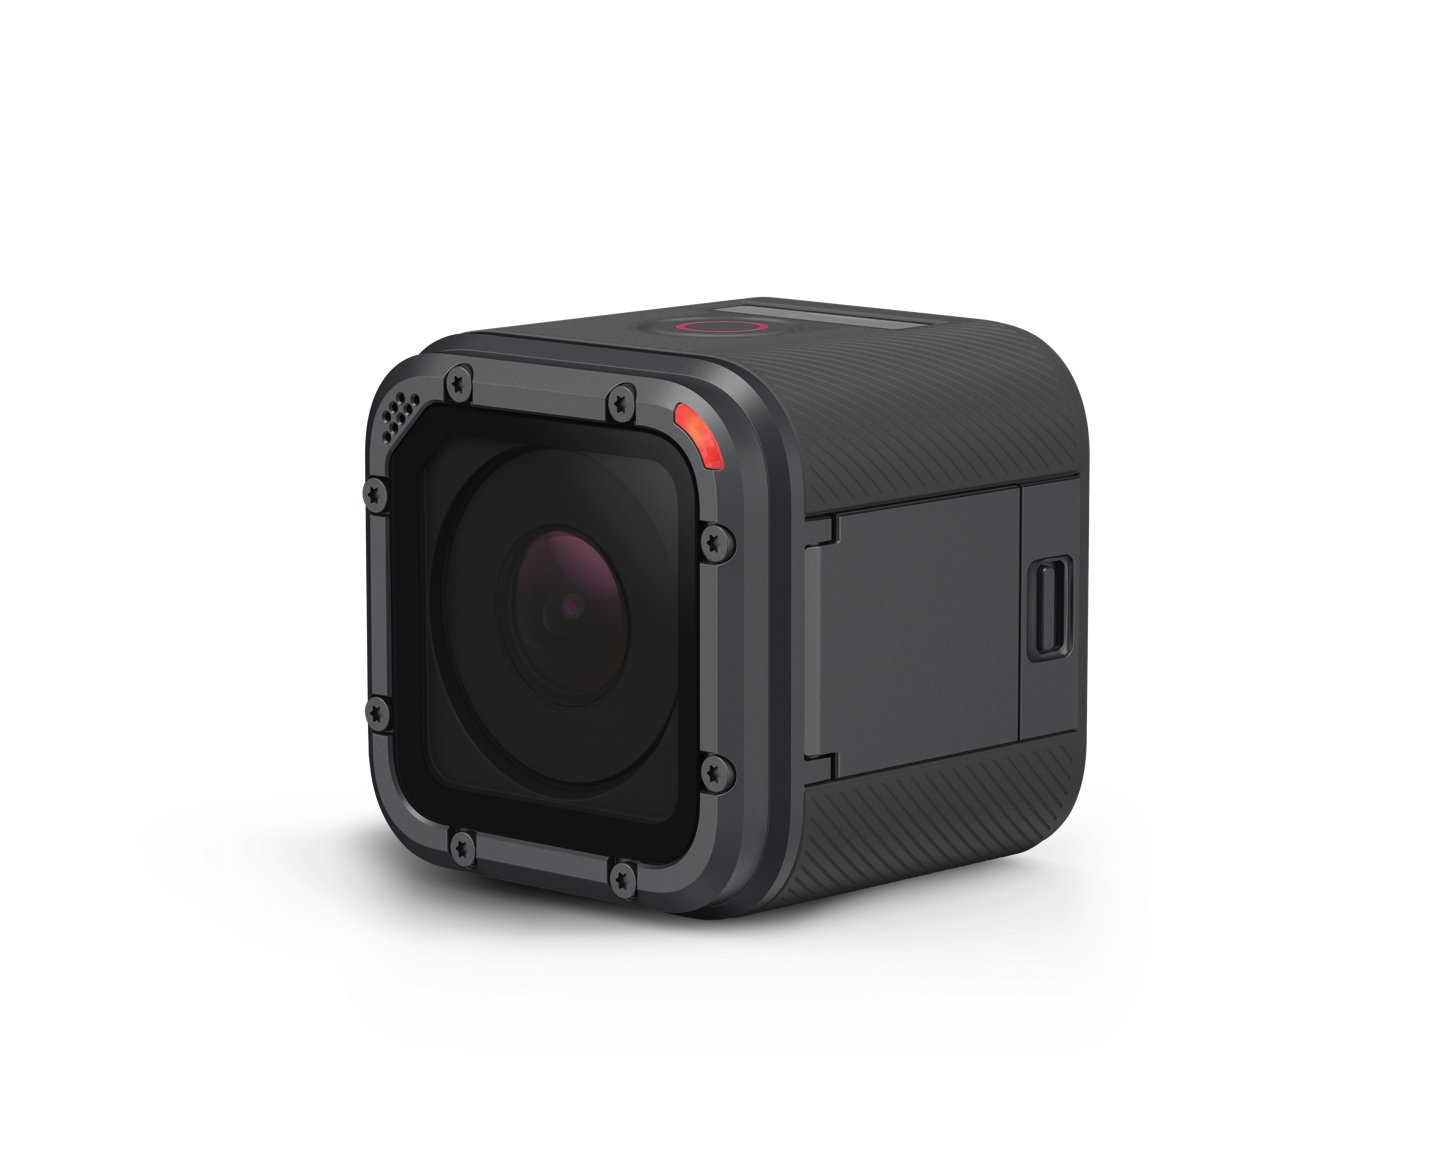
    If you’re heading out on a road trip, and you want to capture some of your journey, whether for a travel vlog, to show friends and family or just for fun, you NEED to take a GoPro with you.

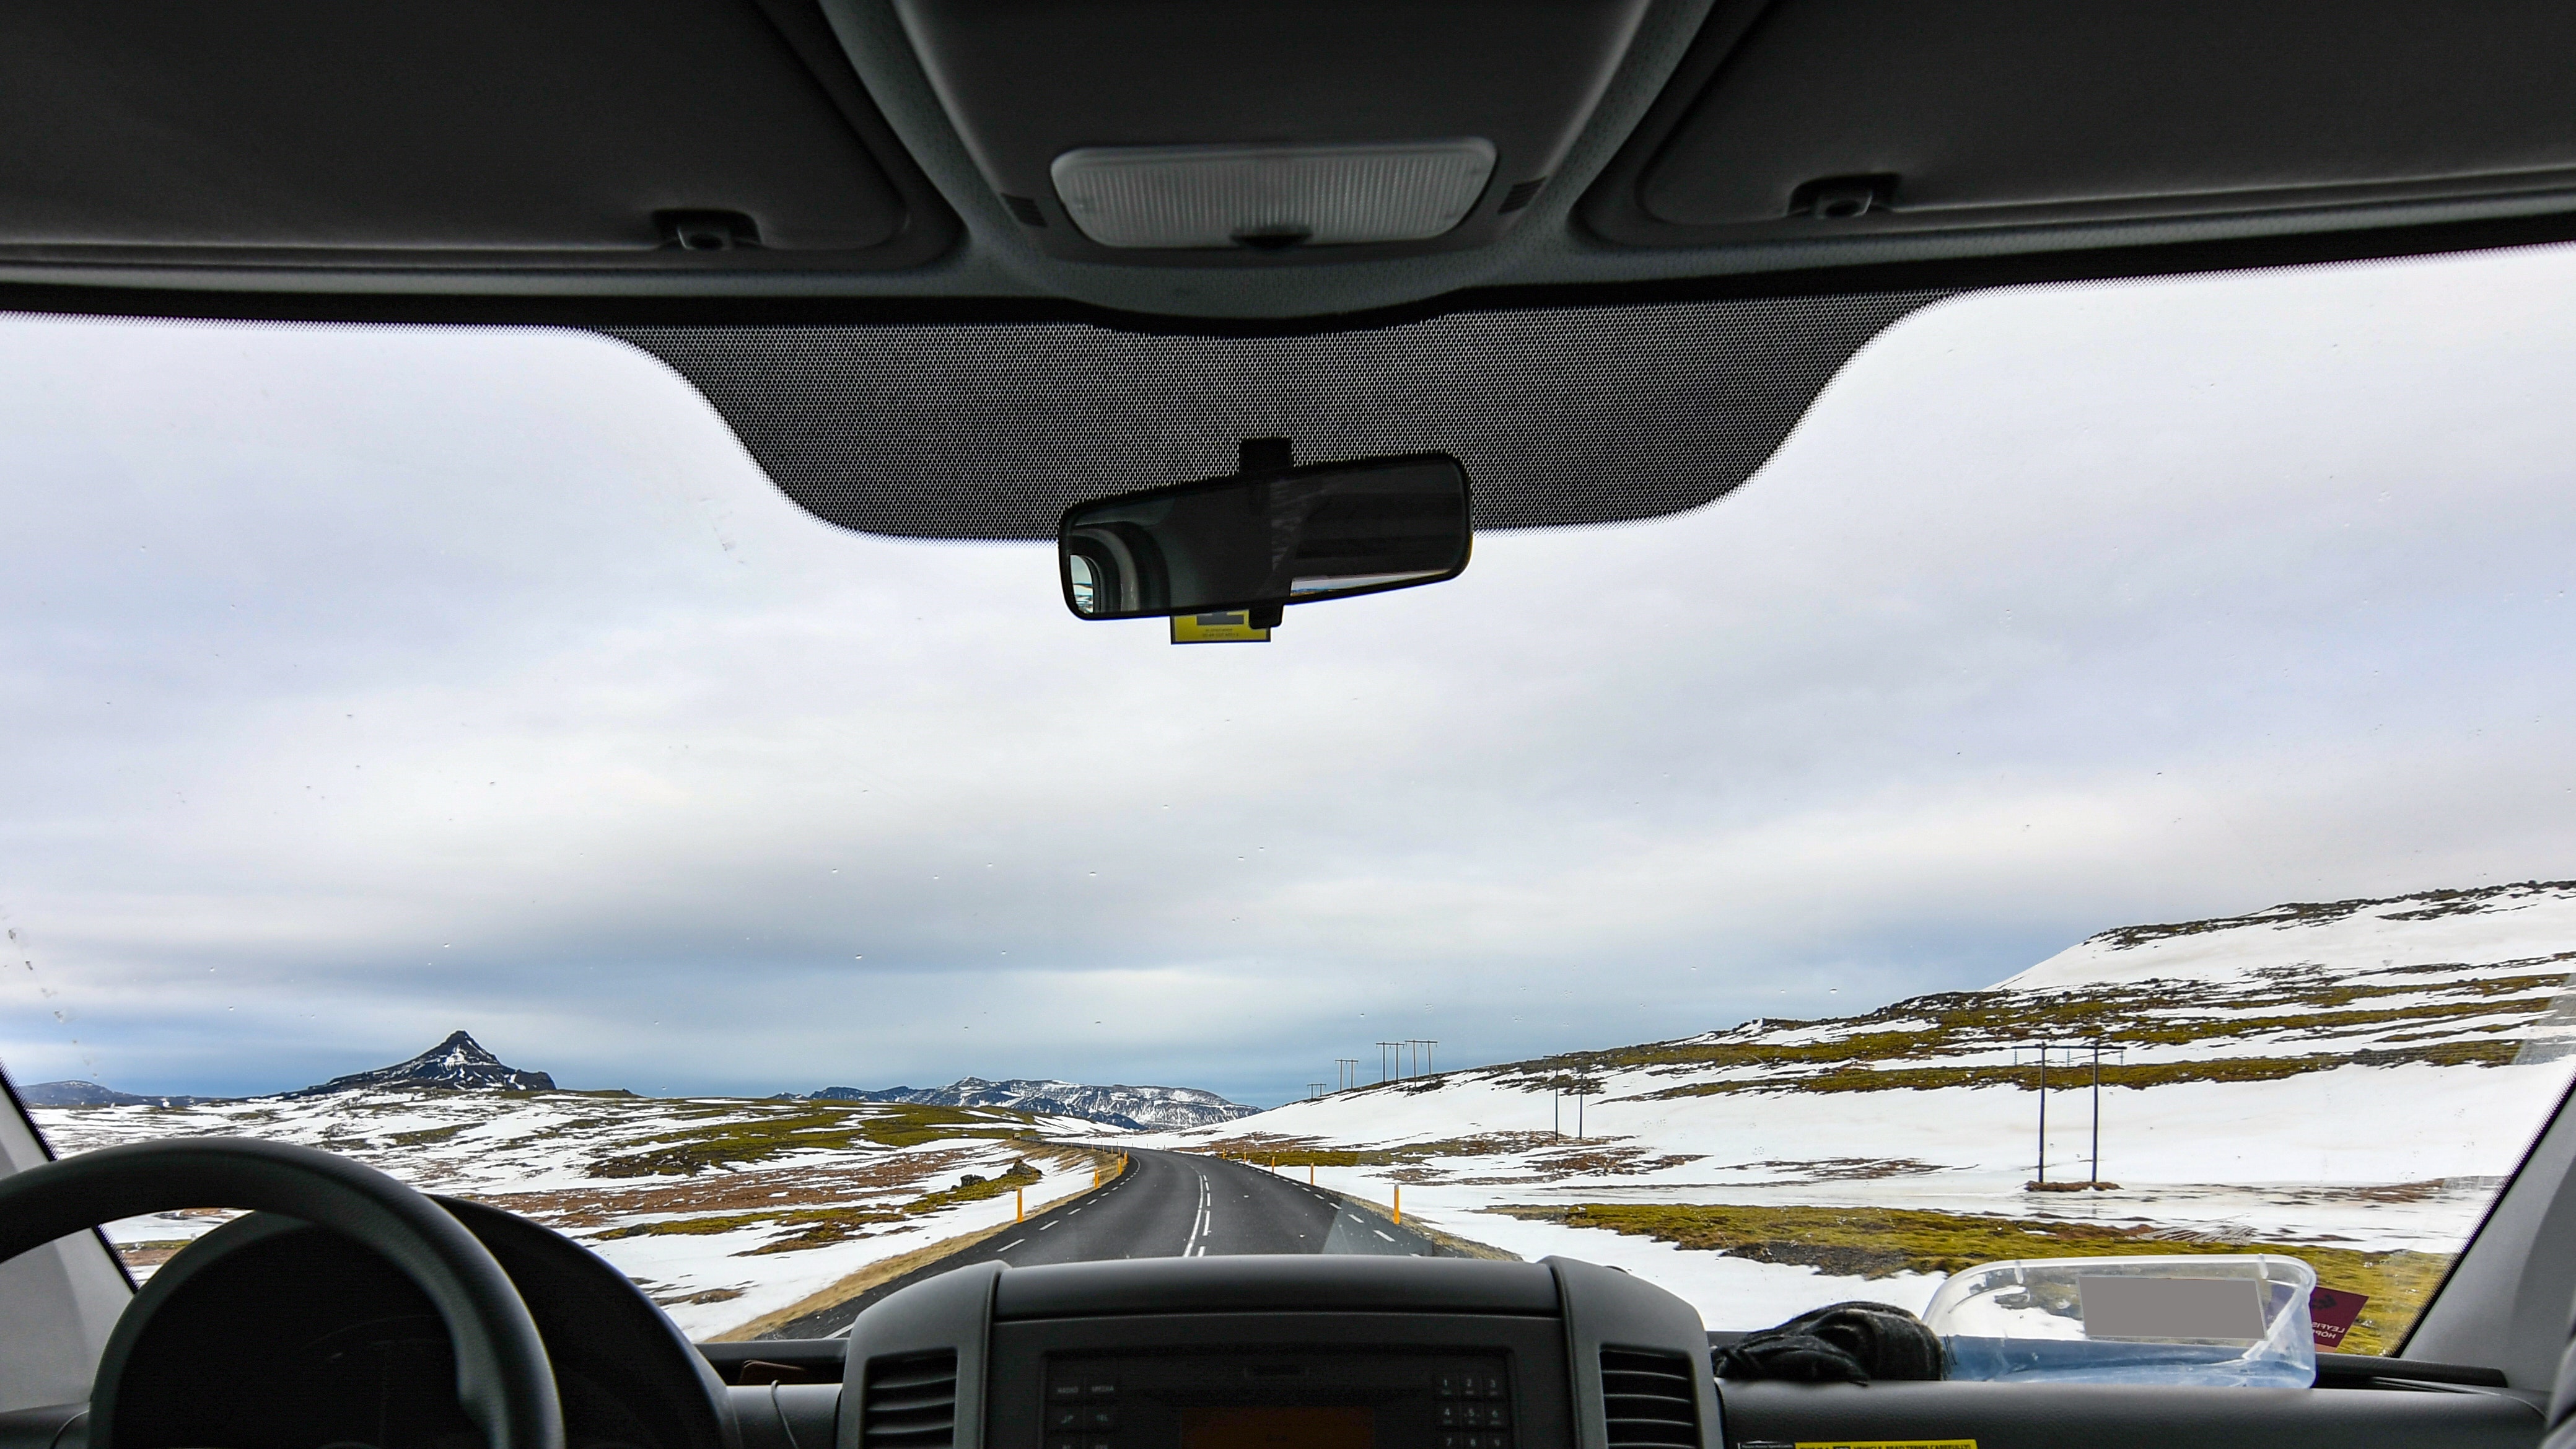
    Thanks to their size and the different available mounts, you can mount them almost anywhere in or on your car. So you can get unique angles of the journey, the car, the driver and the passengers. You’ll be set up for your very own Top Gear special.

    Before you hit the road with your GoPro though, here are 13 GoPro driving tips to help you capture the best possible driving footage. Or if you were hoping to use your GoPro more as a safety measure, like a dash cam, we’ve got tips for that too!

    The Best GoPro For Road Trips

    So if you want to capture some quality footage of your road trip, you’ll need to find the best GoPro for the job.

    GoPros have come a long way in recent years, which means there’s quite a few big differences between the different models.

    It’s easy to get drawn in by cameras that offer the highest resolution, but for road trip driving footage, you also need to consider frame rate.

    If you want to get clear shots of the road, the scenery and the moving car, you’ll need a GoPro that can shoot in a high resolution at a high frame rate. And if you have to sacrifice one or the other, sacrifice a bit of resolution.

    For example, if you’ve got the option of 4K at 10fps, or 2.7k at 60fps, in this case you want to prioritize frame rate.

    When you’re on the road you’re going to be moving pretty fast (hopefully, unless traffic slows you down). And for your GoPro footage to look smooth and clear, you’ll need that higher frame rate.

    GoPro Hero 7 Black – The Ultimate Road Trip Camera

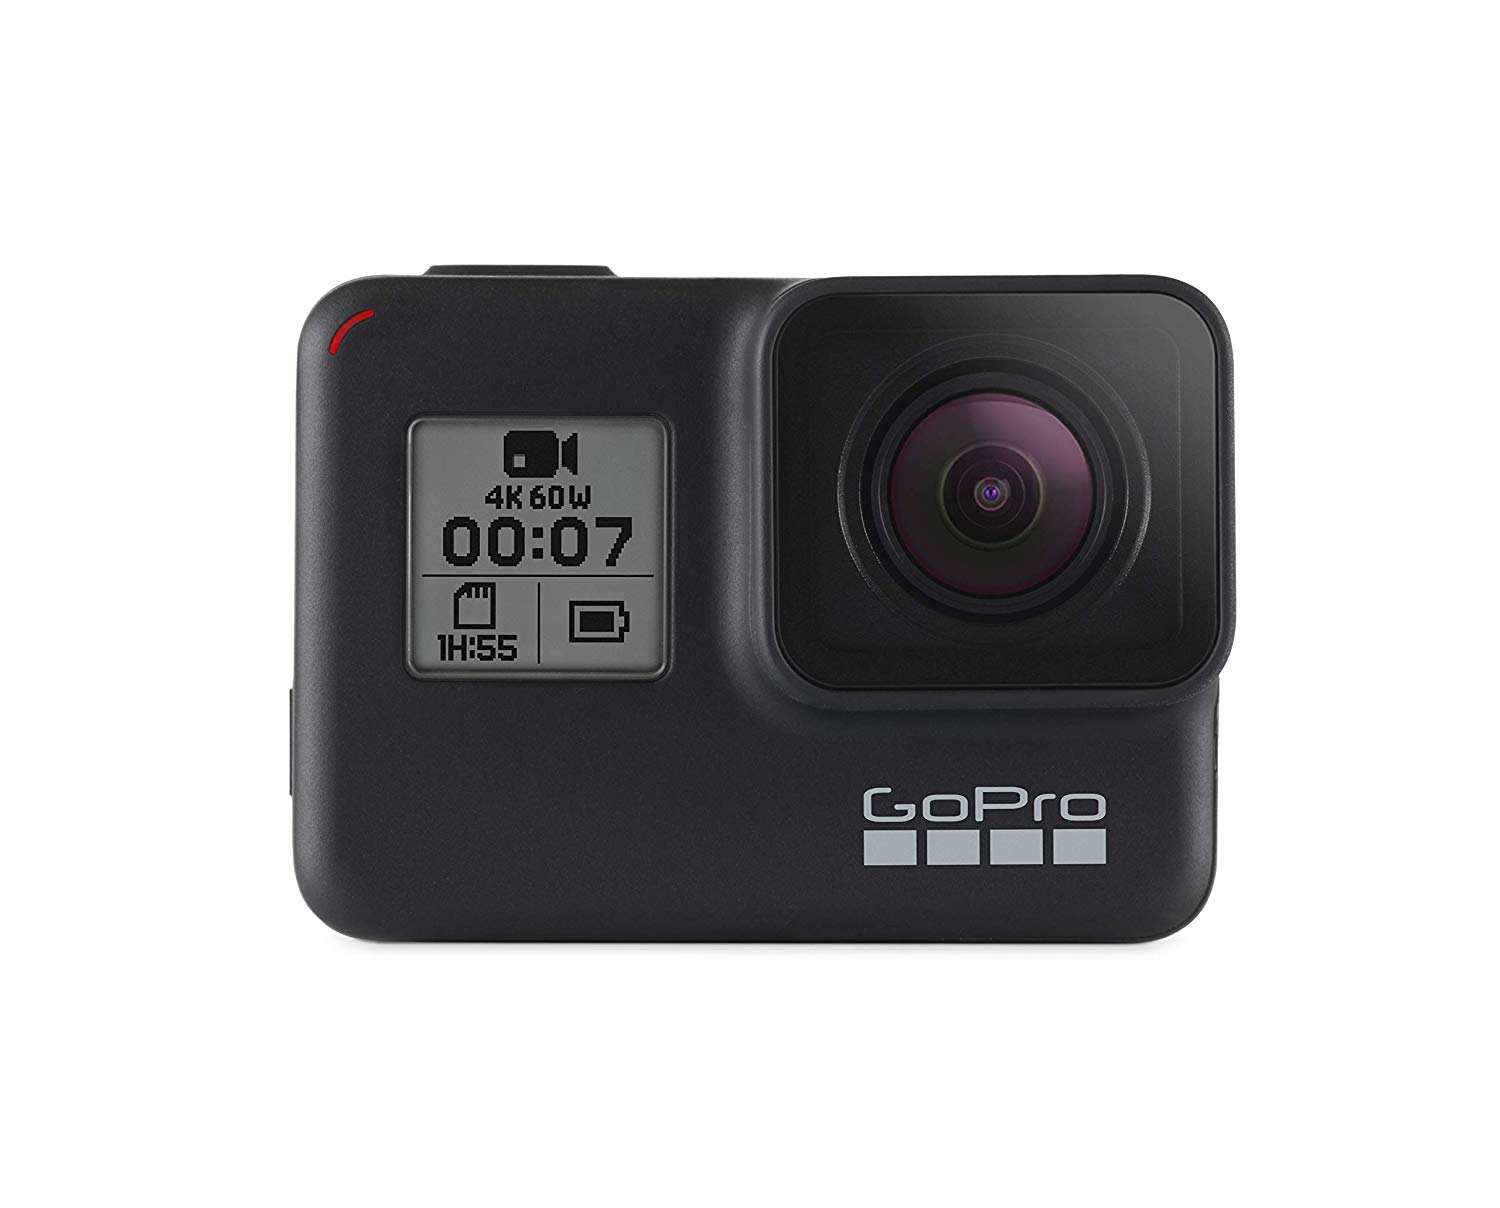
    If you want the very best GoPro model to take on your road trip, it has to be the GoPro Hero 7 Black. This new release is a huge improvement on the other GoPros, and as well as being great fun to use, it’s going to create professional looking, top quality road trip videos.

    In terms of 4K, it can shoot at 60fps, same as the Hero 6, so there’s no real change there. But if you wanted a really high frame rate, you can shoot in 2.7K at 120fps. You probably wouldn’t opt for 120fps for standard footage, because of motion blur, but this is great if you want to slow down your footage later.

    The Hero 7 also has the best stabilisation we’ve seen on a GoPro yet. Hyper Smooth will record, well, hyper smooth footage, even on the bumpiest of roads. So you can even go off-roading, and still get perfect footage.

    The stabilisation even works whilst you’re live streaming. That’s right, you can live stream your road trip videos right to Facebook or Instagram.

    The voice control is also a great feature for those on a solo road trip, as you’ll be able to start and stop your camera recording, and even change settings or take a picture, all without taking your hands off the wheel.

    The waterproof and shockproof nature of the Hero 7 means that you really can mount it anywhere on the car, even on the exterior, in the rain.

    GoPro Hero 6 – The Second Best GoPro For Road Trips

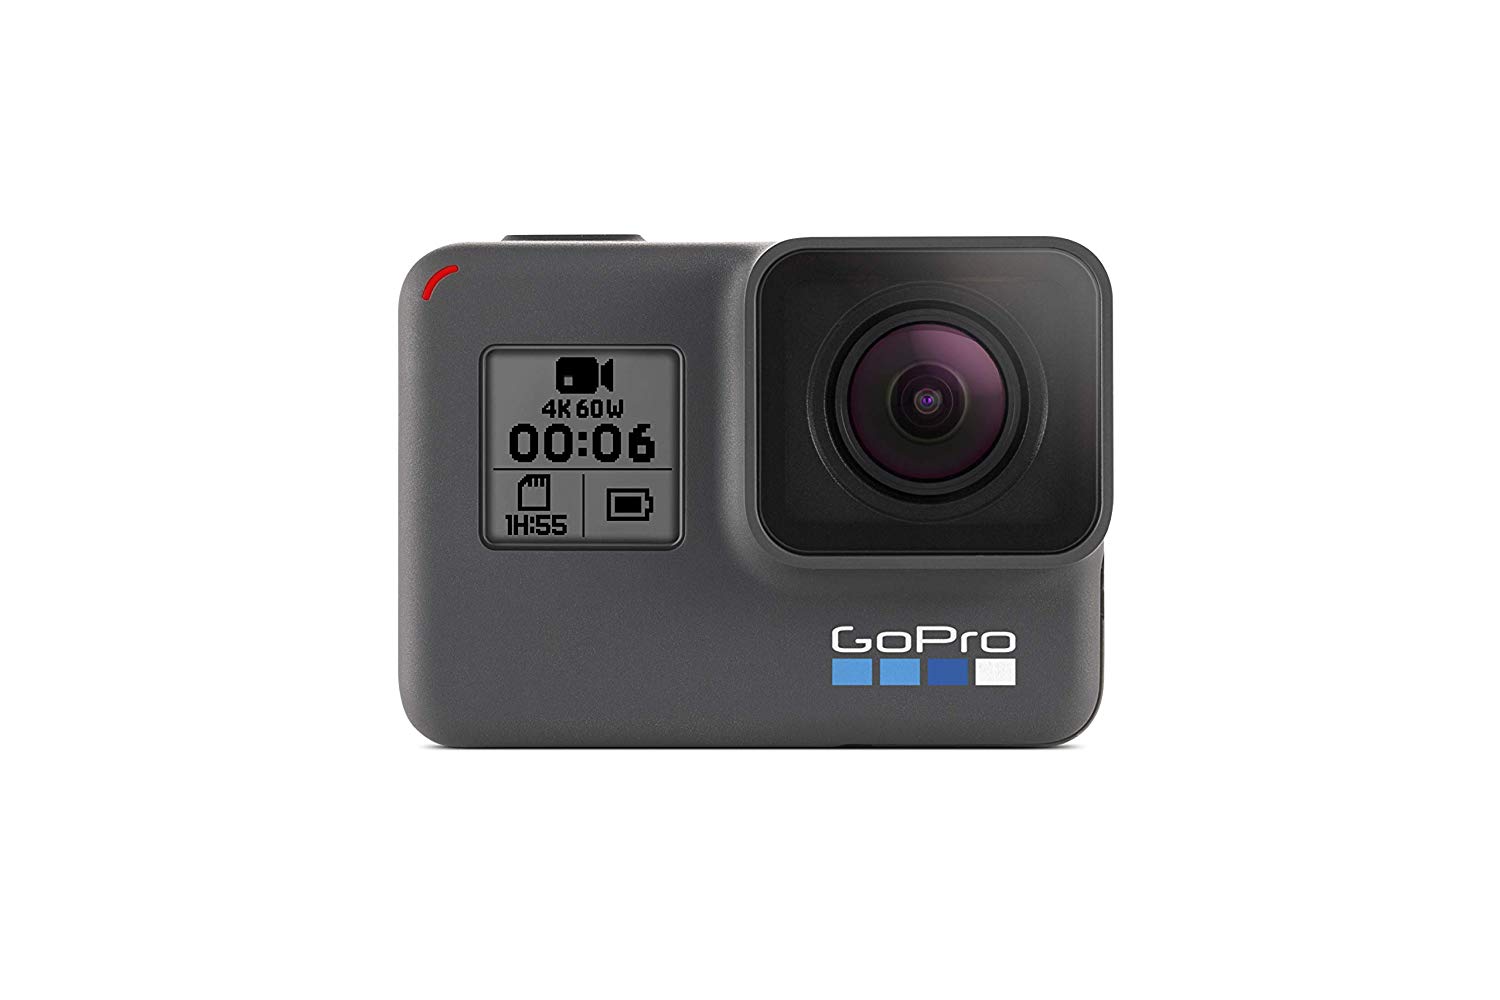
    The Hero 6 takes it one step further, shooting in 60fps in 4K, which gives you the best of both worlds. It also has some good image stabilisation, which make the bumps in the road less of an issue.

    The Best Budget GoPros For Road Trips: Hero 4 Black, Hero 5 and Hero 5 Session

    I’ve grouped these GoPro cameras together because they can all film with a frame rate of 60fps at 1440p, so they’re all going to give you more than adequate footage.

    These models are also much more affordable than the latest GoPro, and whilst the footage won’t be as stable, you can still capture some great footage and artistic shots.

    9 GoPro Road Trip Tips

    1. Mix up your angles and mounting positions

    If you’re hoping to create an interesting film or vlog from your road trip, the last thing you want to do is just stick your GoPro on the dashboard and leave it there for your whole trip. No one’s going to watch hours of the same thing.

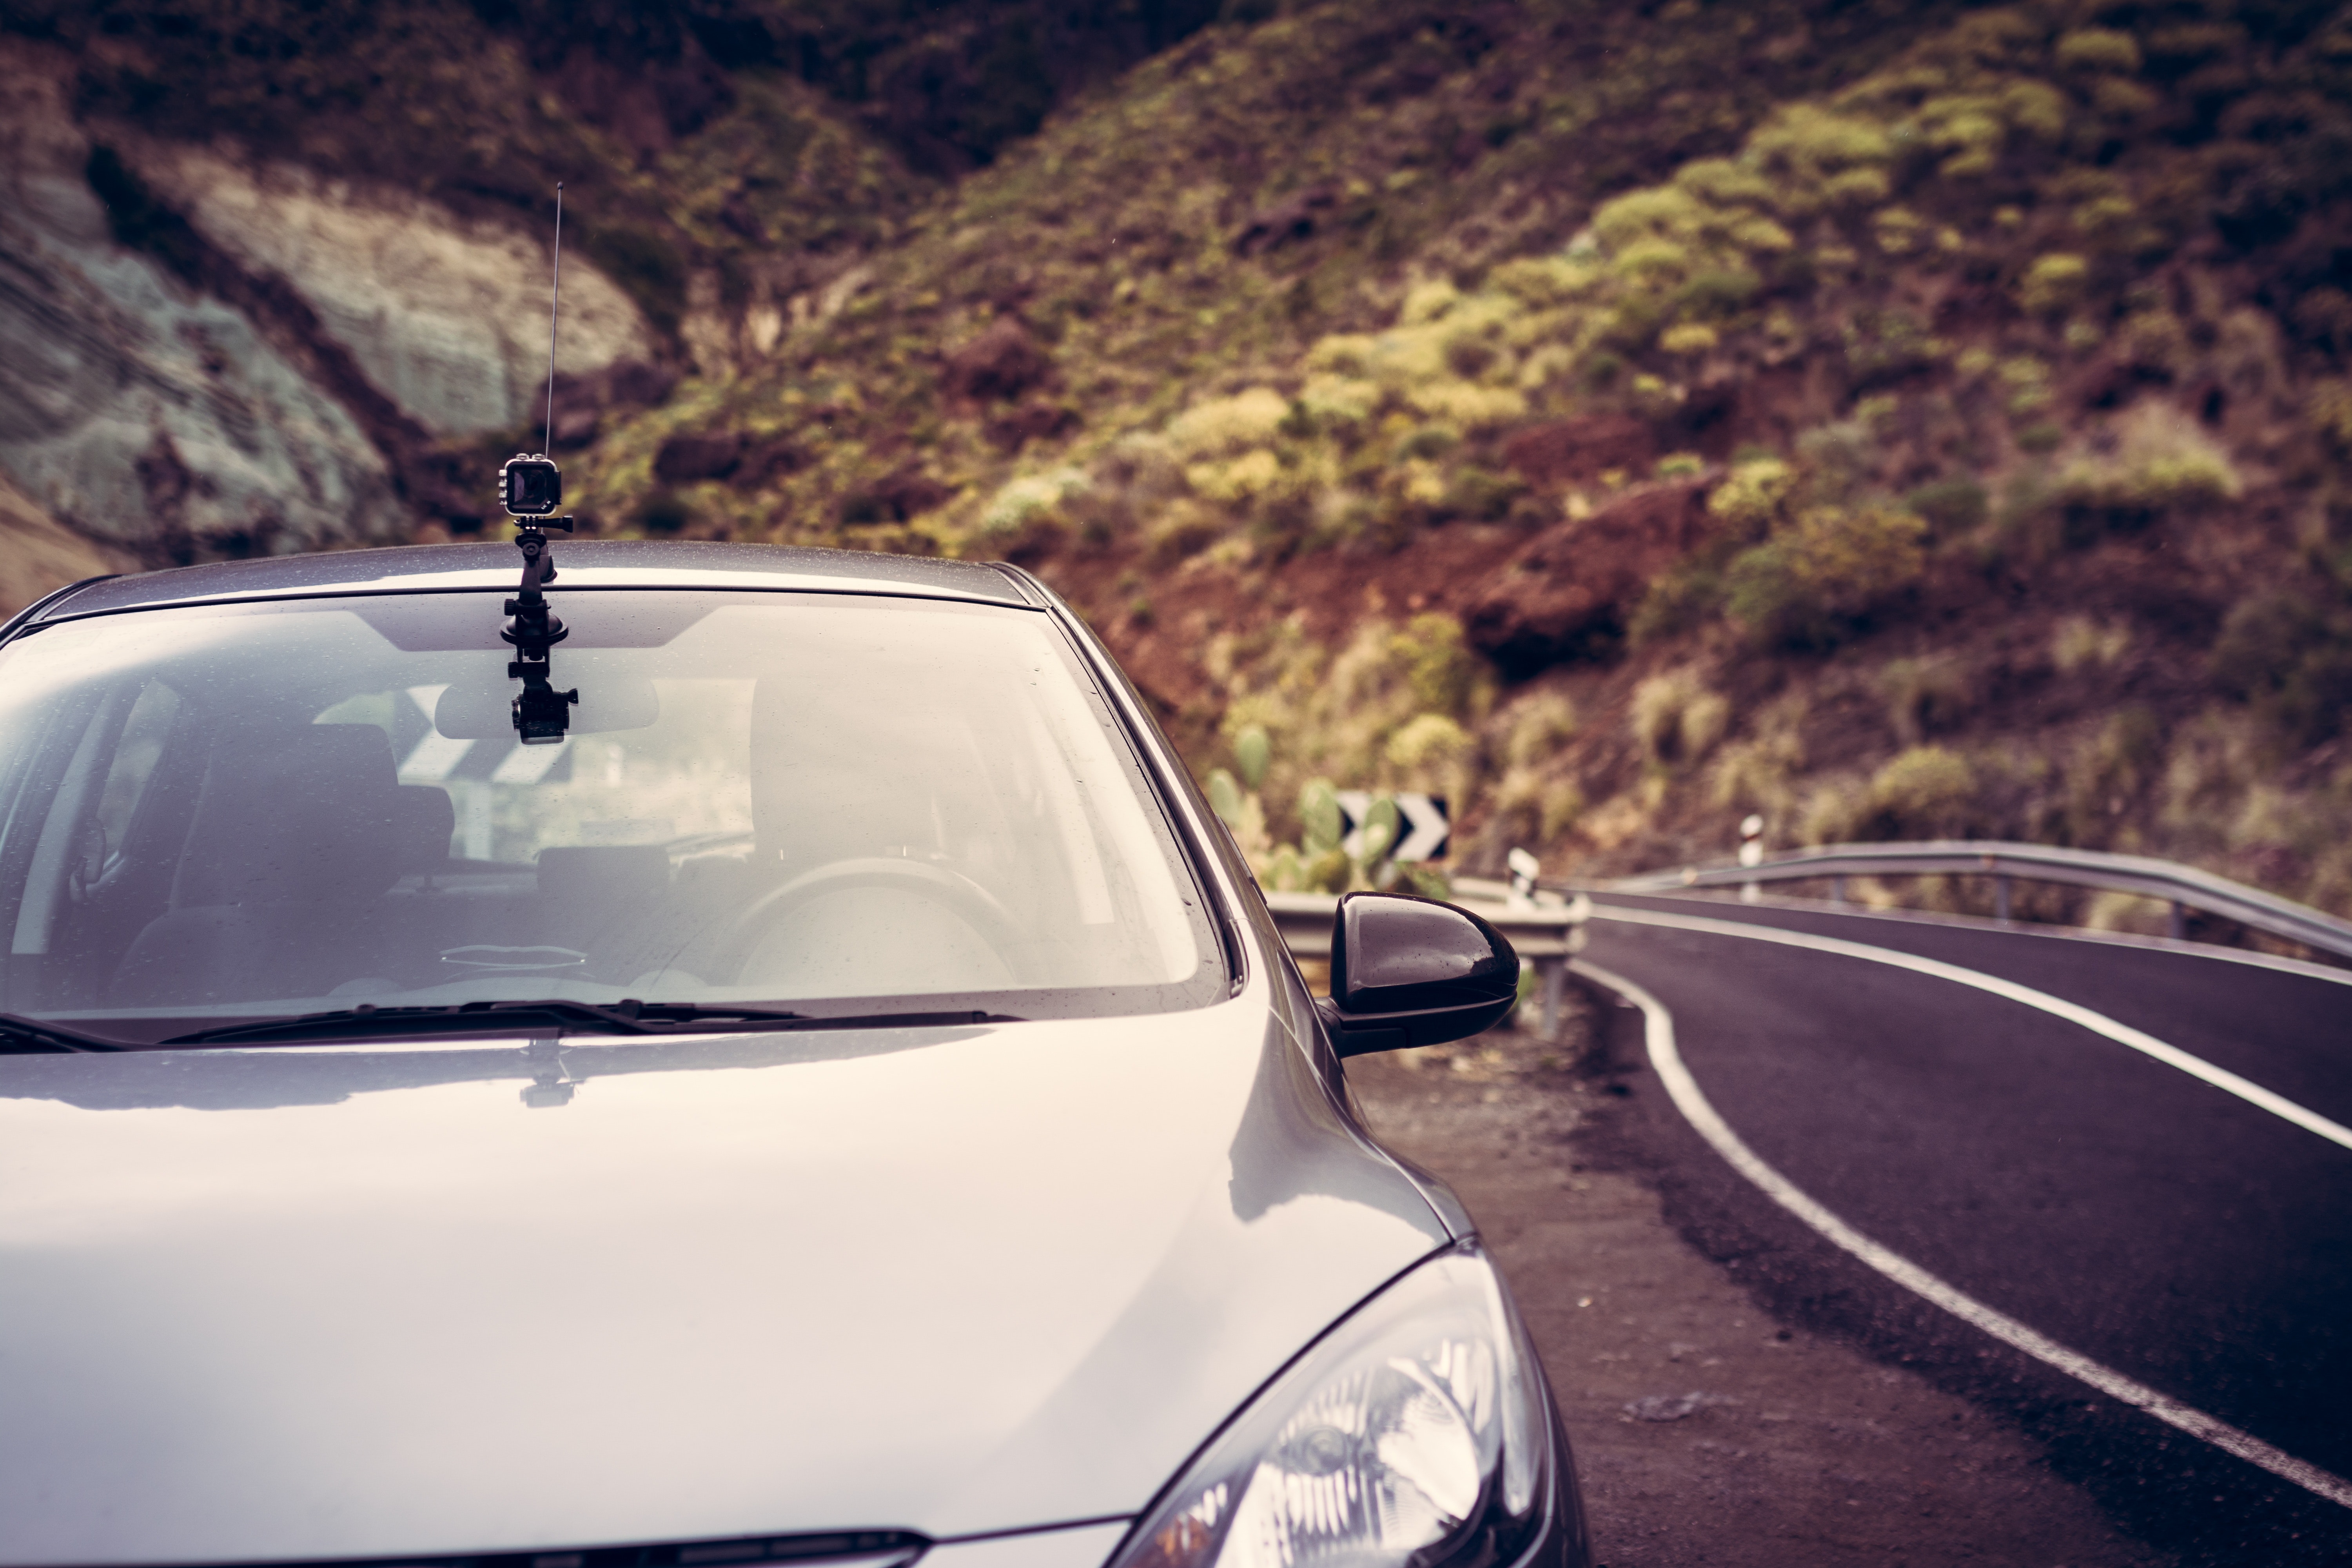
    With a few different mounting accessories, you can mount your GoPro in some really creative places. There are different angles you can get within the car, as well as outside the car.

    Get dashboard shots, as well as ‘from the back’ shots, ‘of the driver’ shots, and shots of the wheels rolling.

    All these different angles are going to make your video seem much less amateur. You’ll look like you’re working with a whole camera crew!

    2. Get some candid footage

    Road tripping isn’t just about the scenery and the drive, it’s about the journey, the laughs you have on the way to your destination.

    Filming just the scenery and the road is cool for a while, but after a while it’s going to make your end video pretty repetitive. So try to film some in-car footage, of the road trip dynamic. Get shots of you and your fellow road trip companions laughing, navigating, talking – it’s these shots that are going to break up your footage and give your road trip video more substance.

    And don’t forget to include some shots of you arriving at, and enjoying your destination.

    3. Shoot in loop mode when using your GoPro as a dash cam

    If you’re more interested in using your GoPro for safety reasons, rather than to get creative, you can also it as a dash cam.

    Most GoPros have loop recording modes, which basically just let your GoPro film non-stop without it using up your memory. How does it work? Basically it films and saves footage from a set amount of tmie, which could be anywhere from 5 minutes to two hours.

    Let’s say you set it to 5 minutes, your GoPro would split that five minutes into chapters, so every 1.5 minutes or so would be one chapter. So when your GoPro has recorded 6.5 minutes, it will delete the first 1.5 minutes.

    This way, you can continuously record your whole journey, and worst case scenario, if you’re involved in or witness an accident, you can stop your camera recording and look back over the saved footage. And because it will only have saved the latest footage, you won’t have to sift through hours of video to find what you’re looking for.

    4. Create a time lapse of your journey

    Filming your whole drive in real time can create hours of footage that quite frankly, is too boring to sit through and watch.

    Creating a drive lapse (a time lapse of your drive) will create a more artistic video of your drive, a snippet if you like. And this snippet is going to take up a lot less space on your memory card than the full extended version.

    Choose somewhere to mount your GoPro (the dashboard is the go-to place for drive lapses) and choose an interval setting.

    If you want a time lapse of a large portion of your journey, choose a slower interval setting, otherwise you’ll end up with a drive lapse that’s still too long to sit through.

    If you plan on driving through dusk or dawn, this is a great to create a drive lapse, as you’ll see the changing light.

    5. Find a good balance between resolution and frame rate

    Filming top quality road trip is about finding the perfect balance between resolution and frame rate. Lots of people make the mistake of just going for the highest resolution, and not even bothering to look at frame rate. But frame rate is what’s going to make your footage smooth and stable.

    If your GoPro has the option of choosing 60fps, go for this in the highest resolution. The newer models will have 60fps at 4K, but with the older models, you’ll need to go for 1080p, 1440p, or 2.7k at 60fps. So as a general rule of thumb, go for the highest frame rate with the highest resolution.

    6. Pack extra batteries and memory cards

    If you’re planning on driving for more than a few hours, you’re going to need to take a few extra supplies with you. GoPros don’t have the best batteries, so you’ve probably only got up to 4 hours of battery life on one battery. Pack extra batteries and a car charger so that if your GoPro dies, you can charge it right back up again. A car charger or a battery back can also allow you to film whilst charging.

    Just as important as battery is memory, storage space. If you haven’t got enough memory on your memory card to film any more, your GoPro may as well be dead. So pack extra memory cards (don’t worry, you can get really cheap ones), and you’ll have all the storage you could need for your videos.

    Using multiple memory cards is also a great way to organise your footage, especially if you’re going on a multi-day trip. Sifting through footage to find a certain clip can be a nightmare, so why not allocate a different memory card to each day or so of your travels?

    7. Use auto for most settings

    When you’re on the road, the light and your surroundings are constantly changing, so rather than having your white balance, exposure and other settings set to manual, just keep them on auto for the majority of your trip.

    You don’t want to be playing around with the settings every ten minutes, so leave it on auto and your GoPro will adjust automatically to your surroundings.

    8. Get a variety of different accessories

    If you want to make the best possible road trip film, you’ll need a few different accessories. Different mounts mean you can mount your GoPro on different parts of your car, and get really creative with your angles.

    Below are some of the best GoPro accessories to take on your road trip:

    • GoPro extendable poleWith the extendable pole you’ll be able to get shots of the moving car from outside the car. All you have to do is get one of your passengers to stick it out the window – just make sure you’re on a fairly deserted road when you use this one!
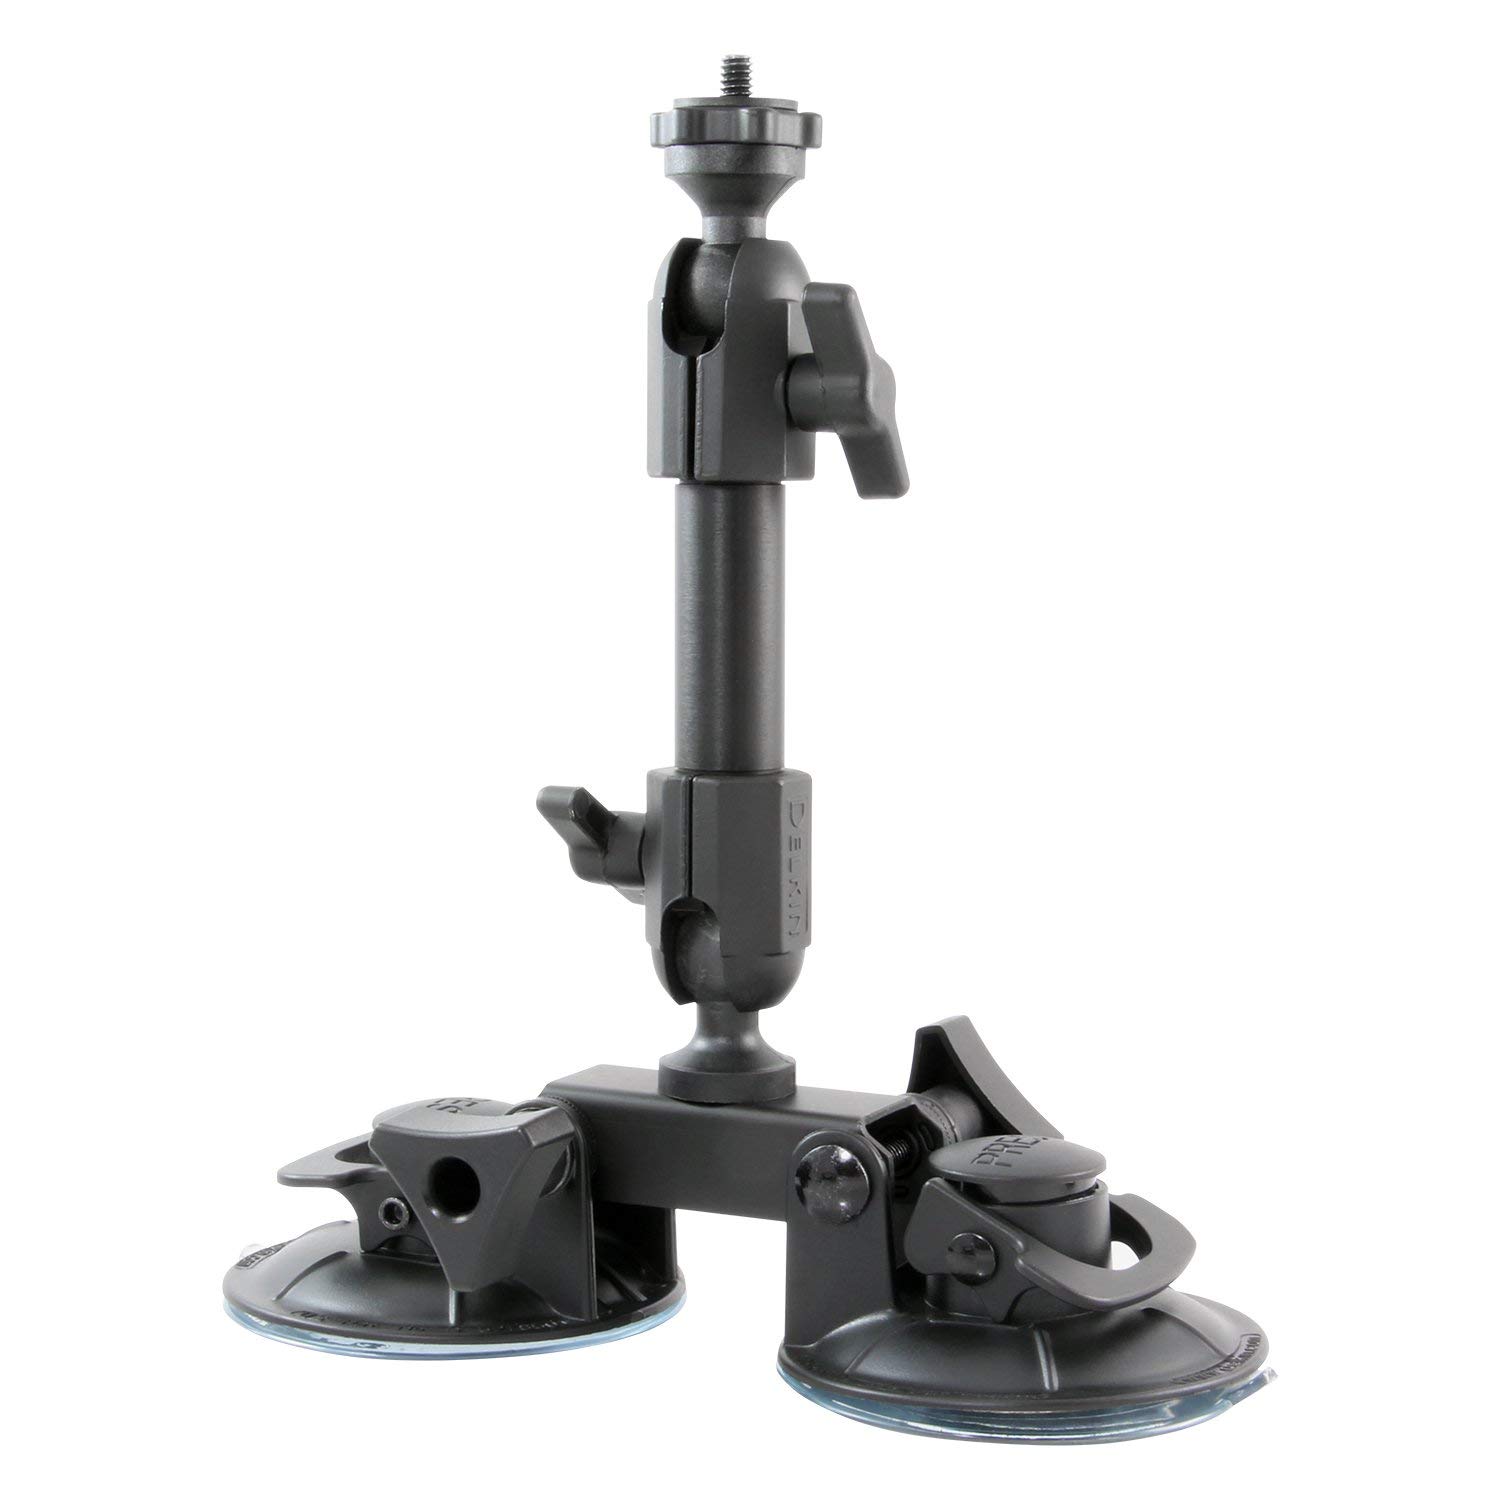
    • Dual cup suction mount

      You’ve probably seen the suction cup mount around, but a dual suction cup gives you extra grip and more mounting possibilities. For example you can stick this mount on your car’s exterior, and you don’t need to worry about it coming loose because this thing is super strong.

    • GoPro auto chargerThis is a car charger for your GoPro, so you can charge it using your car’s cigarette lighter. This is a must-have for anyone going on a long-ass road trip.

    9. Play around with the shutter speed

    Generally, a shorter shutter speed, or whatever the default on your GoPro is is great for ordinary clips.

    But a longer shutter speed will blur moving objects in your time lapses, which can give them a really artistic feel, especially when shooting a time lapse at night. This is how you can get oncoming cars to look like light trails.

    10. Use different clips and effects in your final film

    When it comes to putting all your clips together and creating a final road trip film, make sure you keep it interesting by using different clips, angles and effects.

    The chances are you’re creating this film or vlog for an audience, so you want to make sure it’s not going to send anyone to sleep.

    Edit your clips: slow some down, speed some up, and make sure they all tell a story of your journey.

  • Sony Cyber-Shot DSC-WX500 Review – My New Favourite Travel Camera!

    Sony Cyber-Shot DSC-WX500 Review – My New Favourite Travel Camera!

    [et_pb_section fb_built=”1″ admin_label=”section” _builder_version=”3.0.47″][et_pb_row _builder_version=”3.15″][et_pb_column type=”4_4″ _builder_version=”3.0.47″ parallax=”off” parallax_method=”on”][et_pb_text _builder_version=”3.15″]Most of the time when I travel, half of my weight allowance is dedicated to carrying around my camera equipment. I love my DSLRs, my stabilisers, and tripods, but recently I’ve been doing a lot of action-packed trips, which all involve a lot of hiking.

    Anyone who’s used to traveling with a DSLR will understand the struggle of lugging it around on long hikes, which is why I decided to invest in a compact camera.

    I did a lot of research before buying the Sony Cyber-Shot DSC-WX500, but boy am I glad I did. It’s everything I could have hoped for, in fact, it’s my new favourite travel camera.

    So here’s an honest review of the Sony Cyber-Shot DSC-WX500!
    [/et_pb_text][/et_pb_column][/et_pb_row][et_pb_row _builder_version=”3.15″][et_pb_column type=”4_4″ _builder_version=”3.0.47″ parallax=”off” parallax_method=”on”][et_pb_image src=”http://travellifestylemagazine.com/wp-content/uploads/2018/06/71ScTckJ6lL._SL1500_.jpg” _builder_version=”3.15″][/et_pb_image][/et_pb_column][/et_pb_row][et_pb_row _builder_version=”3.0.77″][et_pb_column type=”1_2″ _builder_version=”3.0.47″ parallax=”off” parallax_method=”on”][et_pb_button button_url=”https://amzn.to/2RITvRs” url_new_window=”on” button_text=”Check Price on Amazon (US)” button_alignment=”center” _builder_version=”3.15″ custom_button=”on” button_text_size=”36px” button_text_color=”#0badbf” button_bg_color=”#dddddd” button_border_width=”3px” button_border_color=”#494949″ button_border_radius=”35px” button_letter_spacing=”0px” button_font=”Amatic SC|on|||” button_icon=”%%28%%” saved_tabs=”all”][/et_pb_button][/et_pb_column][et_pb_column type=”1_2″ _builder_version=”3.0.47″ parallax=”off” parallax_method=”on”][et_pb_button button_url=”https://amzn.to/2RJgkVb” url_new_window=”on” button_text=”Check Price on Amazon (UK)” button_alignment=”center” _builder_version=”3.15″ custom_button=”on” button_text_size=”36px” button_text_color=”#0badbf” button_bg_color=”#dddddd” button_border_width=”3px” button_border_color=”#494949″ button_border_radius=”35px” button_letter_spacing=”0px” button_font=”Amatic SC|on|||” button_icon=”%%28%%” saved_tabs=”all”][/et_pb_button][/et_pb_column][/et_pb_row][et_pb_row _builder_version=”3.15″ custom_padding=”51px|0px|31px|0px|false|false”][et_pb_column type=”4_4″ _builder_version=”3.15″ parallax=”off” parallax_method=”on”][et_pb_text _builder_version=”3.15″]

    Sony WX500 Specs

    If you know what you’re looking for from a camera, you’ll no doubt be interested in the tech specs. So here are the specs of the Sony WX500 so that you can compare it to other cameras.

    [/et_pb_text][/et_pb_column][/et_pb_row][et_pb_row _builder_version=”3.15″ custom_padding=”0|0px|0|0px|false|false”][et_pb_column type=”4_4″ _builder_version=”3.15″ parallax=”off” parallax_method=”on”][et_pb_tabs _builder_version=”3.15″][et_pb_tab title=”Sensor” _builder_version=”3.15″]

    Max Resolution:  4896 x 3672
    Image Ratio:        1:1, 4:3, 3:2, 16:9
    Effective Pixels:   18 megapixels
    Sensor Photo Detectors:   21 megapixels
    Sensor Size:          1/2.3″ (6.17 x 4.55 mm)
    Sensor Type:        BSI-CMOS
    Processor:            Bionz X 

    [/et_pb_tab][et_pb_tab title=”Optics & Focus” _builder_version=”3.15″]

    Focal Length (Equiv.):    24-720mm
    Optical Zoom:                    30x
    Max. Aperture:                  F3.5-6.4
    Autofocus: Contrast Detect (sensor), Multi-area, Center, Selective single-point, Tracking, Single, Continuous, Face Detection, Live View
    Digital Zoom:                    Yes (2X-4X)
    Normal Focus Range:     5cm (1.97″)
    Macro Focus Range:       5cm (1.97″)

    [/et_pb_tab][et_pb_tab title=”Photography Specs” _builder_version=”3.15″]

    Minimum shutter speed: 30 sec
    Maximum shutter speed: 1/2000 sec
    Aperture priority:      Yes
    Shutter priority:          Yes
    Manual exposure mode: Yes
    Subject/scene modes:   Yes
    Built-in flash:               Yes
    Flash range:                   5.40 m (with Auto ISO)
    External flash:               No
    Continuous drive:        10.0 fps
    Self-timer:                      Yes
    Metering modes:        Multi, Center-weighted, Spot
    Exposure comp:          ±3 (at 1/3 EV steps)
    AE Bracketing:            ±3 (at 1/3 EV steps)
    WB Bracketing:           Yes

    [/et_pb_tab][et_pb_tab title=”Videography Specs” _builder_version=”3.15″]

    Resolutions: 1920 x 1080 (60p, 60i, 30p, 24p), 1280 x 720 (30p)
    Format: AVCHD, XAVC S
    Microphone: Stereo
    Speaker: Mono
    Image Stabilisation: Optical

    [/et_pb_tab][/et_pb_tabs][/et_pb_column][/et_pb_row][et_pb_row admin_label=”row” _builder_version=”3.15″ background_size=”initial” background_position=”top_left” background_repeat=”repeat” custom_padding=”38px|0px|17.8125px|0px|false|false”][et_pb_column type=”4_4″ _builder_version=”3.0.47″ parallax=”off” parallax_method=”on”][et_pb_text _builder_version=”3.15″ background_size=”initial” background_position=”top_left” background_repeat=”repeat”]

    Sony Cyber Shot DSC-WX500 Review

    If you’re not sure whether or not the Sony WX500 is for you, here’s everything you need to know about it – the good and the bad (because nothing’s perfect).

    It’s a great price

    I was expecting to have to fork out loads for a decent compact camera, but I was pleasantly surprised when I found out that the Sony WX500 was relatively cheap (around $250). For a camera this decent, I was expecting it to be much more expensive.

    It’s so compact!

    This Sony camera is smaller than my phone, which means it’s super easy to carry around. It can fit easily in a pocket, and it’s no effort to carry at all, because it’s just so light. This means it’s perfect for those looking for a camera that has the quality of a DSLR, but the portability of a compact camera or phone.

    The quality is amazing

    Lately people have been saying that there’s no point paying for a camera when smartphone cameras are so good, and to a certain extent, they are right. Phone cameras are now as good, if not better, than a lot of the really cheap cameras out there. But even the late iPhone X can only shoot in 12MP, whereas this Sony can shoot 18.2MP photos. This is almost as good as a lot of the super expensive DSLRs out there! And the colours is incredible too, so vivid! Take a look at the picture below, which I took using my Sony Cyber-Shot DSC-WX500.  You might notice it can also focus on certain things, whilst blurring out the rest, something that most DSLR users will be used to doing. The video quality is also quite impressive. Whilst it’s not 4K, the 1080p video quality is more than amazing. You get a crisp and clear shot, and it’s great at automatically adjusting the exposure when you move around and the light changes. If you were certain that you wanted 4K video quality, you could always go for the model up from this one, the only reason I didn’t was because I wasn’t too fussed about it being of professional quality – I just wanted a good travel camera. But if you’re interested in compact 4K Sony cameras, you can find them here!

    The image stabilisation is great

    More and more people are wanting their cameras to have image stabilisation, so don’t worry, Sony thought about that, and you can shoot super smooth videos of ypourself playing at https://www.red-dog-casino.org/. I must admit that until now I hadn’t used a camera with image stabilisation, I’d just been using a handheld gimbal, so I was more than impressed.

    There are so many different modes!

    I was so impressed by how many different modes and setting options there were on the WX500. There are beauty modes which make your skin look softer, scenery modes depending on what type of setting you’re shooting in (snow, night, fireworks, restaurant etc.) You can even edit pictures a little on the camera in playback mode. You can add smooth skin effects, teeth whitening effects, you can even make your eyes look wider! The intelligent auto mode also means you don’t have to worry about knowing what settings do what. It picks the best mode and settings for you so that your pictures and footage always look top notch.

    It’s really easy to film with it

    Before I got this camera, I wasn’t particularly big on filming, I was more of a photographer than a videographer. But it’s just so easy that I had to give it a go (check out my YouTube and you’ll see my videos).  The 180 degree rotatable screen means that you can film yourself and see exactly what the camera sees. This is also great for taking selfies. Plus the ‘movie’ button means that regardless of what mode you’re in, you can start filming with just one button click.

    It’s so easy to transfer your photos

    The camera has it’s own Wi-Fi, which means that you can easily send your pictures wirelessly to your phone or tablet. For me, this is perfect, because I always edit my photos and share my photos on my phone. Plus, I can’t always be bothered to connect my cameras to my laptop and wait for everything to import. If you prefer using a wire to connect your camera to a computer though, don’t panic, you can of course do this as well! And for videos, you’ll need to do this, as you can’t send videos wirelessly.

    The battery lasts forever

    The battery life is great on this Sony Cyber-shot. I used mine constantly for about three days (taking pictures) before it died. The battery obviously doesn’t last quite as long when filming, but this is the same with all cameras.

    The zoom is incredible

    Being a fan of DSLRs, previously if I wanted to zoom, I’d lug around some super heavy zoom lens, like my Sigma 150-600mm. And no way was I expecting this tiny little Sony camera to have a zoom that was anywhere near as decent as that, but I was pleasantly surprised. In fact, I recently learned that the Sony WX500 was the world’s smallest superzoom camera when it was released. The WX500 has both digital and optical zoom, it can zoom a certain distance optically, but then switches to digital zoom. So obviously when it switches to digital zoom the quality starts to drop, but still the distance that you can zoom with this thing is amazing. If you’re hoping for top quality shots, obviously a DSLR with a zoom lens is a much better option, but if like me, you just want a decent camera that you can occasionally zoom with, you’re not going to be disappointed in the slightest.

    It’s not so good at macro

    My main issue with the Sony Cyber-shot DSC-WX500 is that it’s not great at taking close up photos. If something is too close, it simply can’t focus on it. But then again, I bought this to be a travel camera, and I don’t often need to take close up photos unless I’m getting artsy.

    It’s a little delicate

    The only thing I’d say about it is that it feels quite delicate. It’s not really the sort of camera you can throw around or drop, and expect it to be fine. But then, I suppose if you want a rugged camera, that’s when you go for a GoPro. I managed to make mine a little more durable with a screen protector and a case that meant I could wear it around my neck (as I would with a DSLR) and protect it from any bashes.

    So to sum up…

    The Sony Cyber-Shot DSC-WX500 is definitely the camera to get if you want a top quality travel camera, for a reasonable price. It does everything you could ever need it to do, and it produces top quality pictures and videos.

    [/et_pb_text][/et_pb_column][/et_pb_row][et_pb_row _builder_version=”3.0.77″][et_pb_column type=”1_2″ _builder_version=”3.0.47″ parallax=”off” parallax_method=”on”][et_pb_button button_url=”https://amzn.to/2RITvRs” url_new_window=”on” button_text=”Check Price on Amazon (US)” button_alignment=”center” _builder_version=”3.15″ custom_button=”on” button_text_size=”36px” button_text_color=”#0badbf” button_bg_color=”#dddddd” button_border_width=”3px” button_border_color=”#494949″ button_border_radius=”35px” button_letter_spacing=”0px” button_font=”Amatic SC|on|||” button_icon=”%%28%%” saved_tabs=”all”] 

    It’s a great price

    I was expecting to have to fork out loads for a decent compact camera, but I was pleasantly surprised when I found out that the Sony WX500 was relatively cheap (around $250). For a camera this decent, I was expecting it to be much more expensive. 

    It’s so compact!

    This Sony camera is smaller than my phone, which means it’s super easy to carry around. It can fit easily in a pocket, and it’s no effort to carry at all, because it’s just so light.

    This means it’s perfect for those looking for a camera that has the quality of a DSLR, but the portability of a compact camera or phone. 

    The quality is amazing

    Lately people have been saying that there’s no point paying for a camera when smartphone cameras are so good, and to a certain extent, they are right. Phone cameras are now as good, if not better, than a lot of the really cheap cameras out there. But even the late iPhone X can only shoot in 12MP, whereas this Sony can shoot 18.2MP photos. 

    This is almost as good as a lot of the super expensive DSLRs out there! And the colours is incredible too, so vivid! Take a look at the picture below, which I took using my Sony Cyber-Shot DSC-WX500. 


    You might notice it can also focus on certain things, whilst blurring out the rest, something that most DSLR users will be used to doing. 

    The video quality is also quite impressive. Whilst it’s not 4K, the 1080p video quality is more than amazing. You get a crisp and clear shot, and it’s great at automatically adjusting the exposure when you move around and the light changes.

    If you were certain that you wanted 4K video quality, you could always go for the model up from this one, the only reason I didn’t was because I wasn’t too fussed about it being of professional quality – I just wanted a good travel camera.

    But if you’re interested in compact 4K Sony cameras, you can find them here!

    The image stabilisation is great

    More and more people are wanting their cameras to have image stabilisation, so don’t worry, Sony thought about that, and you can shoot super smooth videos. 

    I must admit that until now I hadn’t used a camera with image stabilisation, I’d just been using a handheld gimbal, so I was more than impressed. 

    There are so many different modes!

    I was so impressed by how many different modes and setting options there were on the WX500. There are beauty modes which make your skin look softer, scenery modes depending on what type of setting you’re shooting in (snow, night, fireworks, restaurant etc.)

    You can even edit pictures a little on the camera in playback mode. You can add smooth skin effects, teeth whitening effects, you can even make your eyes look wider!

    The intelligent auto mode also means you don’t have to worry about knowing what settings do what. It picks the best mode and settings for you so that your pictures and footage always look top notch.

    It’s really easy to film with it

    Before I got this camera, I wasn’t particularly big on filming, I was more of a photographer than a videographer. But it’s just so easy that I had to give it a go (check out my YouTube and you’ll see my videos).  

    The 180 degree rotatable screen means that you can film yourself and see exactly what the camera sees. This is also great for taking selfies.

    Plus the ‘movie’ button means that regardless of what mode you’re in, you can start filming with just one button click.

    It’s so easy to transfer your photos

    The camera has it’s own Wi-Fi, which means that you can easily send your pictures wirelessly to your phone or tablet. For me, this is perfect, because I always edit my photos and share my photos on my phone. Plus, I can’t always be bothered to connect my cameras to my laptop and wait for everything to import.

    If you prefer using a wire to connect your camera to a computer though, don’t panic, you can of course do this as well! And for videos, you’ll need to do this, as you can’t send videos wirelessly. 

    The battery lasts forever

    The battery life is great on this Sony Cyber-shot. I used mine constantly for about three days (taking pictures) before it died. The battery obviously doesn’t last quite as long when filming, but this is the same with all cameras.

    The zoom is incredible

    Being a fan of DSLRs, previously if I wanted to zoom, I’d lug around some super heavy zoom lens, like my Sigma 150-600mm.

    And no way was I expecting this tiny little Sony camera to have a zoom that was anywhere near as decent as that, but I was pleasantly surprised.

    The WX500 has both digital and optical zoom, it can zoom a certain distance optically, but then switches to digital zoom. So obviously when it switches to digital zoom the quality starts to drop, but still the distance that you can zoom with this thing is amazing.

    If you’re hoping for top quality shots, obviously a DSLR with a zoom lens is a much better option, but if like me, you just want a decent camera that you can occasionally zoom with, you’re not going to be disappointed in the slightest.

    It’s not so good at macro

    My main issue with the Sony Cyber-shot DSC-WX500 is that it’s not great at taking close up photos. If something is too close, it simply can’t focus on it.

    But then again, I bought this to be a travel camera, and I don’t often need to take close up photos unless I’m getting artsy. 

    It’s a little delicate

    The only thing I’d say about it is that it feels quite delicate. It’s not really the sort of camera you can throw around or drop, and expect it to be fine. But then, I suppose if you want a rugged camera, that’s when you go for a GoPro.

    I managed to make mine a little more durable with a screen protector and a case that meant I could wear it around my neck (as I would with a DSLR) and protect it from any bashes.

    So to sum up…

    The Sony Cyber-Shot DSC-WX500 is definitely the camera to get if you want a top quality travel camera, for a reasonable price.

    It does everything you could ever need it to do, and it produces top quality pictures and videos.

     
    [/et_pb_button][/et_pb_column][et_pb_column type=”1_2″ _builder_version=”3.0.47″ parallax=”off” parallax_method=”on”][et_pb_button button_url=”https://amzn.to/2RJgkVb” url_new_window=”on” button_text=”Check Price on Amazon (UK)” button_alignment=”center” _builder_version=”3.15″ custom_button=”on” button_text_size=”36px” button_text_color=”#0badbf” button_bg_color=”#dddddd” button_border_width=”3px” button_border_color=”#494949″ button_border_radius=”35px” button_letter_spacing=”0px” button_font=”Amatic SC|on|||” button_icon=”%%28%%” saved_tabs=”all”][/et_pb_button][/et_pb_column][/et_pb_row][/et_pb_section]

  • How To Keep Expensive Camera Gear Safe Whilst Traveling

    How To Keep Expensive Camera Gear Safe Whilst Traveling

    You’ve probably heard a fair few horror stories about traveling with camera gear. Lenses getting broken, kit being stolen, hold luggage containing cameras going missing, so it’s no wonder people often leave the bulk of their camera gear at home.

    But if you’re traveling to some amazing places (which no doubt you are), you want to be able to capture the moment and scenery as best you can. And that means taking all your best camera gear with you!

    Don’t panic though, it doesn’t have to end in disaster. It doesn’t even have to be difficult. You just need to know how to keep your gear safe from breakage, loss and theft. Once you’re used to traveling with your photography gear, you won’t even consider traveling without it again.

    So here’s how you can make sure your camera gear stays safe and by your side on your adventures.

    Pack your cameras in your carry-on luggage

    There are so many different horror stories about airlines losing people’s luggage, and whilst it’s never happened to me, I always make sure to pack my most precious possessions (which always includes my camera gear) in my carry on bag.

    If something ever were to happen with my hold luggage, it would be stressful enough losing clothes and toiletries, and I dread to even think about losing my photography equipment too.

    Hold luggage also gets thrown around quite a bit, you just need to watch them loading the plane to see that. So if you pack your cameras and lenses in your hold luggage, it’s much more likely that you’re going to have a few breakages.

    It’s okay to put non-delicate camera accessories in your hold luggage, like memory cards, battery chargers or even some tripods. Anything that can take a bit of a beating.

    Pack spare lithium batteries in your carry on luggage

    If any of your photography gear has spare lithium batteries (that aren’t installed in the device), pack them in your cabin bag. This is less about keeping your batteries safe, and more about making sure you adhere to the TSA guidelines.

    Plus, lithium batteries can cause hazards if they short circuit, and the last thing you want is to put yourself and the entire plane at risk.

    Get a protective camera bag

    There are so many different camera bags out there that there’s no excuse for transporting your camera kit in a flimsy bag. Camera bags are made to protect and cushion cameras, and whatever your budget, you’ll be able to find one to suit you.

    Whether you want a camera rucksack with padding, or a hard shell, cushioned case, most camera bags will be cabin approved, and will make sure your cameras aren’t bashed around at all during transportation.

    Tone down your bag

    Some camera bags obviously look like they contain cameras, which is great if you want to feel like a real pro, but thieves will also be able to tell that you’re traveling with expensive gear.

    If you can, go for a camera bag that’s a bit more generic. One that looks like a regular bag. This way, you won’t attract as much attention, and your cameras are much less likely to be stolen.

    Another good way to deter thieves is to beat up your bag a little bit. This might sound like a horrific thing to do, especially if your camera bag is a recent purchase, but if your bag is a bit dirty, or a bit old looking, you won’t be such an obvious target.

    An old bag implies old gear, gear not worth stealing. And you’ll also give the impression that you’re very well traveled, and no one’s going to mess with a sassy and street wise traveler – thieves tend to go for the rich but inexperienced travellers.

    Keep an eye out

    When you’re using your photography gear to capture amazing shots of your travels, just have your wits about you and make sure you keep an eye out for anyone lurking too close.

    It doesn’t happen very often, but sometimes tourists will have cameras stolen from their hands before they’ve even had time to click the shutter button. So if you catch a glimpse of anyone suspicious, or anyone hovering suspiciously close to you, secure your camera gear and move on. Find a crowd if you can.

    Find a fellow photography enthusiast

    You’ve probably been told time and time again not to travel anywhere dangerous, or walk home at night on your own, and this is a rule that you should definitely stick to when out and about with your camera gear.

    Thieves will go for those who are easiest to rob, and if you’re traveling with someone else, or even a group of people, you’re instantly not as vulnerable as a solo photographer. You’ll also have a buddy to keep an eye out for you whilst you shoot.

    Keep your bag in sight

    The easiest way to carry a camera bag is often wearing it on your back, or slinging it over your shoulder, but if you’re traveling through crowds, this is going to make you an easy target for thieves.

    If you can, wear your bag on the front of your body, even if you have to wear your camera rucksack like a baby carrier. You might look a bit strange, but you’ll have your camera gear right where you want it: right in front of your eyes.

    Use several different memory cards

    Memory cards are the easiest thing to lose, and if you’re taking some incredible photos, you don’t want to risk losing them all.

    So rather than opting for one 256gb memory card for example, go for a few smaller, 32gb ones. This way, if you lose your memory card on one day, you’ll still have the footage from the other days, and another memory card to see you through to the end of your trip.

    Ask for a safe at your hotel or hostel

    Most hotels and hostels will have safes available, even if there isn’t one already in your room. Just pop down to reception and ask if it’s possible to hire one.

    If you’ve got a safe at your accommodation you won’t feel the need to carry your camera gear everywhere with you. You’ll be able to leave it in the room, reassured that it’s safe.

    Make a note of all your gear

    Before you set out for your travels, make a note of all your gear, and if you want to be super safe, write down the serial numbers of your devices too.

    This way, you can do a stock check every now and then, especially if you’re traveling with a lot of gear. And with the serial number you’re more likely to track down a lost item.

    Take out photography insurance

    You’ve heard of travel insurance, and probably content insurance, but there are companies that deal specifically with insuring photography gear for those that travel a lot.

  • How To Capture Perfect Travel Photos And Videos With Your Drone

    How To Capture Perfect Travel Photos And Videos With Your Drone

    Drones are fast becoming one of the most popular travel accessories. You can capture some truly incredible photos and videos with a drone, especially if you’ve got one of the high end 4K quadcopters.

    But it can be hard to know where to start, especially if you’ve never even flown a drone before. So here are some top tips for taking great photos and videos.

    Top Tips For Taking Stunning Drone Photos

    Learn Basic Photography

    Drone photography isn’t all that different from normal photography, so it can help to learn the general basics before taking to the skies with your flying camera.

    Photography is all about light. If you think about it, light has much greater impact in aerial photography, as your camera is now closer to the most powerful source of natural light – the sun.

    The effect of glare, reflections and shadows are therefore magnified. Learning how to manipulate light to your advantage will better equip you to overcome these challenges.

    In addition to light, understanding composition techniques such as leading lines, framing and the rule of thirds will also be invaluable in creating balanced, aesthetically pleasing images.

    Capitalize on the Golden Hour

    You get two chances every day. The Golden Hour refers to the times of day when the natural light is perfect – in the morning it’s the hour after sunrise and again in the evening the hour before sunset. How long these periods actually last, will vary based on time of year and location.

    During these times the sun is lowest in the sky, creating soft, diffused light instead of the harsher midday sun. This type of light reduces shadows and highlights, giving the overall image a warm and pleasing glow. There are also usually a lot less people around at these times so that’s definitely a plus.

    Location, Location, Location

    Do your research and scope out your location beforehand. See what the crowds are like, find a spot for take-off and landing, make note of interesting landmarks and talk to the locals about any hidden gems.

    You’ll also want to stay clear of people and private property, so make sure the location is safe and legal to fly over.

    Create a Flight Plan

    Plot your flight course for safety and efficiency. You don’t want to waste precious battery power figuring out where to go and what to shoot. This is where your photography knowledge, time of day and location considerations come together.

    By planning a route to fly, you’ll also be able to think about what you want to capture in advance.

    Take Control

    While automatic flight modes are great when you’re getting started, you’ll want to take the reins and fly manually as soon as you’re able.

    The finer more precise control and handling of your craft, will allow you to create images exactly as you envisioned. With automatic modes you’re trading control for ease – don’t be lazy, master your machine.

    This goes for camera settings too, especially shutter speed. Keep in mind that with drone photography your camera is not stationary and where there’s movement there’s the risk of introducing blur. Blur can be a creative tool, but it should be controlled. In most cases, you’ll want to use faster shutter speeds to avoid blur and get sharp images. So shoot manually if your camera allows. I know it sounds like a lot to do at once, but practice is the key.

    Remember You Are Creating Art

    The purpose of art is to evoke emotion. You want your images to make people pause and really take it in. You want them to feel something. Make your captures tell a story – about your journey, the culture of your destination or even just a moment. You are an artist and your drone is your paintbrush.

    Use the Tools Available

    The tools we’re talking about here, are your accessories. As with standard photography, basic accessories like lens filters and hoods can really enhance your images. Neutral density and polarizing filters will play a crucial role in controlling exposure and tonal quality, while hoods can prevent glare and propeller shadows.

    Top Tips For Capturing Impressive Drone Videos

    Make sure the drone is stable before filming

    If there are strong winds, your drone might be wobbling in the sky a bit. Before hitting the record button, make sure the drone is stable and hovering. This should mean less editing later on.

    Master Flight Manoeuvres

    Flight patterns can make for some unique footage. So before you head out on your first trip, practice flight patterns, such as figure eights and circles to elevate your captures in the field.

    Take it a step further and learn how to control your gimbal to pivot your camera midair for those panning and tilting shots.

    A classic drone shot to try is focusing on something, and drifting up and back. This creates a cinematic video piece that will impress anyone. And it’s super easy to do.

    Top Shots To Try With Your Drone

    Still Shots

    1: Symmetry & Repetition

    Order and structure can be spellbinding in their simplicity and often invokes a sense of calm.

    2: Unique Patterns & Abstracts

    Things that look humdrum and ordinary from the ground, can turn out to be intriguing from above. You will be amazed by how random shapes and patterns come together.


    3: Flipped Perspective

    Take advantage of your bird’s-eye view to create optical illusions.


    4.         Miniature Effect (Tilt-Shift)

    Create the illusion of a tiny toy-like world. You may need a bit of a post-production touch to get it just right, but it will be well worth it. These shots never fail to impress and take the viewer back to a childlike, wide-eyed state of amazement.

    5.         Play with Shadows & Lines

    Distinct lines guide the composition of an image, while shadows can provide a point of interest with giant silhouettes that tickle the imagination. In either case, you are making use of these elements to direct your viewer’s eyes to tell a story.

    Video Shots

    1.         The Fly-By

    Good for story transitions. As the name suggests, it is achieved by simply flying by or over your subject, often with a pan or tilt of the camera. It helps to give your point of interest some geographical perspective and scale.


    2.         The High Pan

    Ideal for showcasing landscapes and showing the distance between two points. Usually achieved with the drone in a stationary hover, then capturing a sweeping shot by panning the camera in either direction. You can make it a bit more complex by moving the drone forward or backward during the pan for added visual impact.


    3.         The Reveal

    Provides a grand entrance for your subject or point of interest. Starting from an area with your subject out of frame, pan or tilt your camera towards your subject bringing it in the frame. It’s as simple as that. The reveal can be further enhanced by gradually zooming in on the subject.


    4.         The Chase

    Great closing and action shot. This involves following a moving subject at equal or greater speed. We see this used often in movie chase scenes (I guess that’s where the name comes from), as it creates an intense, action packed atmosphere.


    5.         The Pedestal

    Often used when filming tall objects like monuments or skyscrapers. The shot involves filming with the drone moving up and down – not tilting the camera with the gimbal.


    These are just a few of the most common drone cinematography techniques. They vary in complexity, so there is something for you to try at any skill level. Just keep practicing and before you know it, you will take your videos to a whole new level.

  • Why Every Digital Nomad Needs A Camera Drone

    Why Every Digital Nomad Needs A Camera Drone

    For any avid traveler, recording the journey is almost as important as the experiences themselves. As a result, the camera has always been a nomad’s best companion. From disposable cameras, camera phones, GoPro’s and DSLRs, we’ve now entered the era of the drone.

    But if you need a little more convincing that a drone is the perfect travel accessory, here are the top reasons why every digital nomad needs a camera drone.

    Get a Bird’s-Eye View of Your Destination

    Drones offer a whole new perspective, so you can see your destination not just from the ground, but from the skies, looking down. This kind of view never used to be possible for the average person, unless they somehow managed to charter a plane or a helicopter. And none of us have the money to dothat.

    Capture spectacular aerial shots with your drone and take in the view from every angle. Let’s face it, everything looks a little cooler from the air.

    Flexible Shooting Options

    Another great benefit of having a drone is that you can capture incredible videos, as well as photos. Off-the-wall selfies, breathtaking scenery, cinematic videos and stunning panoramas.

    One thing’s for sure, there are way more angles and opportunities when filming with a drone than with a regular camera.

    Some drones today come equipped with intelligent flight modes that allow for unmanned flight, to follow its pilot or even track an object or point of interest, creating awe inspiring footage with ease.

    Get Your Bearings

    The chances are, even if you’re already a drone owner, you’ve never once thought about using a drone this way. But if you think about it, what better way to pinpoint your location and get your bearings back on track?

    Imagine losing your way in a forest – just send your drone up to find the trail or a landmark. Ideally you would want a drone that can send live feed to your smartphone for this purpose.

    Make New Friends

    As popular as they are today, drones are still a fascination for most. Whether it’s because of their price tag or because they’re just not that mainstream yet, there are always going to be people that drones are out of reach for. So be prepared to get some attention when you pull out your flying machine.

    You never know, you might even meet fellow drone flyers, which could lead to hours of interesting conversation, exchanging tips and advice on tricks and top drone flying locations.

    There’s the potential to make money with your drone videos

    What most people don’t realise is that anyone that captures amazing drone footage could easily be making money from those videos.

    Become a drone nomad and upload your videos to sites like YouTube or even stock video sites. With ads, affiliate links, or downloads, whichever route you decide to take, there’s money-making potential. So you can fund your travels with your travel videos!

    Your travel videos will be much more interesting

    Normally, when anyone puts on a slideshow of their travel photos, everyone smiles and nods along with the occasional ‘oh wow’, whilst they secretly try to suppress their yawns.

    But when you’ve got a video of some exotic location, filmed from 100 meters above ground level, people are going to be genuinely interested and intrigued. Drone videos can be really impressive pieces of cinematography, even if you’re only an amateur drone flyer.

    Drones can even be lighter than digital cameras

    If you normally travel with your digital camera, you’ll know how heavy they can be, especially if you’re got different lenses and pieces of kit. A drone can often take better pictures and videos than even the most high-end digital cameras, and what’s more, they can be lighter!

    This is obviously dependent on the drone you choose as your travel companion, but many of the latest drones, like the Mavic Air, can film in 4K, and fit right in your back pocket.